How to create Urban Ink effect in Photoshop
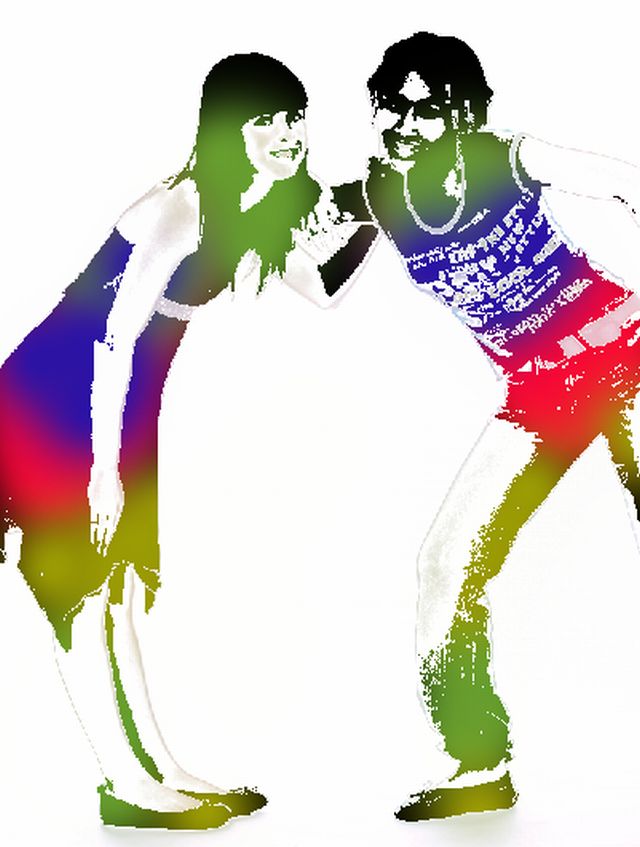
In this tutorial, we are going to learn how to create urban effect on image in Photoshop. This effect looks really cool on images with simple background. So first of all, we need an image to work on. Here we are taking the picture of two girls. Below is displayed our final result that we are aiming to achieve.

Step – 1:
Let’s open the file first. Click File >> Open, then locate your file and select and click open in order to open it.

Step – 2:
Then duplicate the layer by right clicking the layer in the layer palette and select “duplicate layer”.
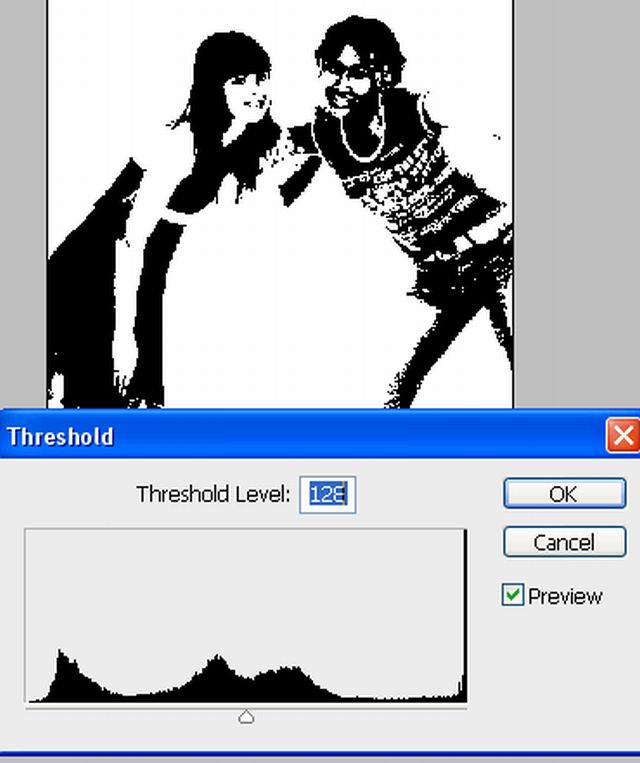
Then Click Image >> Adjustments >> Threshold. Adjust slider in such a way that most of the background disappears & only shadows are displayed black.
Step – 3:
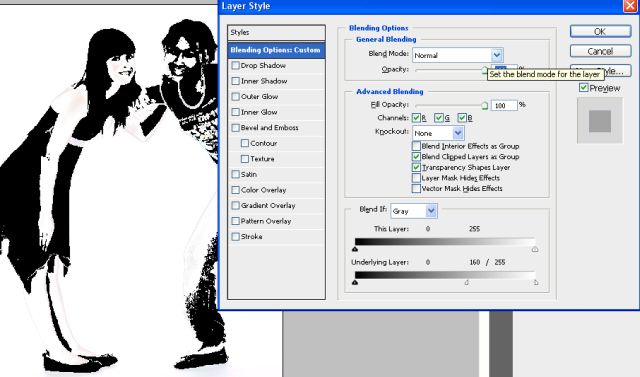
Right click the top layer in layer palette and click Blending Options.
Then in the box at the bottom in underlying layer section, hold Alt, and drag white input slider towards left.
See screenshot.
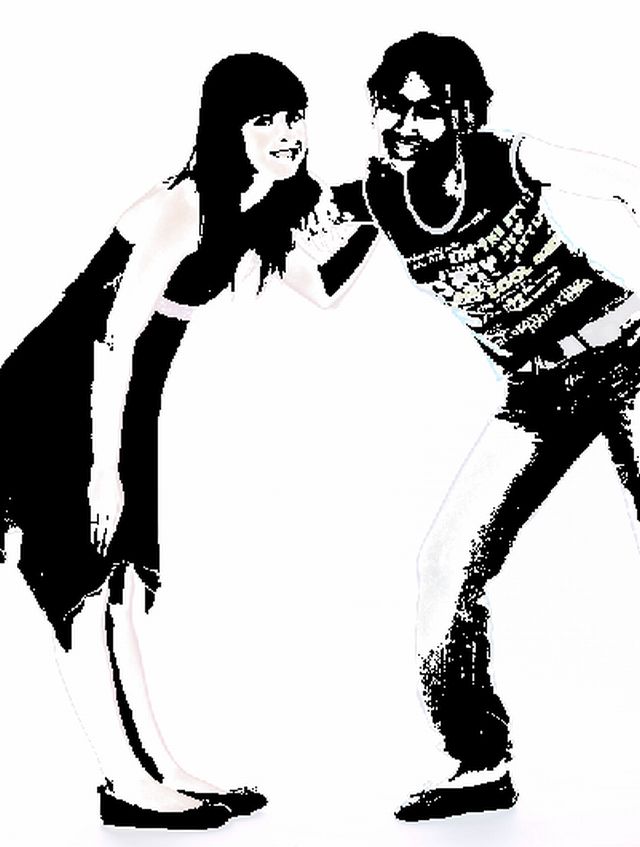
Your image should look like this till now!
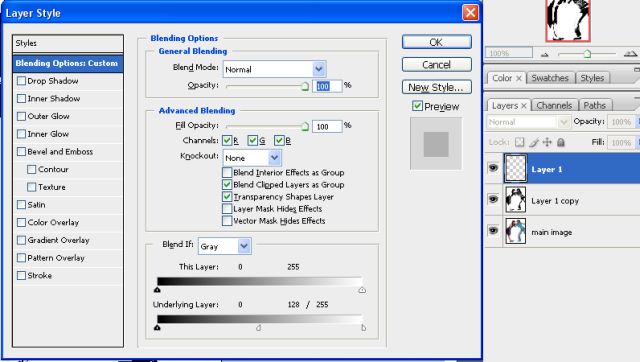
Step – 4:
Now create a new layer. Right click on this newly created layer and choose Blending Options.
Then in the box at the bottom in underlying layer section, hold Alt, and drag white input slider towards left.
See screenshot and fill settings as shown over here.
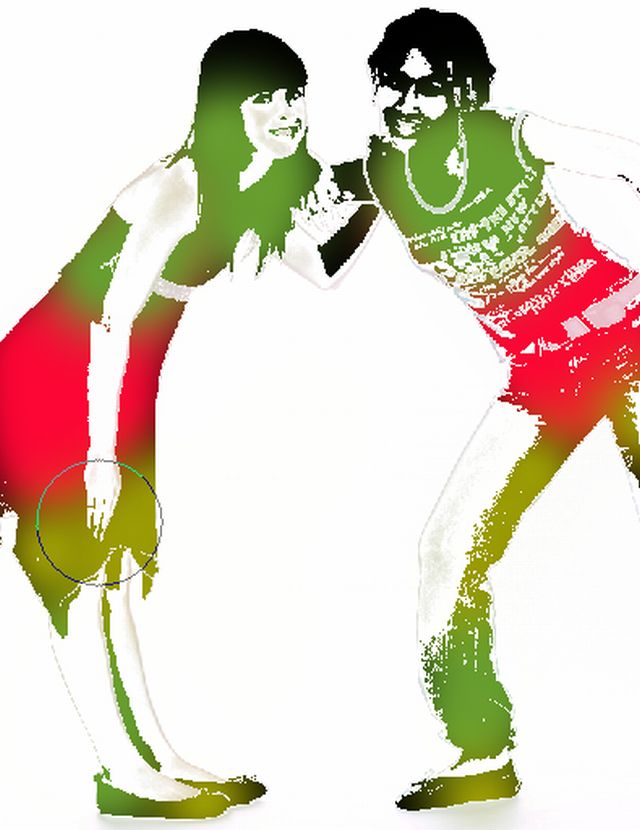
Step – 5:
Now we shall paint current layer. You can use any color you like. Use big brush with hardness 0.
I have used following colors in this tutorial:
# fe0534, 679f2f, 9c9c04, 2b13a6
Here we used magenta, cyan, and yellow colors for creating the effect shown below.
If you want, you can return to the blending options to adjust them accordingly.
Step – 6:
That’s it! Here is our final result. Play a little bit with the idea and try Urban Ink effect on different images in Photoshop.