
How to create fantasy magical eyes in Photoshop
Hello friends! I’m back with another exciting tutorial for you. Today we’re going to make fantasy fairy glittery eyes (how’s that for a name ![]() ) which I hope you love as much as I do. Ok so, let us see, what are the main ingredients, we need to create this beautiful image. We need two images one of a pair of eyes on which we are going to work and an image of sun flower (you can use any flower instead of sun flower if you like).
) which I hope you love as much as I do. Ok so, let us see, what are the main ingredients, we need to create this beautiful image. We need two images one of a pair of eyes on which we are going to work and an image of sun flower (you can use any flower instead of sun flower if you like).
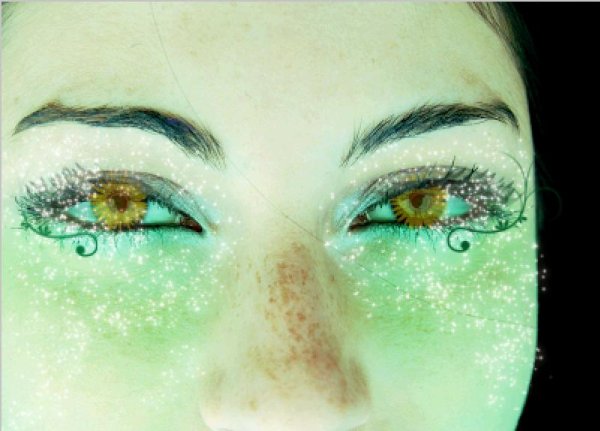
And last but not the least our Photoshop. Now we’ve got all the things we need let’s start our tutorial. However, let’s have a look at the final image before we start.

Step1:-
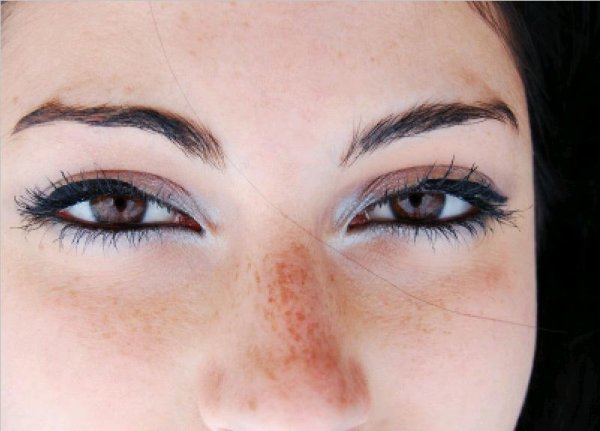
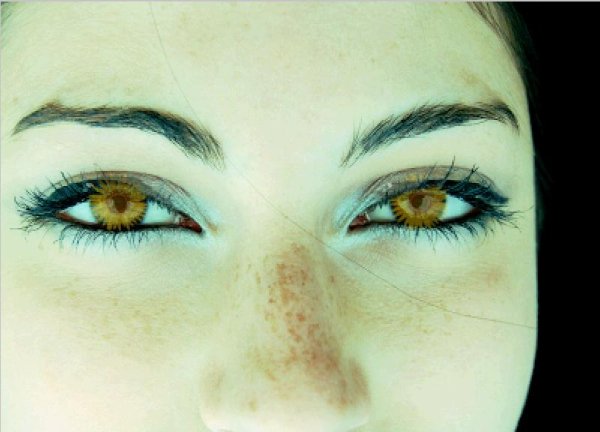
First thing first create a new document of size 400×287. And open the image of eyes in the document (just copy and paste the image into the document).
Step2:-
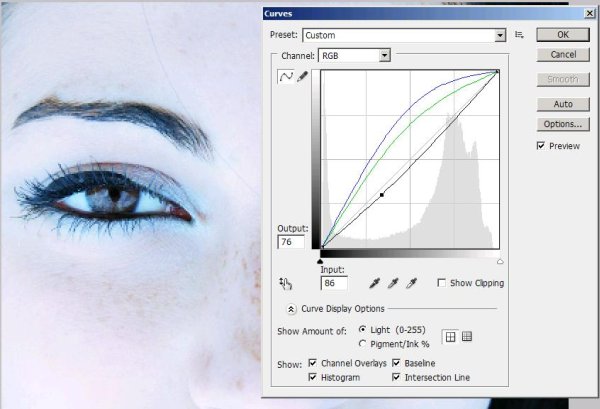
Now make a curve adjustment layer (go to image, go to adjustments and select Curves). Now select the Blue and green channels and keep the curve setting as shown in the picture.
Step3:-
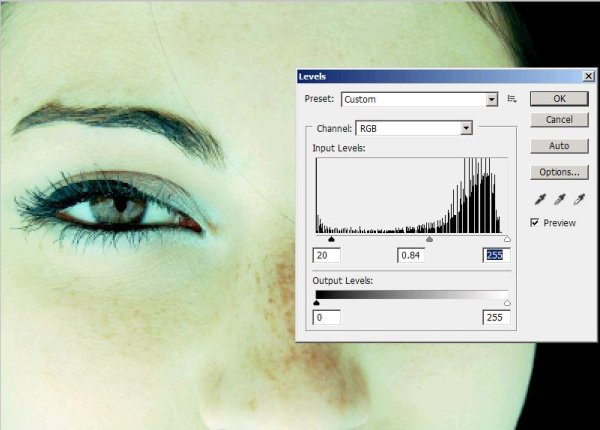
It’s time to create a levels adjustment layer (go to image, go to adjustments and select Levels) and make the settings as 20-0.84-225 (as shown in the picture below).
Step4:-
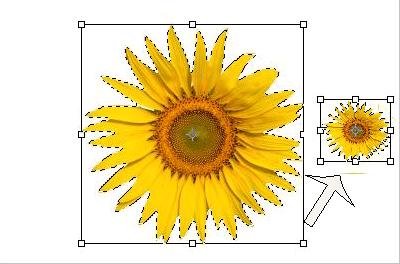
Open the sun flower image ad select the Quick Selection Tool(w), make the selection around the main flower press Ctrl+t and make the size of the image small(as small as the eye ball).
Step5:-
Now copy the small image of the sun flower, create a layer and name it eye1, paste the image on this layer on the eyeball of an eye and reduce the opacity to 40%.

Step6:-
Create another layer and name it eye2 and repeat the process mentioned in step5. Keep the opacity to 40% for this image too.
Step7:-
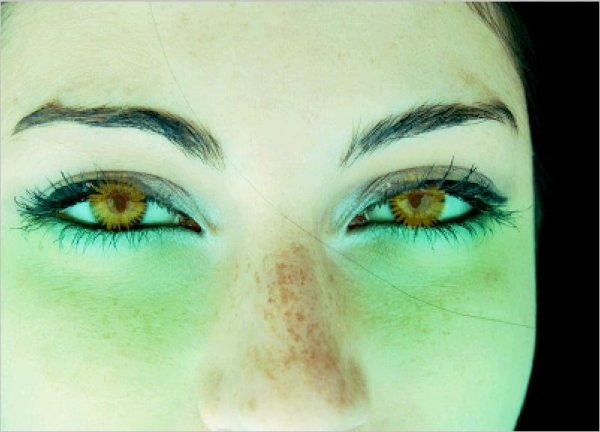
Okay, now create another layer and name it color on face. Select a soft round brush (size 200px) and keep the foreground color #007236. Now paint below the eyes and set it on soft light and opacity 100%.
Step8:-
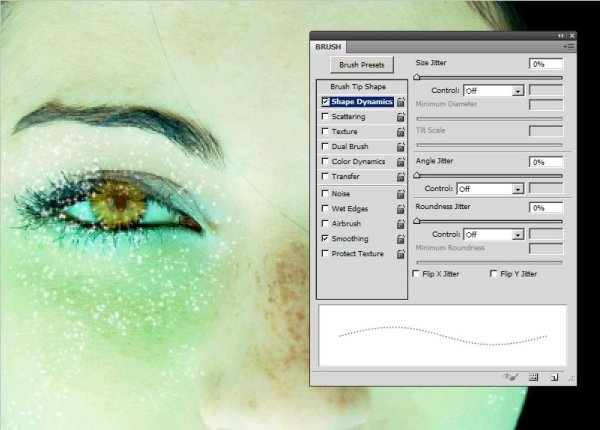
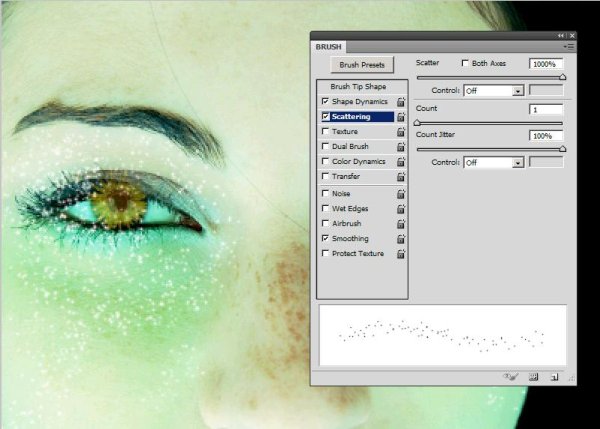
Add another layer and name it as glitter. Go to the brush panel and keep the settings as shown below in the pictures.
Step9:-
Now add some outer glow to the glitter. Keep the setting according to the picture shown below.

Step10:-
Create another layer for lashes enhancement. Use a soft round brush #112(size13px) for that and add some lashes to the eyes. Set the brush angle according to the direction of the lashes in the image.

Step11:-
It’s time to add our swirls around the eyes. This is a random thing, you can choose swirls of your own choice (I’ve used brush swirl #2479, size 76px, and color #005826 around the eyes) and place them as you like or you can follow my placing as shown in the picture below.
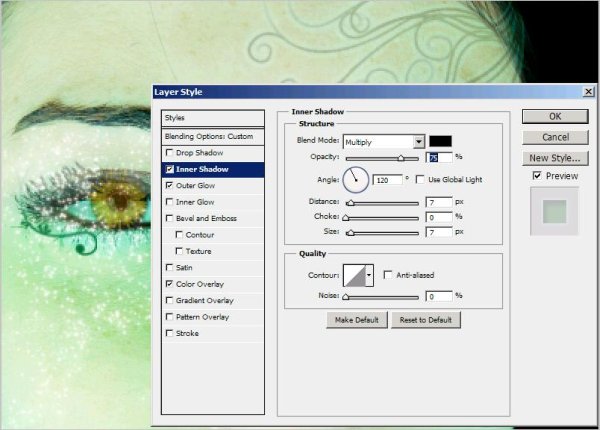
Step12:-
Now we’re going to add another layer for new swirls on the face (brush#2476, size 141px, and color #005826). Right click on the layer, go to blending options and add Inner Glow (keep the settings as are in the picture).
Step13:-
Now add Outer Glow and use the setting as shown in the picture below.

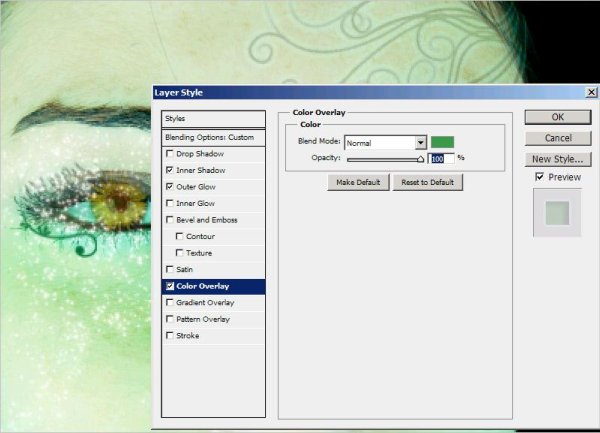
Step14:-
Now add color overlay and keep the setting as are in the picture below.
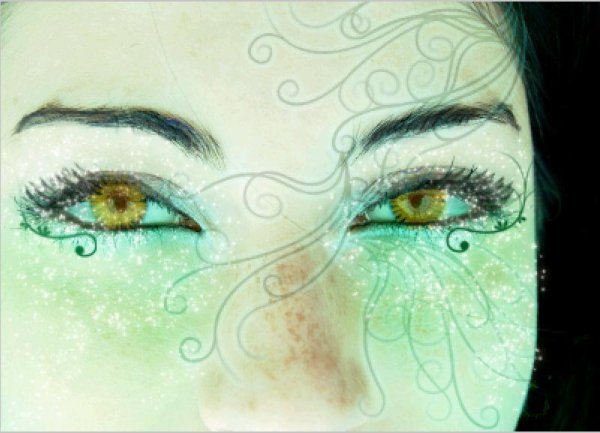
Now here we are with are magical fantasy eyes image complete.
We are done now. Hope you had fun and learned a few tricks of your own. Do try this and share your comments. I’ll be back soon with another cool effect. Till then do take care. Chao.


