
Making Spine chilling scary eyes in Photoshop
Hey friends! Last night I watched a scary movie (big fan of horror) and that gave me the inspiration for the spine chilling scary looking eyes. In this tutorial we are going to re-visit the techniques I’ve used to make these eyes and you are going to do it with me. So let’s count the main ingredients for our horrifying effect on eyes. First we’ll need a pair of eyes and second we’ll need our favorite Photoshop. Yes that’s right these are the two things we’ll use to make this terrific image.
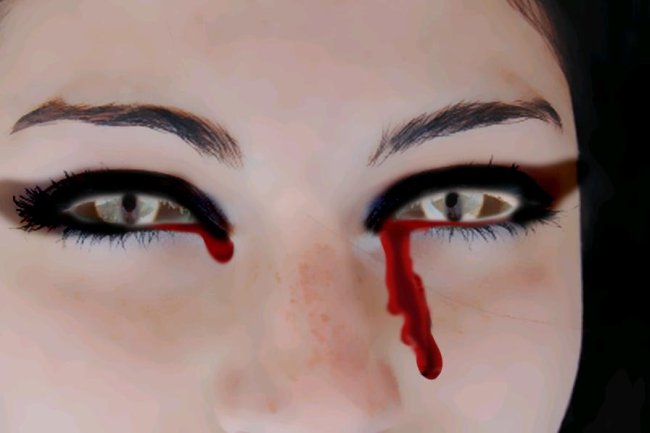
Take a look at the final image before continuing the tutorial.

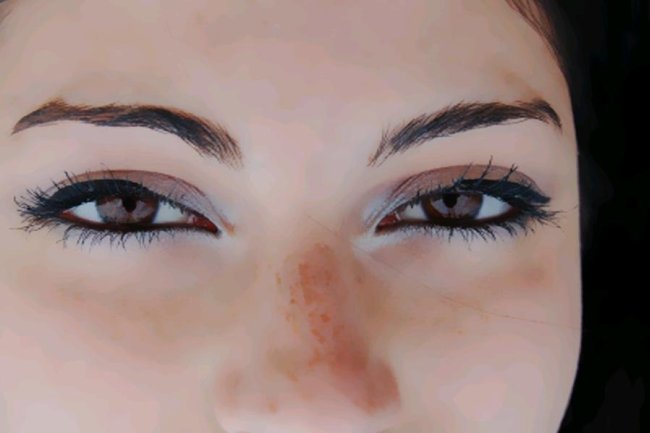
Step1:-
So Let us begin with opening the eyes image in Photoshop.
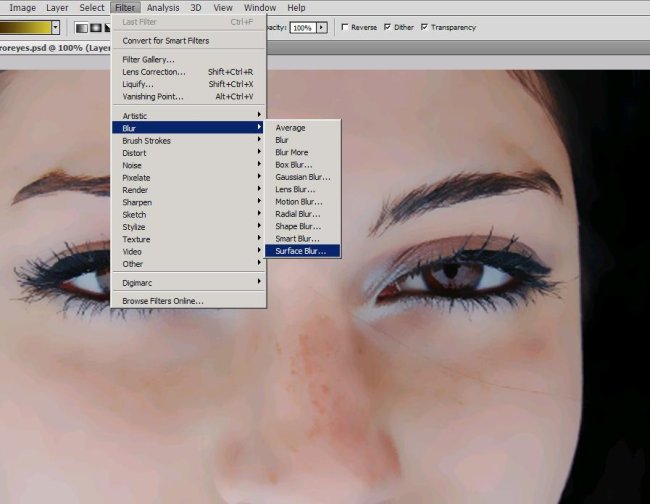
Step2:-
For smoothing out the lines and discoloration go to Filter> Blur> Surface Blur.
Step3:-
Create another layer and select a soft round brush of size 19px with color #d4c7c6 and paint in the eyes as shown below. Erase a bit from the middle according to picture given below.
Step4:-
Set the Blend Mode of this layer to Difference and Opacity 100%.
Step5:-
Now create another layer name it “right eye blood” select a hard round brush of size 25px with color #9e0b0f and paint like a tear coming from right eye as shown below.

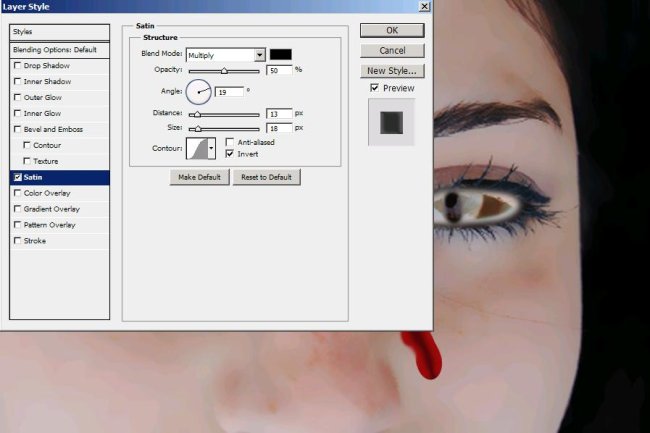
Step6:-
Now we are going to give an effect of thickness to the blood and to do that right click on the layer and check on satin. Make the settings according to the picture shown below.
Step7:-
Make another layer select soft round brush of size 2px with white color #ffffff and make spots on the drop end and in the way to give the effect of reflection. Reduce the Opacity to 29%.
Step8:-
Now go to the blood layer and grab the smudge tool and spread a bit of blood in the eye along the lower lash.

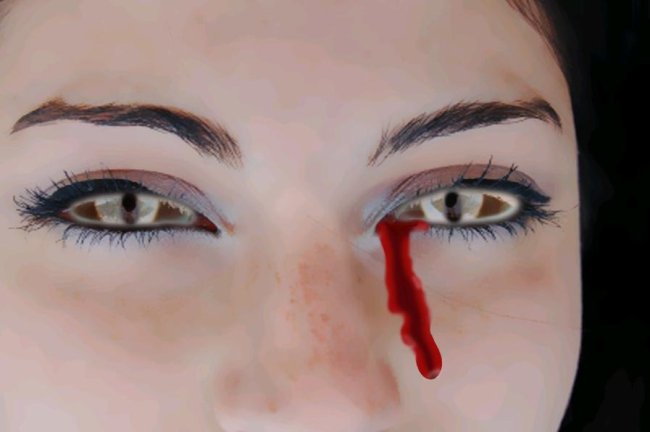
Step9:-
Now create another layer draw a drop of blood on the left eye with color #9e0b0f and give some shading with dark maroon color #790000 as shown below.

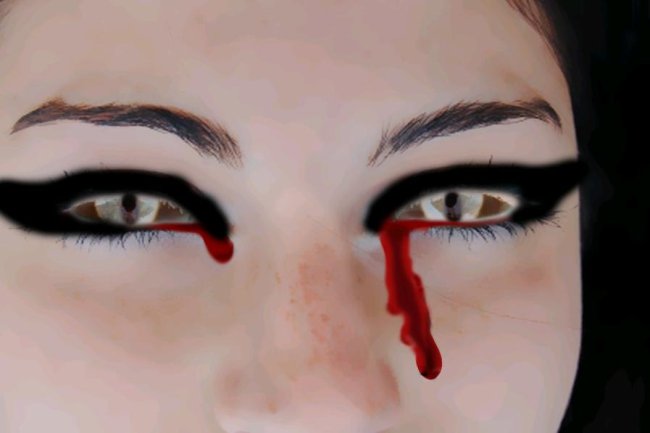
Step10:-
In this step we are going to darken the eye make-up. Select a soft round brush of size 25px with color #000000 and paint around the eyes as shown below.
Step11:-
Set the Blend Mode of this layer to Overlay and leave the Opacity 100%.
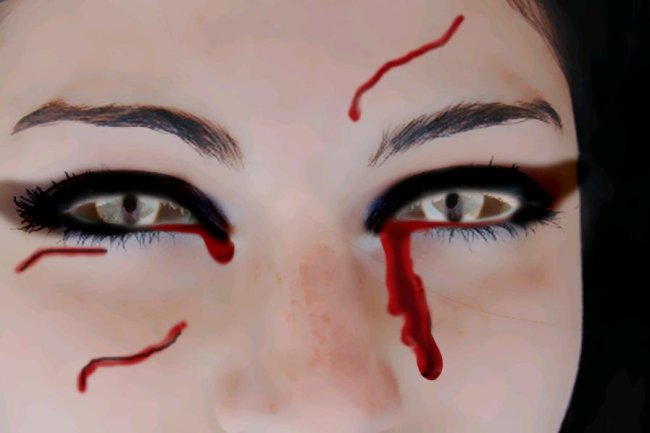
Step12:-
Now we’re going to make some cuts on the face. Select a soft round brush of size 3px with color #9e0b0f and draw some lines as shown below.
Step13:-
Using the same brush as in step 12 with color black#000000 draw on the red lines to give them depth.

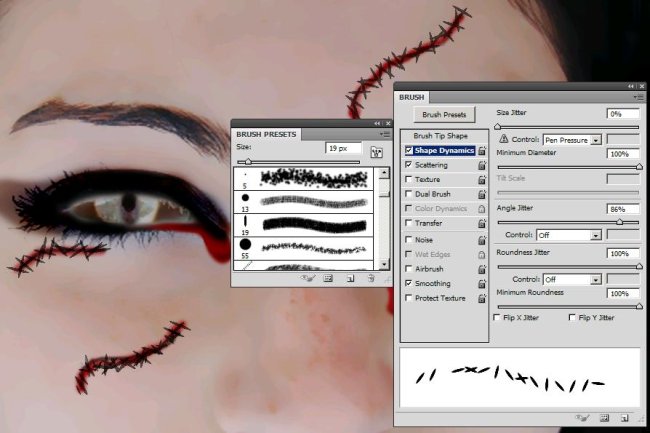
Step14:-
Select a brush as shown below like a small twig and give it spacing using brush panel according to picture given below.
Step15:-
Now when you’ll draw over the red cuts it’ll give the effect of stitches.
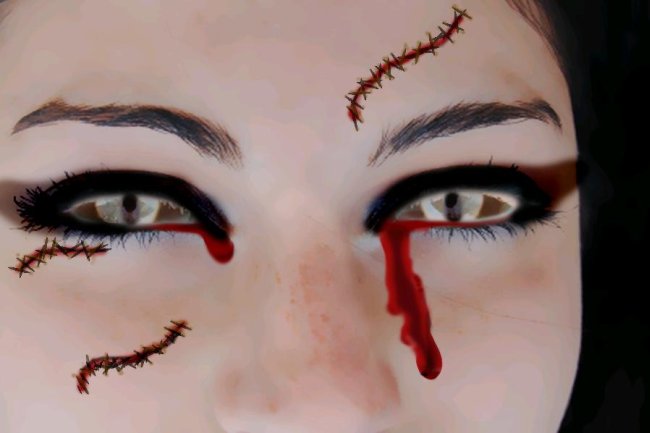
Step16:-
Select soft round brush of size 2px with color#7d4801 and make some spots on the ends of stitches and then reduce the Opacity to 42%.
There you go. Your spine chilling scary eyes are complete. Hope you learned something new. Do share your views. I’ll be back with some new ideas, till then take care.


