
Making a doll out of a portrait picture in Photoshop
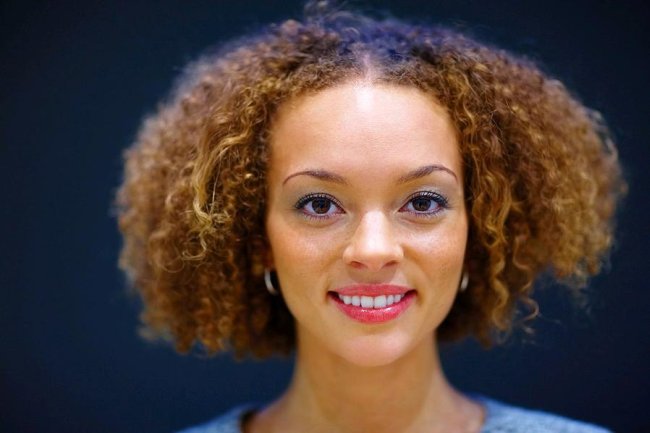
Hey guys! Today we’re going to play with dolls (kidding ![]() ). However, we’re going to make a doll out of a portrait and Photoshop provides us with the perfect tool to do that. The basic thing which is going to be the main key for this task is the Liquefying effect. So let’s just get started by counting the things we’ll need to make a doll face; a portrait image which is taken from the bigstock for this tutorial and with that we only need Photoshop.
). However, we’re going to make a doll out of a portrait and Photoshop provides us with the perfect tool to do that. The basic thing which is going to be the main key for this task is the Liquefying effect. So let’s just get started by counting the things we’ll need to make a doll face; a portrait image which is taken from the bigstock for this tutorial and with that we only need Photoshop.
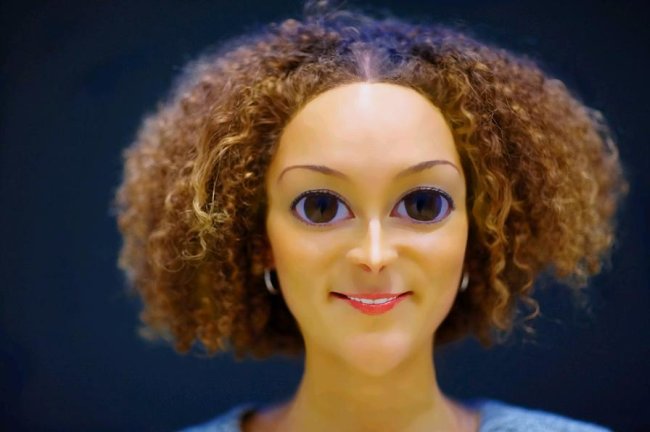
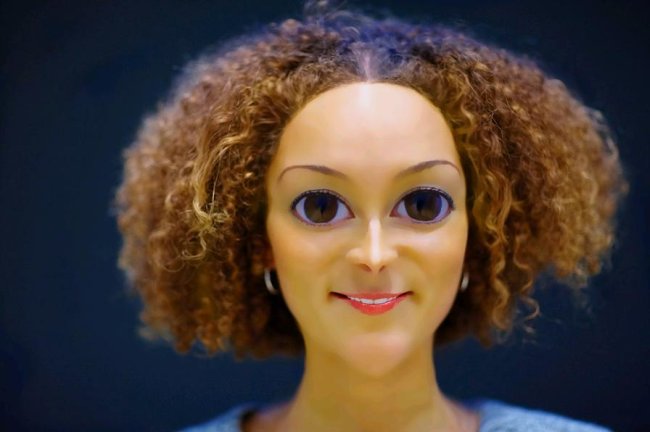
Before we go ahead with the tutorial let’s have a look at the final image.
Step1:-
Open up the portrait of the young lady and duplicate the layer to work on. Right click on the layer and select Duplicate layer from the drop down menu.
Step2:-
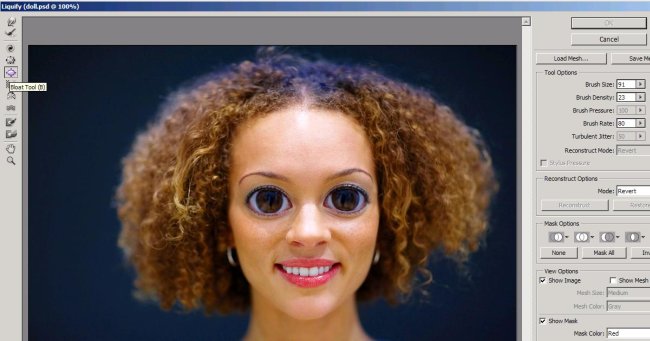
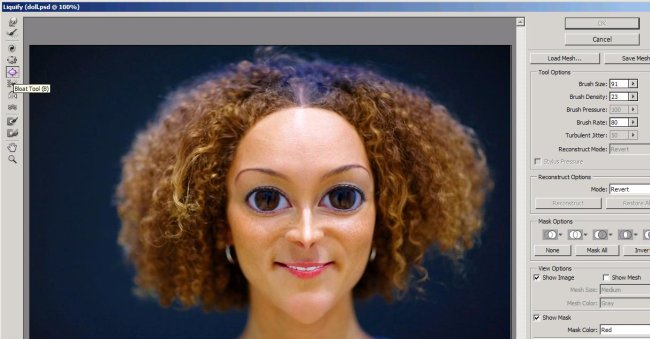
Now go to Filter and select Liquify. Now select Bloat Tool and set the brush size to 91. Now click on the eye balls to make them bigger as shown in the picture below.
Step3:-
Okay now we’ll perform a nose job ![]() . Duplicate the layer and again go to “Filter” then select “Liquify” and then select the Pucker Tool and make long strokes downward on the nose to make it small and pointed as shown below.
. Duplicate the layer and again go to “Filter” then select “Liquify” and then select the Pucker Tool and make long strokes downward on the nose to make it small and pointed as shown below.

Step4:-
Again Duplicate the layer (by creating duplicate layers you can go back and correct if anything goes wrong without disturbing or changing the whole image). Go to Filter and then to Liquify and select pucker tool again to work on the lips. Click on the lips area again and again to make the mouth look smaller as shown in the picture given below.

Step5:-
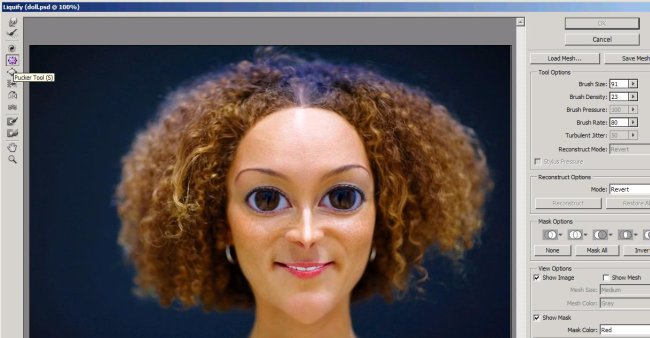
It’s time to make the forehead rounder and for that again we’ll duplicate our layer and work on the duplicated layer. Then go to Filter> Liquify and then again select Pucker Tool. Now we’ll click on the area of the hair line to make it rounder as shown below.

Step6:-
After the forehead we’ll work on the chin of the girl. We’re going to make it pointed like dolls have. Duplicate the layer, go to Filter>Liquify and then select the Bloat Tool this time. Make strokes downward on the chin to make it pointed. If anything goes wrong you can use Reconstruct Tool to go back and correct it.
Step7:-
Now we’ll make the neck thinner. Duplicate the layer again, go to Filter>Liquify and then select Pucker Tool. Make long strokes downward and make the neck look thinner.
Step8:-
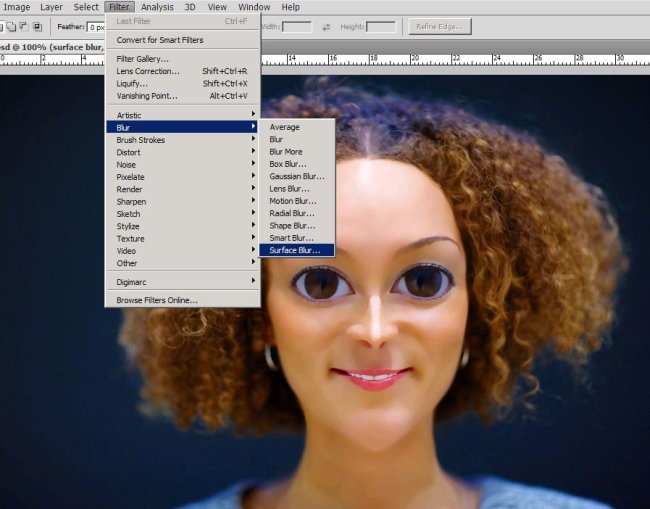
Now we’re going to make the skin clear of any freckles or blemishes or any marks. To do that duplicate the layer again and then go to Filter>Blur>Surface Blur. Then remove the Blur from the layer leaving the face area. This way everything will look real.
Step9:-
Duplicate the layer and then go to Image>Adjustments>Hue/Saturation and make the color of the face a bit yellow to give it the look of plastic.
Step10:-
Finally we’re going to give a pink shade to our doll. Create another layer and fill it with Color #f9ad81. Now remove the color from eyes and hair using Eraser Tool. Set the Blend Mode of the layer to soft light and reduce the Opacity to 18%.

There you have it. Your doll face transformation is complete. Hope you had fun with it. Do try and experiment with this technique. Share your thoughts. I’ll be back with another cool effect soon, till then take care and have fun.


