
Learn how to make Abstract Lines in photoshop
For those who are just starting out with the pen tool, this is a great exercise to enhance your skills. In this tutorial, we would be learning how to make hair like abstract lines by simply using a pen tool.
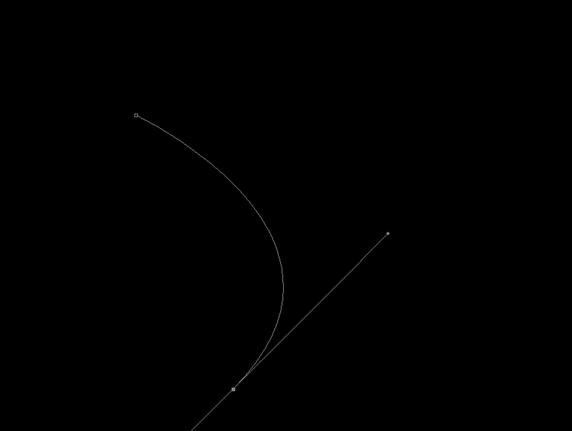
Step 1: Creating a Line
Once you have opened the photoshop document, create a new layer and select the pen tool. After that simply draw a curve using the pen tool.
Step 2: Using the Brush Tool
Once you have made a suitable curve that you are comfortable with, select the brush tool and select the radius of the brush to 1 px and make sure the hardness level is set to 100%. Select the pen tool again, second click on the selection (in the canvas) and click on “Stroke Path”. Once you have done that, a new window would open in front of you. From the drop down menu select on “Brush” and make sure the check box titled “Stimulate Pressure” has been ticked. Once that is done click “OK”, and you would have something like this on your canvas.

Step 3: Multiple Lines
Once you have created the first line, repeat the same step thrice or four times. Make sure that you increase the radius of the brush each time. Also make a note that each line should be made on a separate layer. Keep on reducing the opacity of each layer as you keep on increasing the radius. For example, when you set the radius to 2px, keep the opacity to 80% and so on. After combining several layers, you would have something like this at the end.

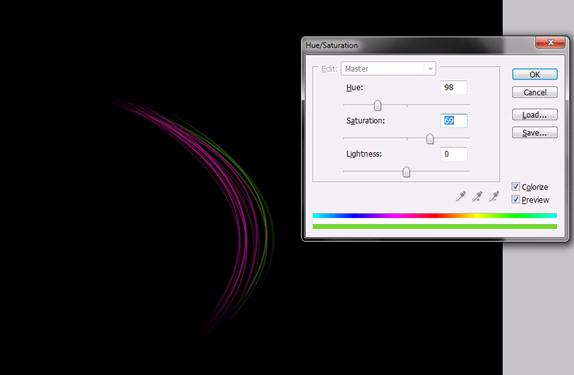
Step 4: Introducing Different Colors
Once you have got the first pair of layers done, it is the time to spread out. Copy the layers into a new group, select the Hue/Saturation option and make sure the check box titled “Colorize” is ticked. After that you can play around and change the color of the lines.
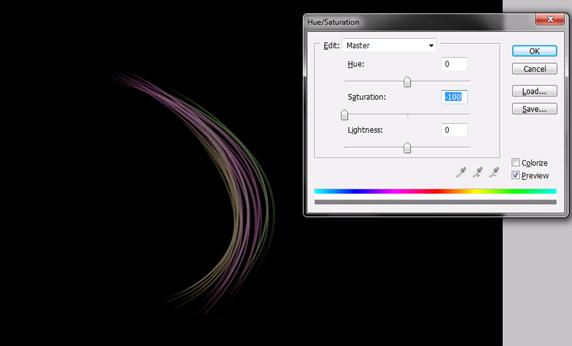
Step 5: Desaturate
Once you are done with the batch of lines, it is the time to add some effect to the lines and try to make them more real. Select all the layers and duplicate them. Select all the duplicated layers and merge them into a single layer. After that go to the Hue/Saturation option and use the following settings to turn the image into black and white.
Step 6: Grey Effect
Once you are done with desaturating the layer, decrease the opacity of the layer to 20%, and you would see a grey shine appearing on the lines.

Step 7: Fill the Canvas
Once your first batch is complete, it is time to fill the canvas completely. Use your creativity to make any pattern you want. Use the transform tool, rotate the lines and try to make eye catching designs.
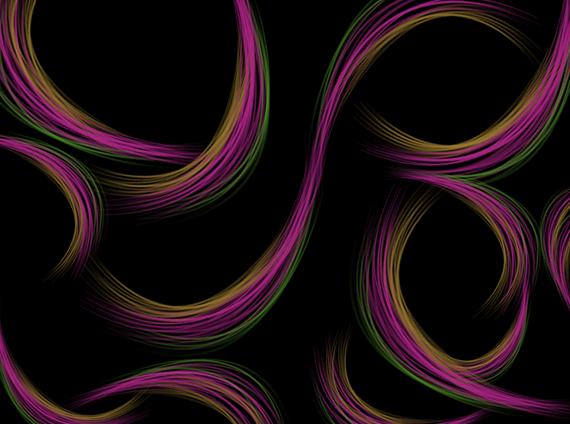
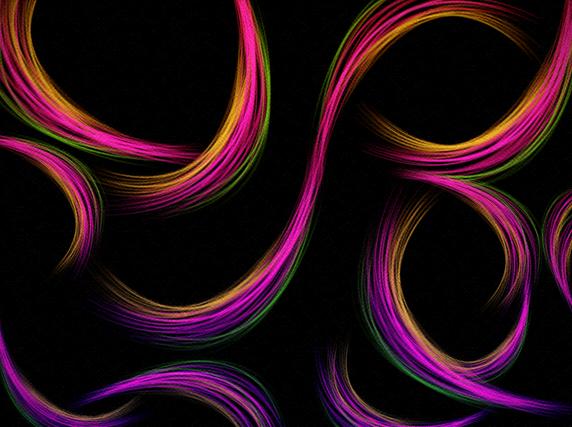
Step 8: Effects
After you have completely filled out the canvas it is time to add some effects. First of all, select the Hue/Saturation option and increase the saturation of the layers to give a more sharp look. After that, copy each and every layer in the document and duplicate them. After that select all the duplicated layers and merge all of them into one. Go to Filter and select the “Filter Gallery”. Use the Cross Hatch filter in the Gallery and select “Ok”. After that, decrease the opacity of that layer to allow the background image to jell in with the effect. The end result would look somewhat like this.


