
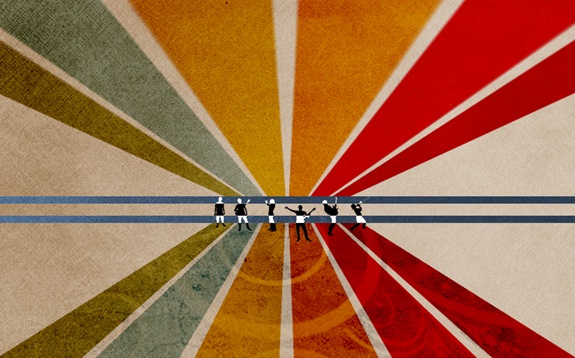
Learn how to create a Retro Poster in Photoshop
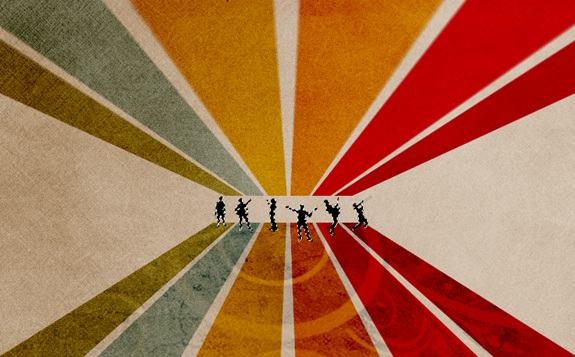
Using basic Photoshop tools, you would learn how to make a retro poster such as the one shown below. Follow the steps with me.
Step 1: Basic Image
Download any grunge background such as the one shown below.
Bring the backdrop on the canvas and press CTRL U. Click on the tick box titled “Colorize” and play with the hues a little bit, until you have this nice fade.

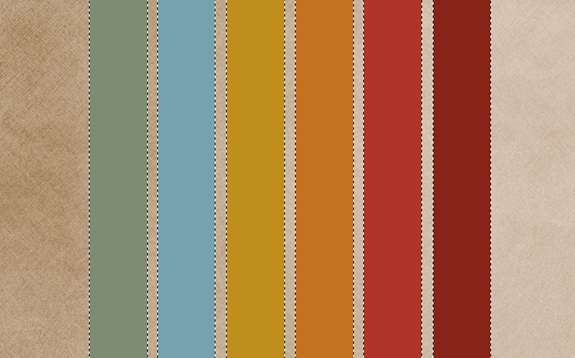
Step 2: Selection Tool
Pick up the Rectangular Marquee tool or the Rectangular Shape tool and make the following selection/shapes. If you are using the selection tool make sure all the strips you make are on the same layer. Color each and every strip using a different color.
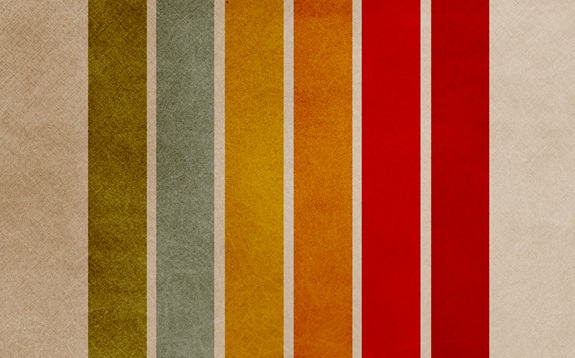
Step 3: Color Burn
Merge all the strips layer into one and change the blending options of that particular layer to Color Burn.
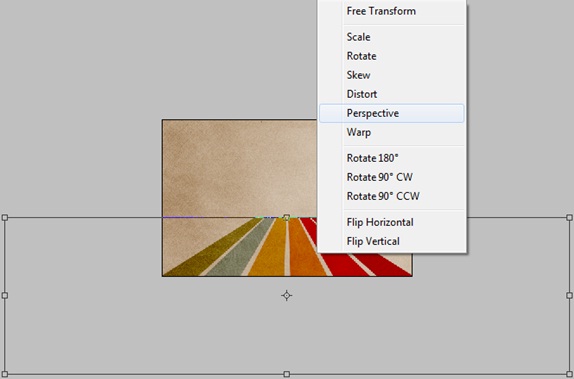
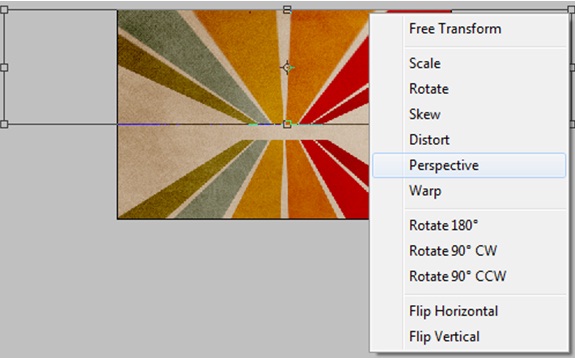
Step 4: Perspective
Now press CTRL T and second click on the selection. Choose the Perspective option and apply it as shown below.
Step 5: Another Perspective
Duplicate the original layer and again apply the perspective option but this time using a different angle.
Step 6: Brushes
For this step, you would need to download some custom brushes. You can download brushes from Brusheezy.com. Once downloaded and installed select any such brush and reduce the opacity to 50%. Apply it on the bottom strips in a new layer. Increase a size of the brush so you would have one single pattern. Press CTRL and click on the layer palette for the bottom stripes and that would automatically load the selection. Now go to your brush layer and using the eraser tool, remove the area, which falls out of the stripes.

Step 7: Silhouettes
Now you would need to download various silhouette images.
Bring the image on the canvas and crop out different silhouettes and copy them in different layers. Position them on the canvas like shown below.
Step 8: Strips
Make two addition strips using the Rectangular Marquee tool or the Rectangular Shape tool. Color both the strips white and change the blending options of the layer to Exclusion. Position the layer right at the top to affect all other layers. And we are all done.


