
How to make blue autumn theme in Photoshop
Hi guys! I’m back with yet another cool theme which I’ve named as Blue autumn. Hope you guys like it as much my other themes. It’s easy to make with Photoshop tools and brushes. All we need for this tutorial is an image of a man (front or back? your choice. I’ve selected an image of a bald man’s back) and with that our own Photoshop.
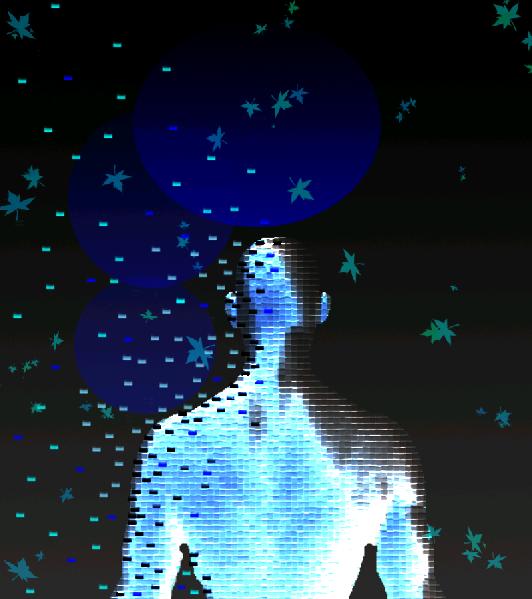
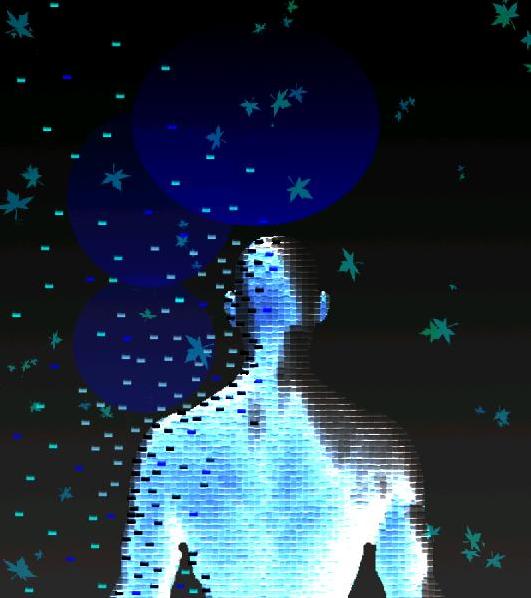
Let’s have a look at our finished theme first and then we’ll start with the process.
Step1:-
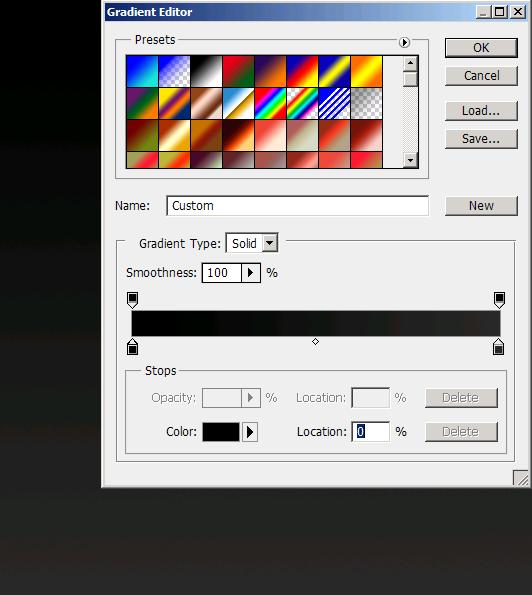
Make a new document, size will be 800x900px. Fill it with dark grey color #2a2929 to black color #000000 gradient (grey on the right color-stop and black on the left).
Step2:-
Open up the man’s image cut the man out of its back ground using Quick Selection Tool then go to Edit and select Cut.

Step3:-
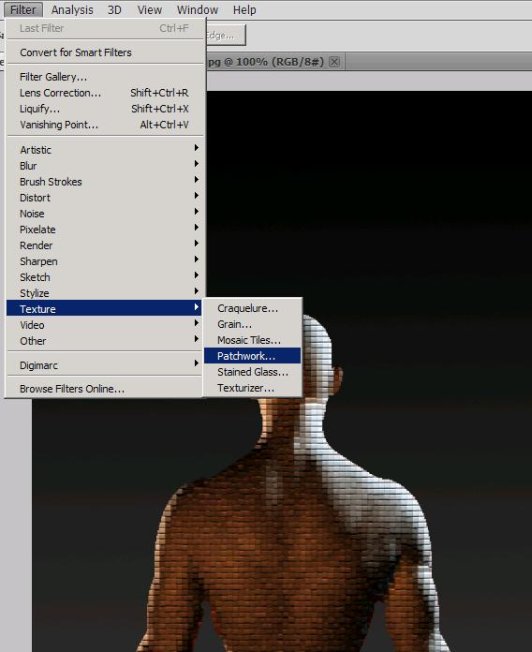
Paste the image on our dark background. Name this layer as “Man”, after that go to Filter>texture>patchwork.
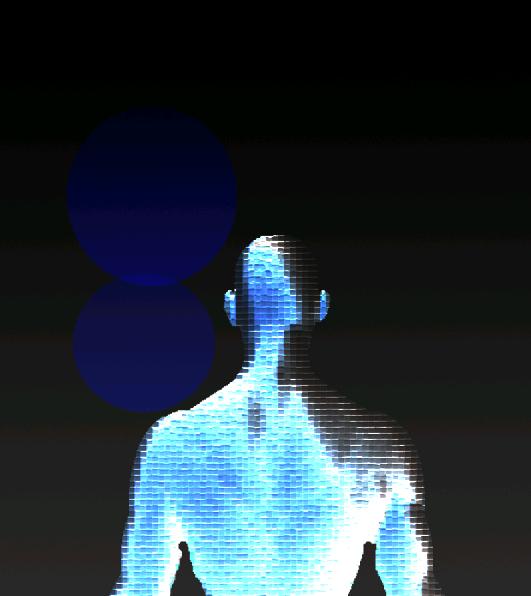
Step4:-
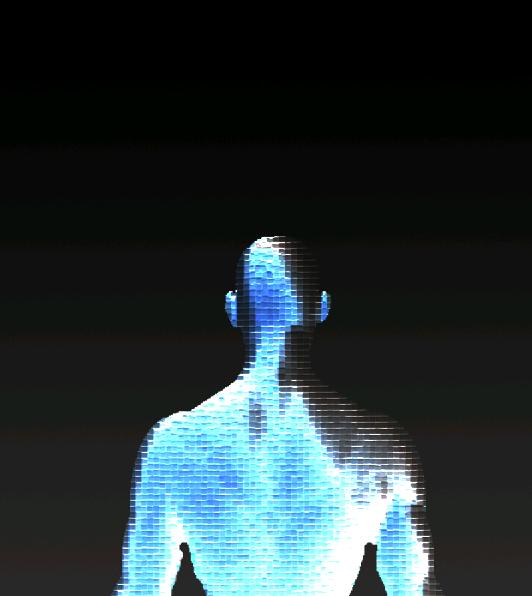
Now set the Blend Mode of the Man’s layer to “Divide” and you’ll have something like the image below.
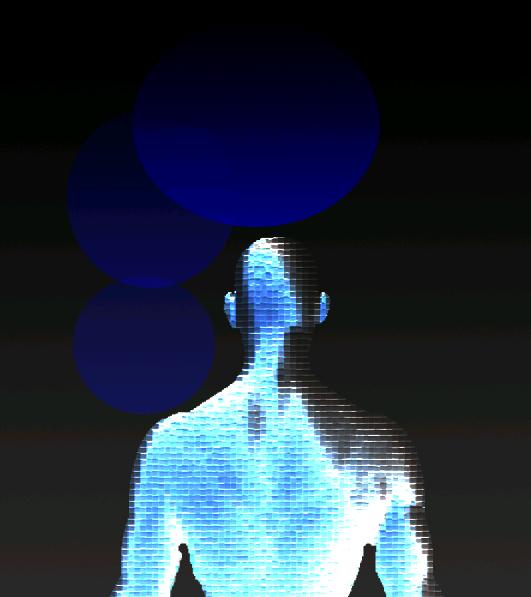
Step5:-
Now select the Ellipse Tool (U) and make 2 circles (name each circle layer as circle 1, circle 2) with the color #0000ff. set the Blend Mode of each circle layer to “Color” and reduce the opacity of circle1 to 24%, and for circle2 reduce the opacity to 40%. Now you’ll have an image similar to the picture shown below.
 Step6:-
In this step we’re going to create another circle. Make a new layer (name this layer as circl3); make a circle using Ellipse Tool (slightly bigger than the other two circles). Set the Blend Mode to Color and leave the opacity to 100%.
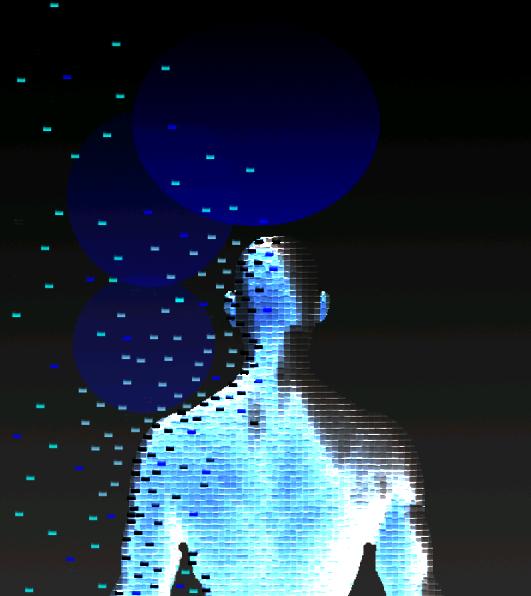
Step7:-
Now we’re going to give our man the effect of crumbling away in the autumn wind. To achieve that effect select a water brush5-superLibbie of size 13px.

Step8:-
I’ve added three colored bricks for scattering effect. Color 1 is #0000ff (this is bright blue), color2 is #63bae3 (sky blue) and third color is #000000 (black). Use the brush (single clicks) as shown in the picture below.
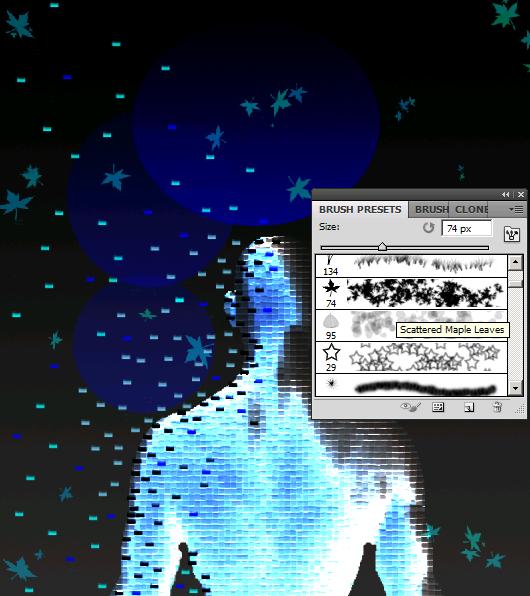
Step9:-
It’s time to add some flying maple leaves to complete our autumn effect. Make another layer and name it “Maple leaves”. Use Scattered Maple leaves brush of size 35px with color #00ffff. Reduce the opacity of leaves to 40%.
Okay now we are done and you have a blue autumn theme made in Photoshop.
I Know you’ll have fun making it. Please do share your thoughts. Thanks for reading. Do take care.


