
How to create digital stars art from an ordinary image in Photoshop
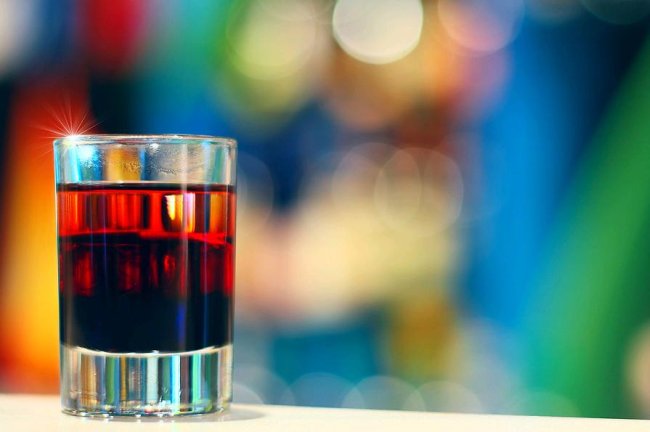
Hey friends! Today I’ve brought a beautiful digital art made out of an ordinary image in Photoshop. It’s very attractive and you’ll learn new tricks of Photoshop in this tutorial. You’ll be amazed to know that how some very simple techniques can produce something so wonderful. So without wasting any more time, let us count the things we’ll need for this attractive image. First we’ll need an image (you can take any colorful image of your choice), I’ve taken here a colorful image from bigstock with that all we need is our Photoshop.
Do take a look at the finished picture before going ahead.

Step1:-
Let’s begin by opening the colorful image in Photoshop.
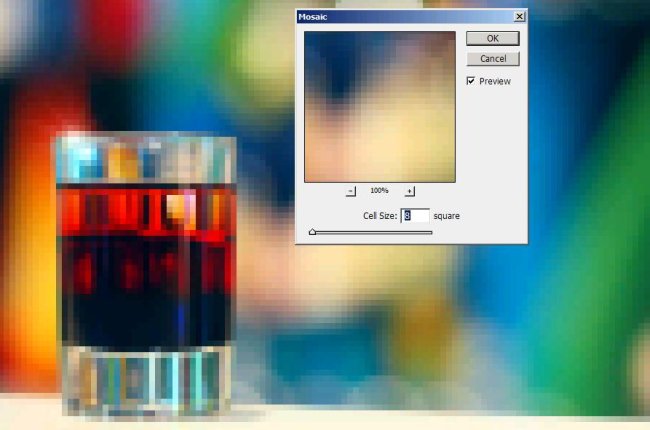
Step2:-
Now go to Filter, then go to Pixelate > Mosaic. Adjust the cell size “8” square as shown below.
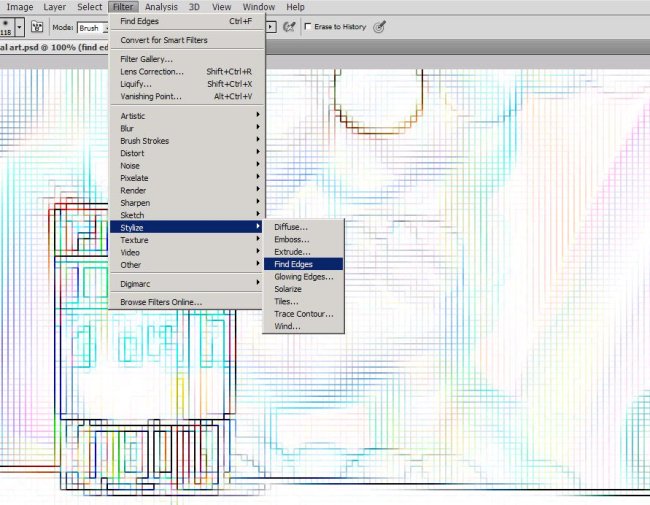
Step3:-
Now again go to Filter> Stylize> Find Edges.
Step4:-
Go to Filter again then to Noise > Median. Adjust the radius 2 pixels. As shown below.

Step5:-
To reduce the size of the spots go to Filter> Other> Maximum and adjust the radius 1pixels.

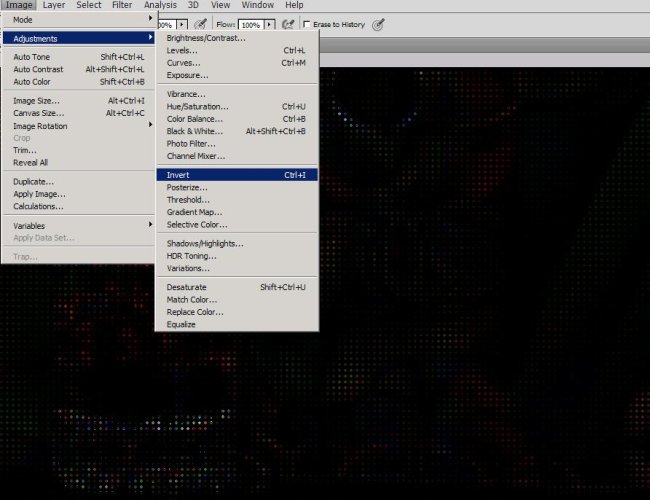
Step6:-
Now go to Image> Adjustments> Invert.
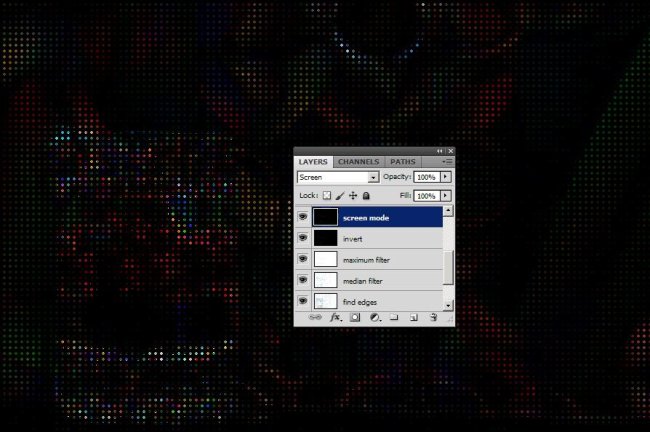
Step7:-
Set the Blend Mode o Screen and leave the Opacity to 100%.
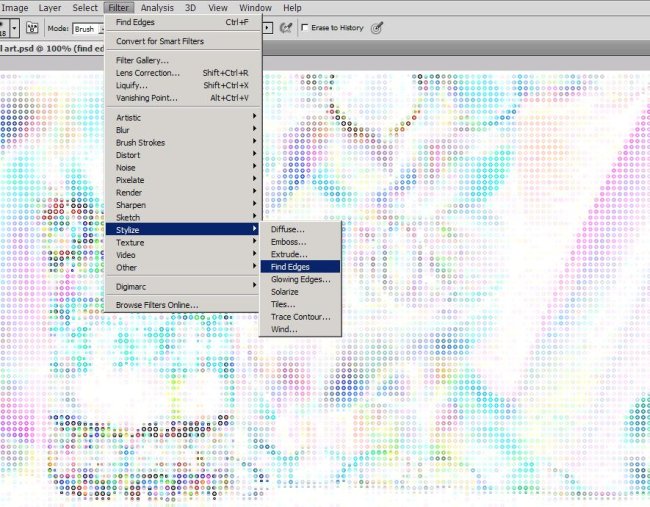
Step8:-
Now again we’ll go to “Filter” then to “Stylize” and select “Find Edges”.
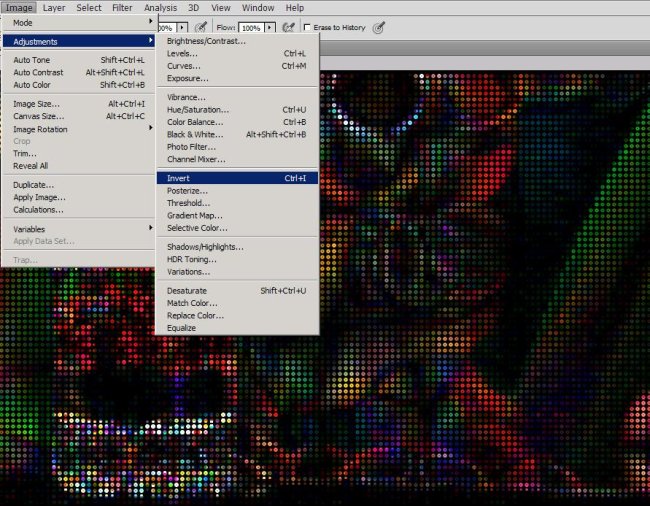
Step9:-
Now go to Image> Adjustments> Invert.
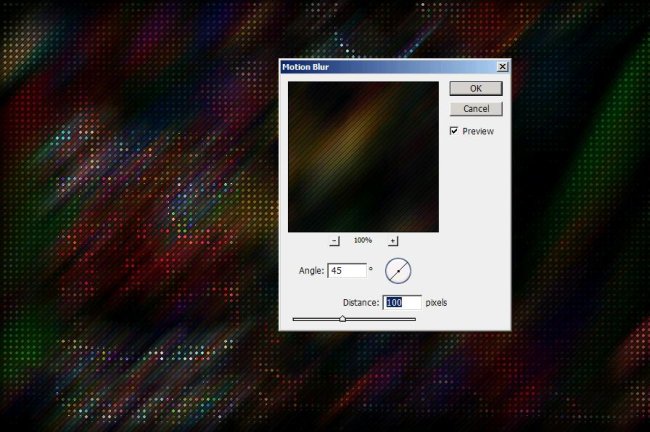
Step10:-
Duplicate the layer 2 times. Now select the first copy and go to Filter> Blur> Motion Blur and set the angle to 45 degree and distance 100 pixels.
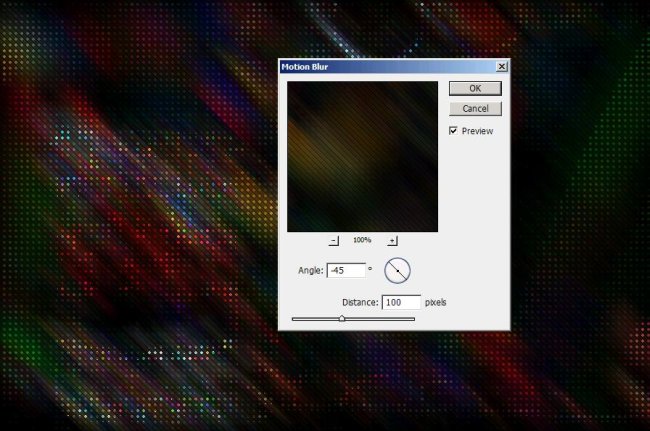
Step11:-
Select the 2nd copy and again go to Filter > Blur> Motion Blur. Set the angle to “-45 degree” and distance will be 100 pixels.
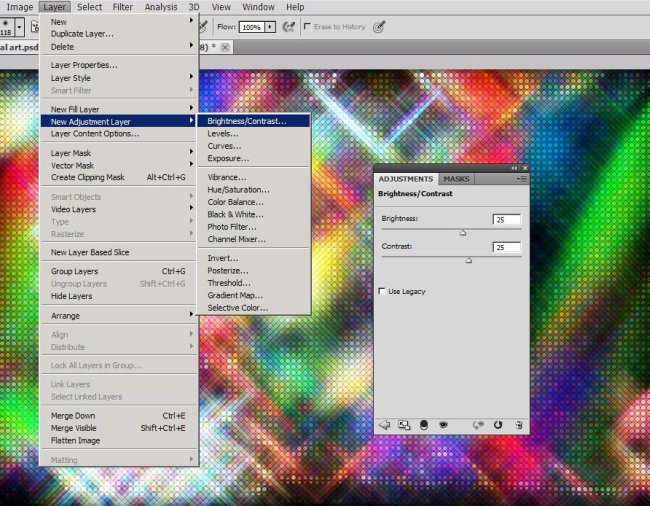
Step12:-
Now go to Layer> New Adjustment Layer> Brightness/Contrast and set both at 25 as shown below.
Step13:-
Now our digital star image is complete.

Hope you had a good time going through this tutorial with me and learned something new also. Do share your thoughts and suggestions. I’ll be back with some new images for you soon, till then take care and have fun.


