
How to create a web with due drops in Photoshop
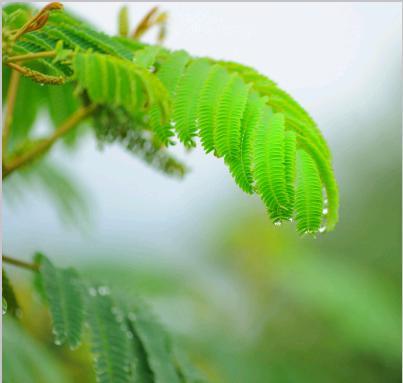
Hi folks! Today I’ve brought a fascinating tutorial for you. It’s a beautiful natural looking web laden with due drops, which we’ll create in Photoshop. So let’s see what we need for this beautiful image, a green fern picture . With that all we need now is our very own Photoshop.
However, before we fall in the pool of our creativity let’s have a look at the final image.

Step1:-
Open a new document of size 400x381px in the Photoshop. Now open your fern image, copy it and paste it in the new document we’ve just created (as shown in the pic).
Step2:-
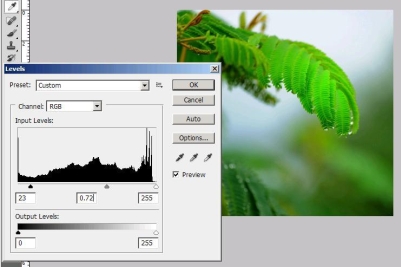
Now go to image, go to adjustments and select levels and keep the setting as 23, 0.72, 255 and click ok.
Step3:-
It’s time to create a gradient overlay layer. Right click on the layer1, select blending options and use the setting as shown below in the picture.

Step4:-
Select the brush tool now and choose the hard round brush, and keep the diameter as 2px. Make a rough circle as the central wring of the web then select the line tool (u) for the straight lines around the circle.

Step5:-
Now select the pen tool to add patterns of the web around the straight lines. Use add anchor point tool to add curves to the patterns.

Step6:-
Now “right click” on the web and select “stroke sub path” then “right click” again on the web and select “delete path” as shown in pictures below.
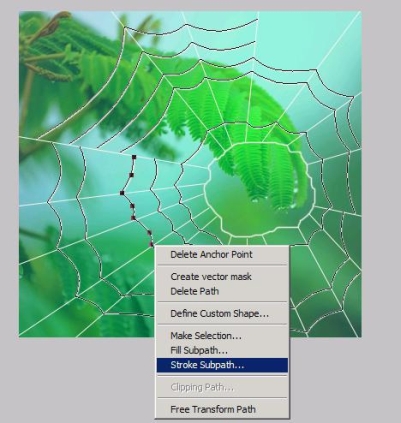

Now you have an image of complete web (as shown in picture below)

Step7:-
Now it’s time to reduce the opacity of the web to 40%.

Step8:-
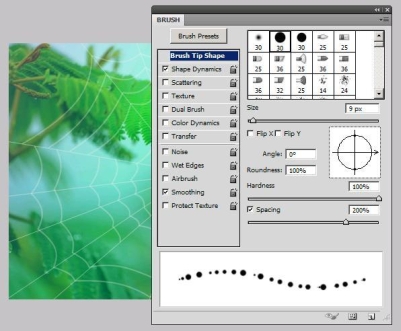
Let’s go now to brushes palette and click on the Brush Tip Shape, select a hard round brush with diameter of 9px. Check the spacing box and set it at 200%.
Step9:-
Now click on Shape Dynamics and keep Size Jitter 100%, also set Control to Off.

Step10:-
Okay now make a new layer and name this layer due drops. It’s time to have some fun. With the brush setting we’ve just made we are going to draw along the web lines. The result will be fascinating as shown in the picture below.

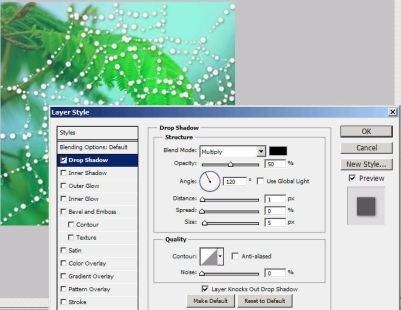
Step11:-
Now right click on the due drops layer and go to blending options and click on drop shadow. Use the setting as shown in the picture below.
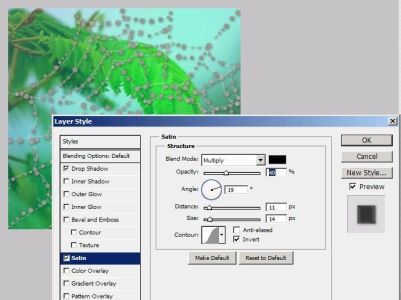
Step12:-
Okay now select the satin box and use the setting as shown in the picture below.
Step13:-
Now check the Bevel and Emboss and keep the setting as are in the picture below.

Step14:-
Select Inner Glow now and use the setting of the picture below.

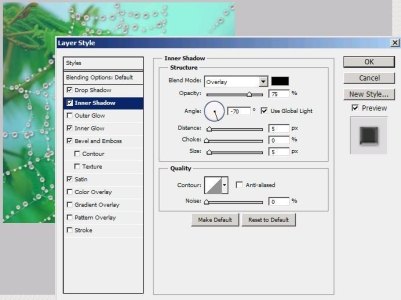
Step15:-
Click on Inner Shadow and keep the setting as shown below. Click ok to close the blending options.
Step16:-
Click “ctrl+left click” on the due drops layer to make selection around the drops. Now click on the web layer and make a layer mask with the selection.

Step17:-
Now go to Blending Options and set the due drops layer to multiply and we are finish with our image.

Here we are with a natural looking image of a web laden with due drops. Hope you’ve enjoyed it. Do try this and I’m sure you can create awesome effect with these Photoshop techniques. Do share your results. I’ll be back with a new tutorial soon, till then take care, babye.


