
How to create a magical winter scene in Photoshop
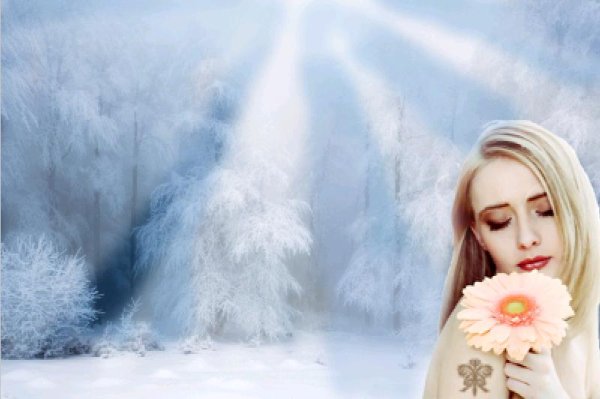
Hi friends! I’m back yet with another beautiful magical winter scene. What can I say, I just love snow and of course in the blistering heat of summer who wouldn’t ![]() ? So let’s just start and create magic with me. For this amazing scene we’ll need an image of the snow covered trees and another image of a beautiful girl. After those images all we need is our Photoshop. What else? However, before entering into this magical journey have a look at the complete scene image.
? So let’s just start and create magic with me. For this amazing scene we’ll need an image of the snow covered trees and another image of a beautiful girl. After those images all we need is our Photoshop. What else? However, before entering into this magical journey have a look at the complete scene image.

Step1:-
Create a fresh new document of size 400×266 px. Copy the image of trees and paste it on the document.

Step2:-
Now open up the image of the girl, use a Quick Selection Tool to cut out the girl from the back ground.

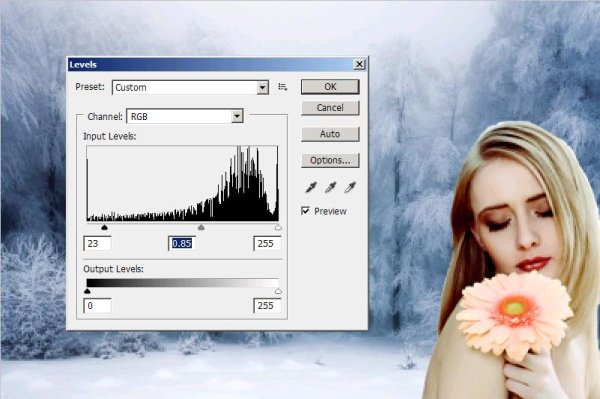
Step3:-
Paste the girl on the trees layer in the right side corner and create and levels adjustment layer. Keep the setting as shown in the picture.
Step4:-
Select a soft round brush of size 13 px and color #ffffff. Brush around the edges of the girl’s cutout to blur the edges, reduce the opacity to 28%.

Step5:-
Now again use the same brush size 60px and through light from the sky on the girl. Reduce the opacity to 51%.

Step6:-
Create another layer and name it “Blue rays”. Okay now we are going to make rays. Select again same soft round brush of size 32px and with color #458ccb. Make the rays as shown in the picture below.

Step7:-
Reduce the opacity of this layer to 30% and you should have the effect as it is in the picture.

Step8:-
We are going to create another layer for some white bright rays. Repeat the same process as mentioned in the step7. Draw bright rays between the blue and reduce the opacity to 29%.

Step9:-
I’ve added a butterfly tattoo on the girl’s arm, for this Make a new layer and select the brush#88 make the size 9px and color#a1876d, reduce the opacity to 63% and there you have it.
Step10:-
Now we are going to add snowflakes or stars (whatever you may want to call them). So make another layer name it stars. Select a star brush#73 of size 19px and color white (as white as it can be for the snow). Scatter them as if falling from the heavens above (as shown in the picture below).

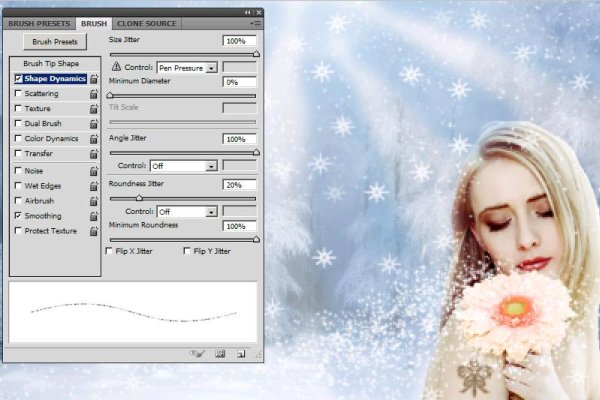
Step11:-
It’s time to give this image a magical touch and for that we are going to add some glitter. Select a hard round brush of size 2px and make the settings as shown in the pictures below.


Step12:-
Scatter the glitter as if falling from the sky n blowing in the wind from the flower.

We are done with the scene now. There you have a magical winter scene made in Photoshop. Hope you liked this tutorial. Do share your thoughts. I’ll be back with another new effect soon. Till then take care of yourselves. Chao!


