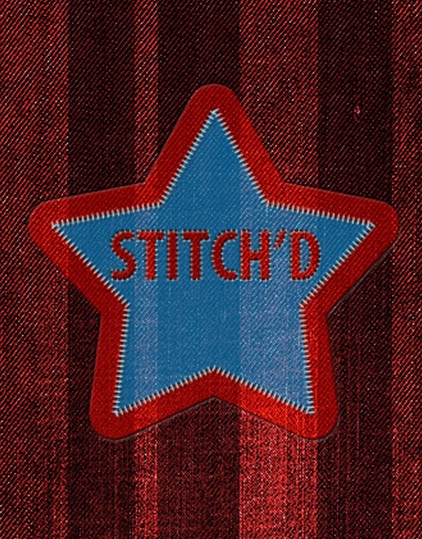
Sewing a Fabric insignia or a symbol in Photoshop
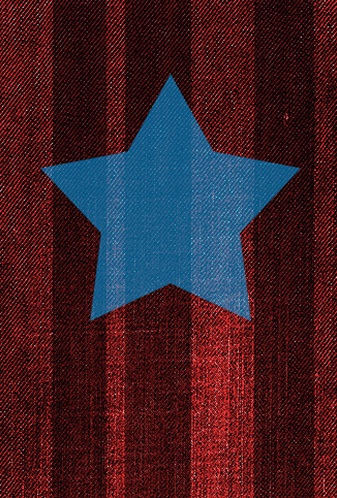
In this tutorial, we are going to learn how to make a fabric insignia in Photoshop. Just follow few simple steps with me and you will be able to create something along the lines shown below. Let’s start now!

Step 1
1. Make a new fresh document (size 500×700 px).
Step 2
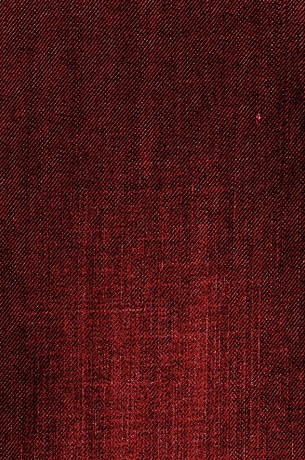
Import an image of fabric and rename the layer to “fabric”.
Step 3
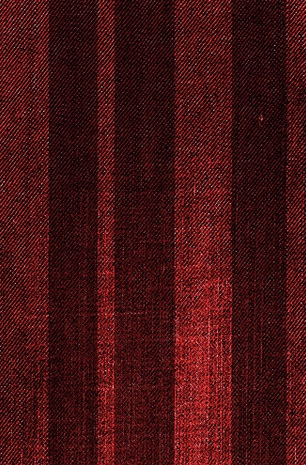
1. Keep color to red (#ff9000) in foreground.
2. Make another layer naming it as “Stripes”.
3. Now draw some perpendicular lines with a variety of widths like the picture shown below.
4. Keep the Blend Mode of the stripes layer to Overlay.
Step 4
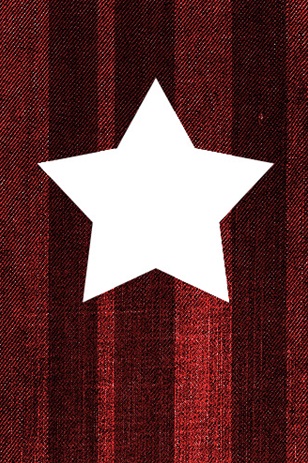
Select shape tool and create a shape like star. Name this layer as “symbol”.
Step 5
2. Now Go to Image, go to Adjustments and select Hue/Saturation. Make a check on Colorize.
3. Make the settings as follows, Hue 200, Saturation 45, and Lightness will be 0.
Step 6
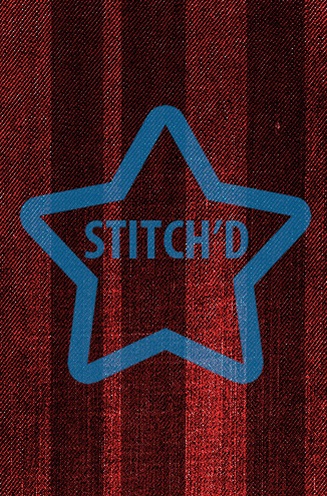
1. Press Ctrl+left click on the “symbol” layer to load a selection.
2. Make another layer naming it as “boundary”. Okay now selection will be filled with color white (#ffffff).
3. Keep the selection on and go to Select, go to Modify and go to Contract.
4. Make the settings of contract 20 px and then hit Delete.

Step 7
Select type tool and type the text you want to show on the “symbol”. “Stitch’d”

Step 8
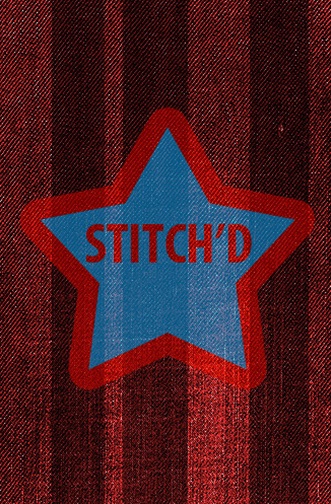
1. it’s time to combine boundary and your text layers into one lone layer.
2. Press Ctrl+left click on the layer for loading a selection. Now delete the merged layer.
3. Now with the selection being on, select the “symbol” layer, copy it (Ctrl+C), after that paste (Ctrl+V) a new layer.
4. Name this recently pasted layer as “symbol Items”.
5. Now hide the “symbol” layer at the back and you will have something as it is in the picture below.
Step 9
1. Select symbol Items layer. Go to Image, go to Adjustments and then select Hue/Saturation.
2. Make a check on the Colorize. Keep the settings as follows, Hue 0, Saturation 65 and Lightness will be 0.
3. Make the “symbol” layer Unhide.
Step 10
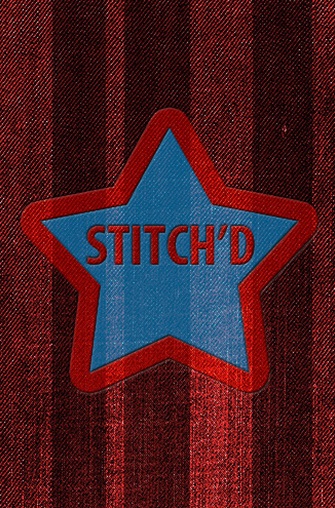
1. Press “Right-click” on “symbol Items layer” and select Blending Options.
2. Choose Bevel and Emboss. Keep the Style to Pillow Emboss with the size to 5pixals, set the Opacity to 30%.
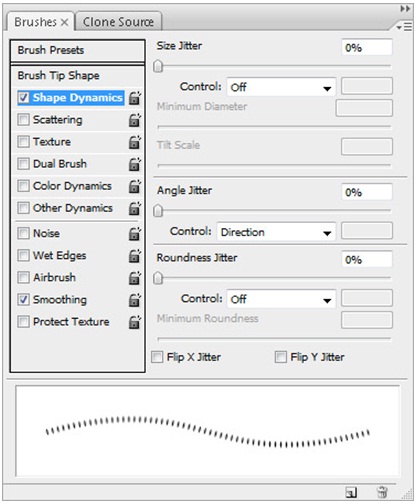
Step 11
We are going to fashion a new brush now.
1. Open the Brushes Palette. Select the Brush Tip Shape and Make the settings as shown in the picture below.

2. Then go to “Shape Dynamics” and make the settings as are in the picture below.
3. Press Ctrl+left click on “symbol Items” layer for loading a selection.
4. Now go to the Paths tab and click on (Make Workpath from Selection).
5. Make the foreground color white (#ffffff). Press “Right-click” on the path creating and selecting Stroke Path.
6. Keep the type to Brush and press OK. Now we’re DONE.