
Play with Color Effects to make a poster
In this tutorial, we would be focusing on image manipulation and color effects in Photoshop to make a poster like the one shown below.

Step 1: Basic Image
First of all, you need to select a particular image you want to edit and bring it on the canvas.
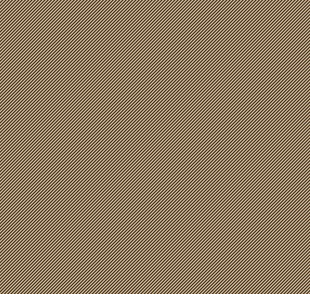
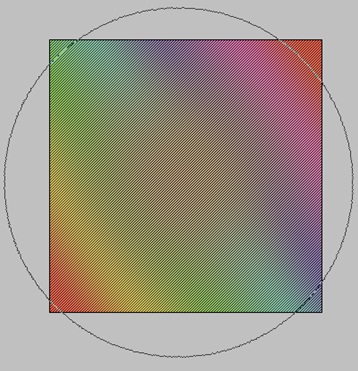
Step 2: Pattern
Open a new document and keep the canvas size 3px by 3px. Make the following pattern using the pencil tool as shown below. Once done go to Edit and choose Define Pattern.

Step 3: Patterned Background
Make a new layer and color the entire layer with any color you want. For this tutorial, we have gone with a Light Brown Hue. After that make another layer and change the option of the paint bucket tool from Foreground to Pattern. Apply the newly created pattern on your background.
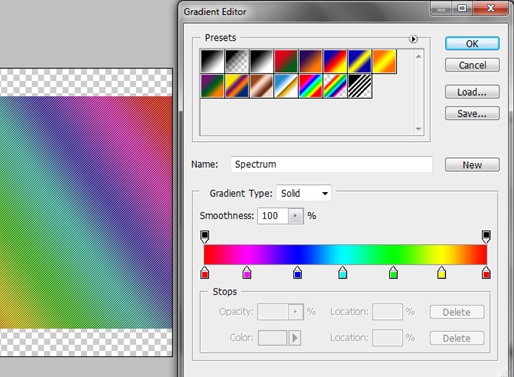
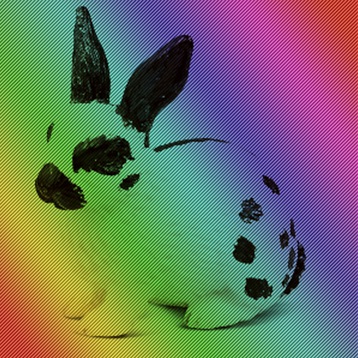
Step 4: Gradient
Duplicate the background layer and apply the following gradient on the newly created layer.
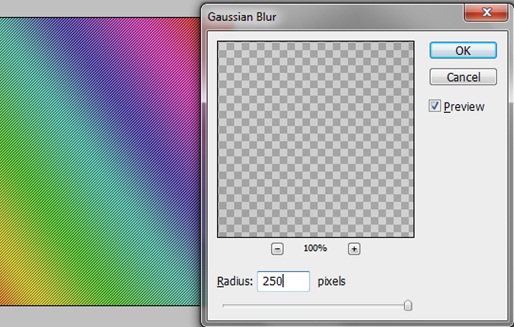
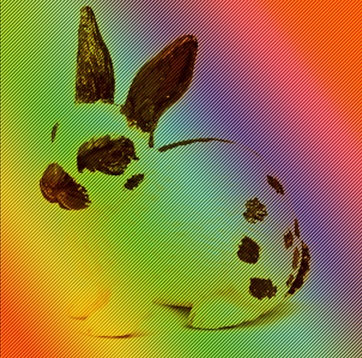
Step 5: Gaussian Blur
Go to Filter, Blur and choose Gaussian Blur. Apply the following details.
Step 6: Eraser Tool
Simply select the eraser tool with 0% hardness and erase the center of the canvas.
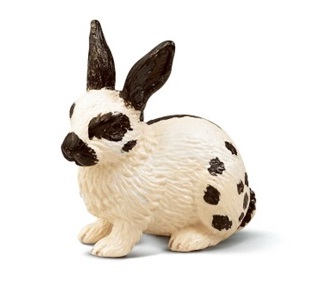
Step 7: Merging with the Backdrop
Go to the bunny layer and remove all the white color from the layer. You can do this by going to Select and choosing Color Range. Once a new window opens, click on the white color and choose select. Hit Delete.
Step 8: Duplicating Effect
Duplicate all the layers and merge them into one. Duplicate the newly created layer. Add the Gaussian blur effect to the new layer and change the Gradient of that Overlay from White to Bright Orange. Repeat the same effect twice to sharpen the colors of the image. Reduce the opacity by 25% as you duplicate each layer.
Step 9: Textured Print
Add a new layer and color the borders with black. Change the blending mode of that particular layer to Overlay. You can add textured wallpapers to give the image more depth.
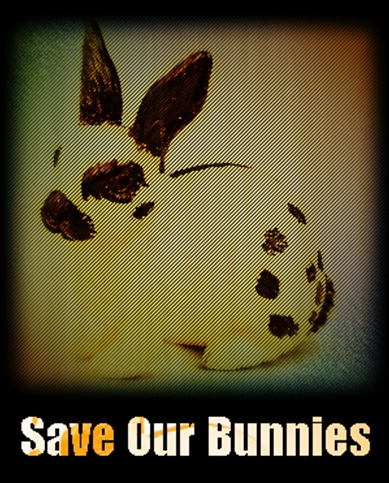
Step 10: Final Touches
Keep the bunny image in the middle of the canvas. The font used for the type is “Impact”. After Rasterizing the font layer, duplicate the gradient layers of the bunny, which were made previously. Keep the layer above the font layer and change the blending option to “Linear Burn”. And you will get this final result.


