How to Transform Photo into Watercolor Painting
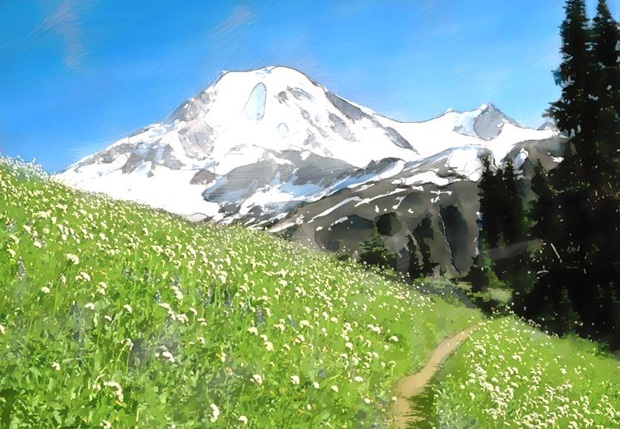
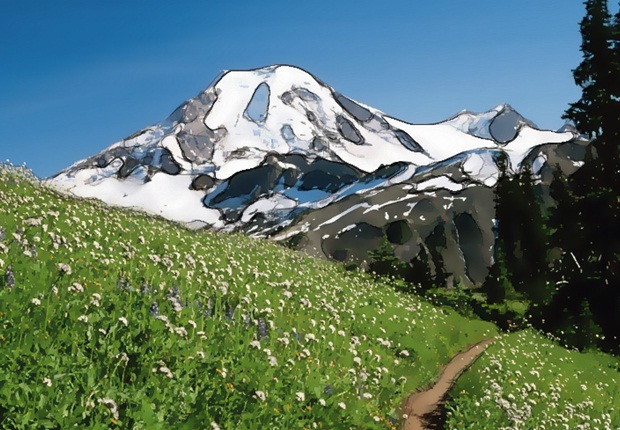
With this tutorial, I am going to show you how to transform any photo into the watercolor painting in Photoshop. Interesting isn’t it! Below is displayed our final image, which we are going to produce.

Step 1
Make a fresh document (750×550 pixels) with white (#ffffff) background.
Step 2
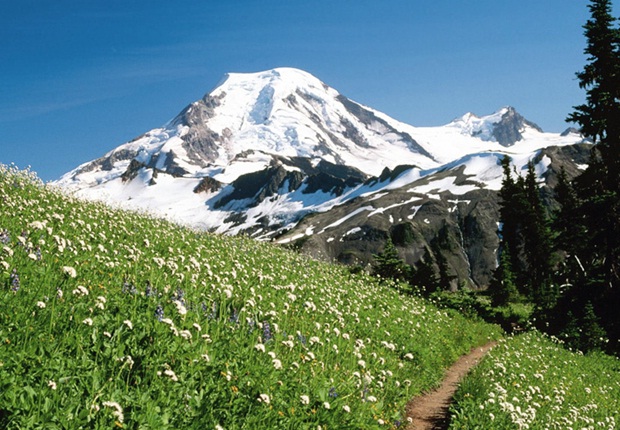
1. Download an image of Scenery, copy and paste it onto the document.
2. Name the layer of the scenery as scenery.
Step 3
1. Now duplicate scenery layer naming the fresh layer as “Blur-scenery”.
2. Go to the Filter tab, go to Blur and then select Smart Blur. Make the settings of the Radius 10 and the Threshold 30. Now Apply.
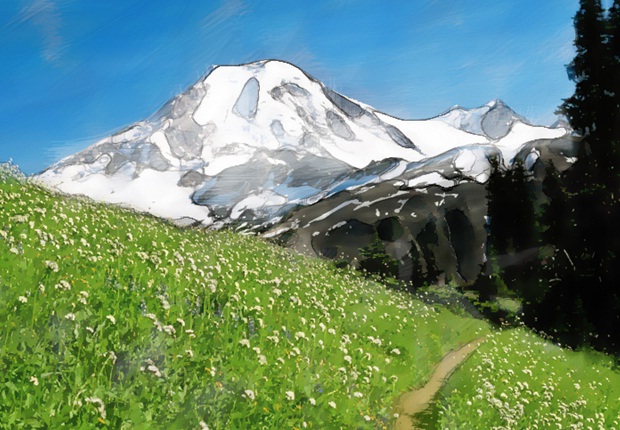
You’ll have an image similar to the picture below.
Step 4
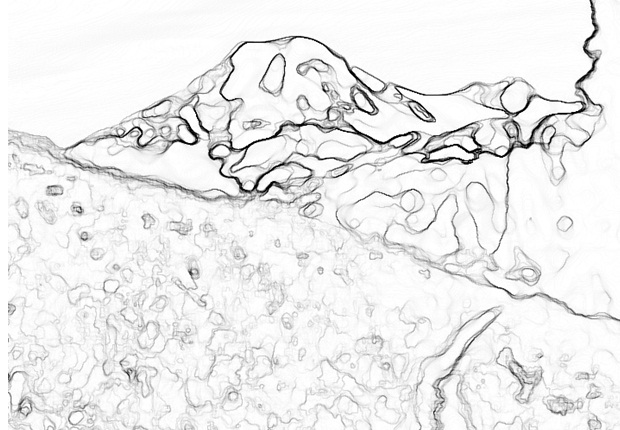
1. Okay now duplicate the scenery layer again naming it as “sketch”.
2. Drag the sketch layer to be over “Blur-scenery” layer.
3. Now go to Filter, go to “Stylize” and select Glowing Edges. Make the Edge Width 1 with Edge Brightness 12 and the Smoothness 15.Now apply.
4. After that go to Image, go to Adjustments and then choose Invert.
5. Then go to Image, go to Adjustments and then Desaturate.
Step 5
1. Make the foreground color black (#000000).
2. Pick up the Brush tool, open the presets.
3. Pick Dry Brush. Reduce the Opacity of this dry brush 10%.
4. Draw momentarily over the drawing layer and you should have the effect shown in the picture below.
Step 6
1. Make the size of the brush 100pt.
2. Draw extended strokes for the sky.
3. Steadily construct the depth of color by drawing above particular areas more than one times.
4. To provide the feeling of watercolor, it is good to leave tiny areas of white (#ffffff) around.
5. Do again the same process for the grass.
6. Set the brush size 30pt. Draw little vertical strokes of grass on the drawing layer.
Step 7
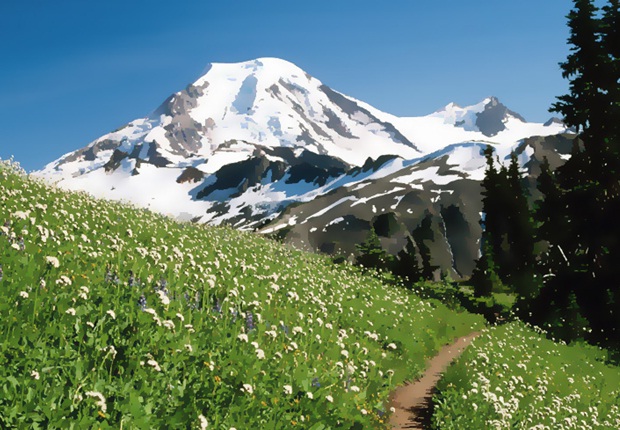
1. In this step we’re going to duplicate the original “scenery” layer. Name the new layer as “particulars”.
2. Reorganize this “particulars” layer to be the uppermost layer.
3. Then go to Filter, go to Artistics and select Watercolor.
4. Make the Brush Details 12 with Shadow Intensity 0 and Texture will be 3.
5. Make the Blend Mode settings of this layer to Luminosity and reduce the Opacity to 25%.
DONE