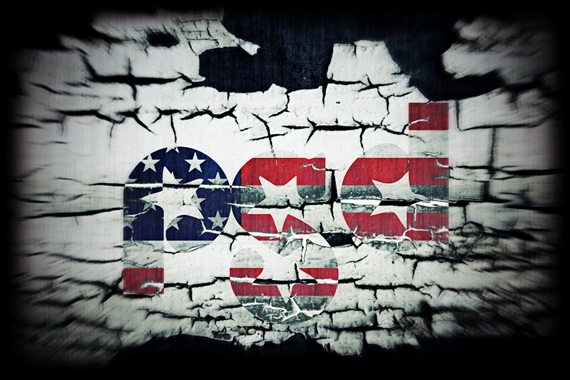
How to create shattering text effect
In this tutorial, we would be using a simple image and creating a shattering effect like shown below. We would be using the basic pen tool and layer blending options to create such an effect.

Step 1: Text
First of all, you would need the Independence font. Once installed, type your text in the middle of the canvas.

Step 2: American Flag
Download an image of the American flag and bring it on the canvas. Position it right at the top.

Step 3: Selection
Press CTRL and right click on the text layer. This would automatically load the selection of the text layer. Select the American flag layer and press CTRL C and CTRL V. Basically this would copy and paste the selection to a new layer.

Step 4: Background
Include a peeling paint texture for the background.

Step 5: First Clipping Mask
Duplicate the background layer and bring it on top of the text layer. Go to Layer and choose Create Clipping Mask. Change the blending mode of that particular layer to Darker Color.
Step 6: Second Clipping Mask
Duplicate the background texture once more. Press CTRL U and set the Saturation level to -100. Move this layer right at the top and go to Layer and choose Create Clipping Mask. Change the blending options of this particular layer to Multiply.
Step 7: Third Clipping Mask
Duplicate the background layer once more. Desaturate it exactly like in the last step. After that, go to Image, Adjustments and choose the Invert option. After that, take this layer at the very top. Go to Layer and choose ‘Create Clipping Mask’. Change the blending mode of that particular layer to Lighten.
Step 8: Finishing Touches
Add two new layers at the top. In the first layer, color the area of the font with white color. Change the blending options to color overlay. Use the eraser tool to remove the colored portion of the text and leave the color on the white portion of the text. Use the second layer to make the borders. Make sure to keep the hardness of the Brush Tool to 0%.