
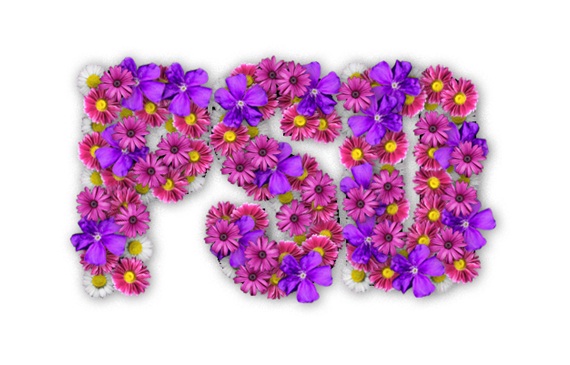
How to create gorgeous Flower Text
In this tutorial, we would be simply using various flower images and combining them to form our text. We are aiming to create the gorgeous flower text displayed below.

Step 1: Text
First of all, select the text tool and write whatever you want to write in the middle of the canvas. In this tutorial, we would be using the font “Impact”.

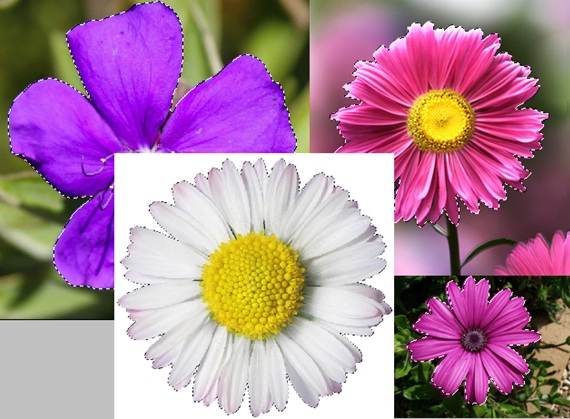
Step 2: Flowers
Take any four images of flowers and crop out the flowers from the background.
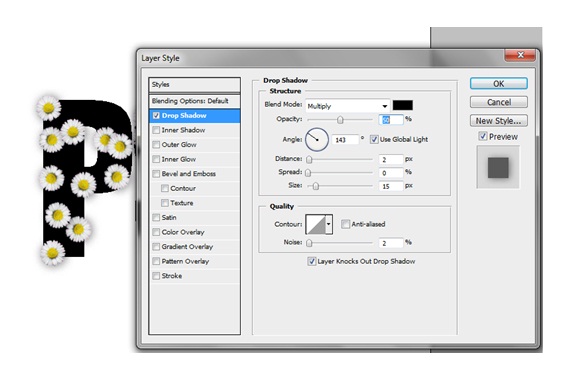
Step 3: Flower Text
Bring the first flower and by using the transform tool reduce the size of the image. Go to the Layer Style of the flower layer and use the details given in the window below. After that, keep on duplicating the layer and cover the text. To add to the depth, rotate the duplicated layer every now and then, so that the text wouldn’t look uniform.
Step 4: Rest of the Flowers
Bring the rest of the flowers in the canvas and using the same layer style, duplicate them and fill the text. Be sure to cover the text accurately, not leaving out any areas. To be sure keep the text layer visible.
Step 5: Soft Light
Duplicate all the layers and merge them into a single layer. Now press CTRL and right click on the text layer to automatically load the selection. After that, press CTRL C and then CTRL V to copy the selection on a new layer. Go to the blending options of that layer and change it from Normal to Soft Light.

Step 6: Grass Background
Now it’s time to add a background. For this tutorial, we have added a grass background.

Step 7: Final Touches
Now as the basic skeleton is completed, keep playing with the filters and blending options to add depth to your image. Add a new layer and cover the entire layer with white. Reduce the opacity of the layer and go to Filter, Blur and choose Motion Blur. Change the blending options of the layer to Soft Light. Pick up the eraser tool to remove the area covered by the text. Similarly, add a new layer and color the borders black. You must keep in mind that the hardness of the brush should be kept at 0%. Change the blending options to Overlay. There are no limits to the number of effects that you can implement on your canvas.


