How to create Amazing wood Text Effect
Now I am going to give you the step-by-step instruction to make a nice wooden text effect in our very famous Photoshop. Simply follow the steps as given below.
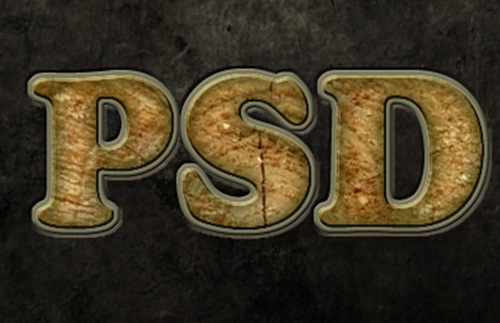
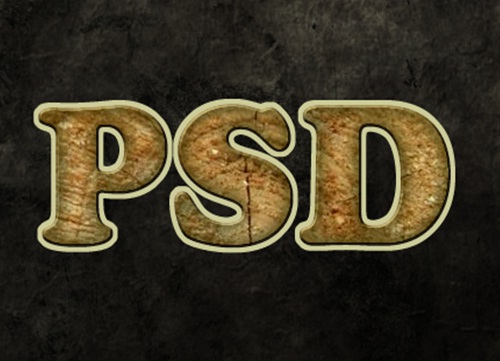
First of all, we are going to use Krakograff texture, also a texture of wood. Below is displayed our final effect.

Step – 1:
Create a new document with 750 width and 550px height.

Step – 2:
Put texture image on the document at center.
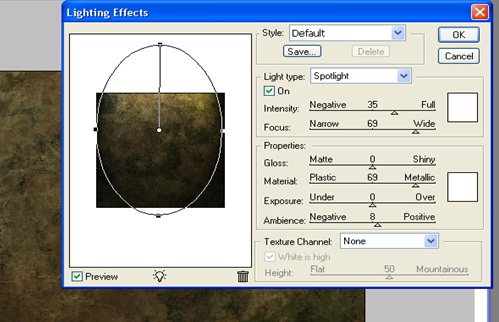
Click on Filter go to Render then go to Lighting Effects.
Now you have to fill the settings exactly as shown in this screenshot.
Step – 3:
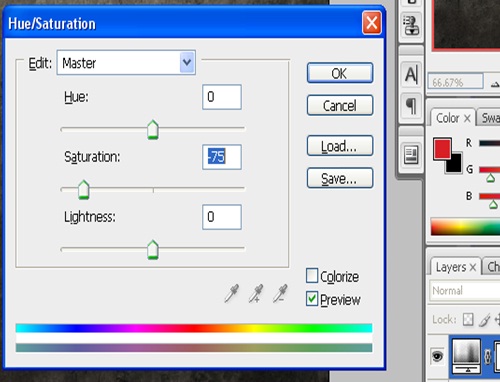
Create Hue – Saturation adjustment Layer.
Now to add a hue/saturation adjustment layer: At the bottom of the layer palette, click on the icon that looks like a half white, half black circle.
Now in the Hue/Saturation Adjustment box, change the setting.
Step – 4:
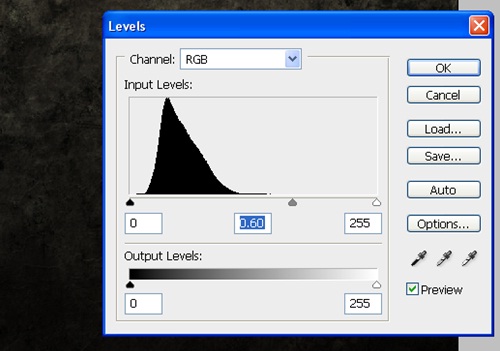
Create Level Adjustment Layer by clicking icon that looks like a half white, half black circle in the layer palette.
Step – 5
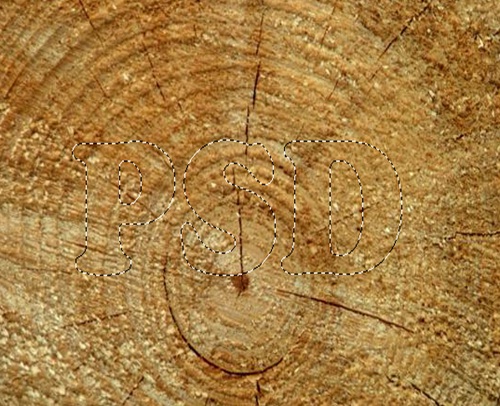
Now type text in center of the document.
Make sure you don’t use smaller font size, as later we shall have embossed effects on the text.
I have used font “Cooper Std”.
Step – 6:
Now place the wooden background on the text you have just typed.
Now, Press ctrl and click left on text layer in your layer palette to load your selection on the text.
Now, apply layer mask over the wooden texture while you have this selection.
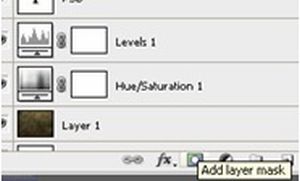
To add layer mask:
click layer mask icon button in layer palette.
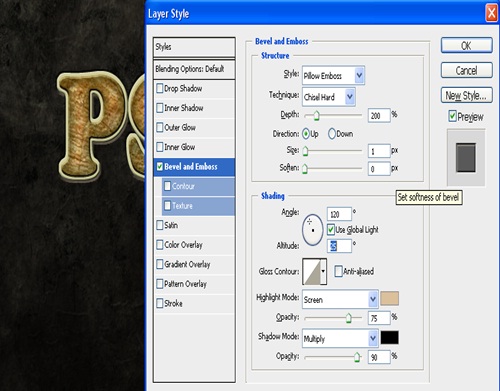
Step – 7:
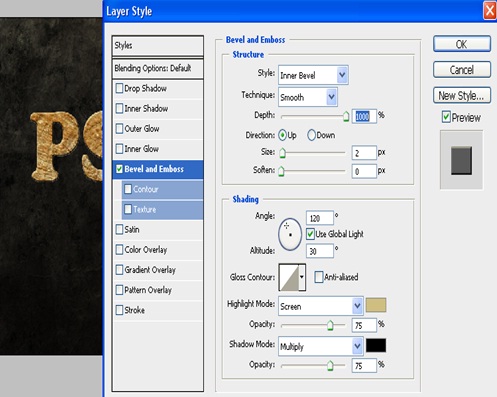
Now apply the Bevel and Emboss effect to the mask layer you have just created.
To apply the Bevel and emboss effect:
Simply Right clicking on text layer in layer palette and select Blending Options.
Fill the settings shown in the screenshot over here.
I have used color as follows:
Highlight Mode: #CEBE80
Shadow color should be #000000.
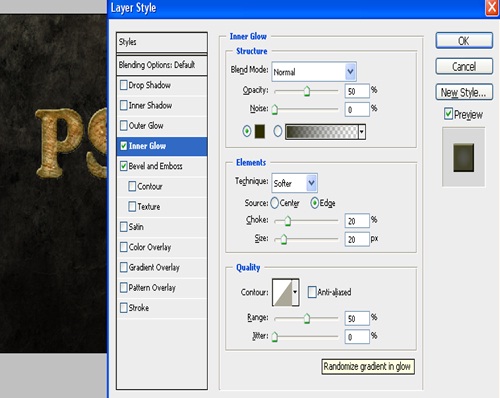
Step – 8:
Now apply the Inner Glow effect to the mask layer you have just created.
To apply the Inner Glow effect:
Right click on text layer in layer palette and select Blending Options.
Fill the settings as shown in the screenshot over here.
I have used color as follows:
Blend Mode: #2E2E00
Step – 9:
Now, Press ctrl and left click on the text layer in your layer palette and create a new layer and place it below the entire text layer in layer palette.
Select the new layer and Load selections by clicking on Modify then Expand by 4 px.
Now, fill selection with color # cccc99 on new layer. You will see a border around text like the screenshot shown here.
Step – 10:
Now apply the Bevel & Emboss effect.
Now, right click border layer in layer palette where you just added border and click Blending Options.
Select bevel and emboss and fill setting as shown on screenshot.
I have used color as follows:
Highlight Mode: #DBC09C
Shadow color is #000000.
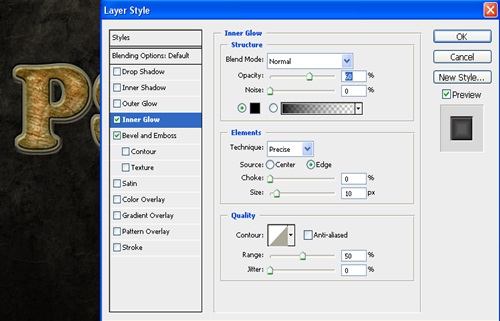
Step – 11:
Now apply some Inner Glow to the same layer.
Select inner glow & fill setting as shown on the screenshot.
I have used color as follows:
Blend Mode: #000000.
Step – 12:
Your final image should look like this!