How to create a Collage in Photoshop
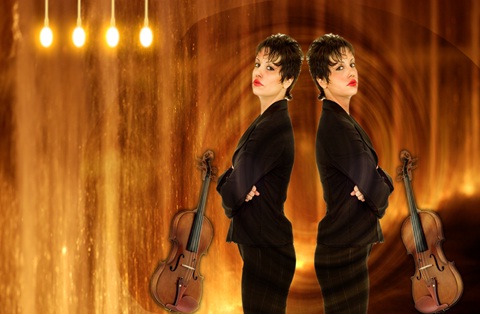
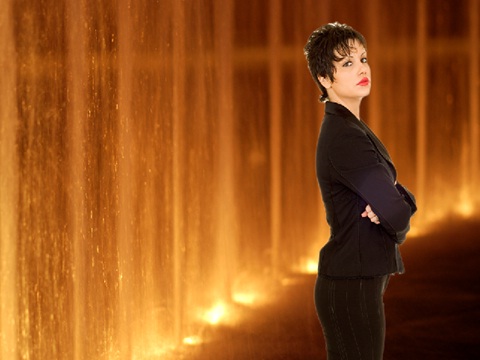
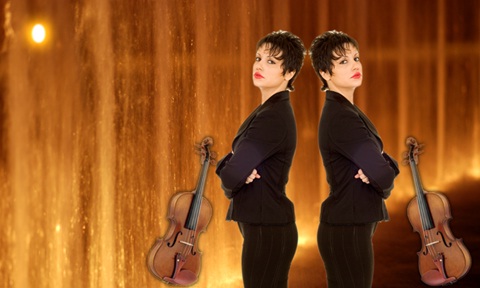
Now let us create a collage in Photoshop. Collage is nothing but an act of combining many images in a better way. To start we require, background, girl photo, and violin image. We are aiming to create the collage displayed below.

Step – 1:
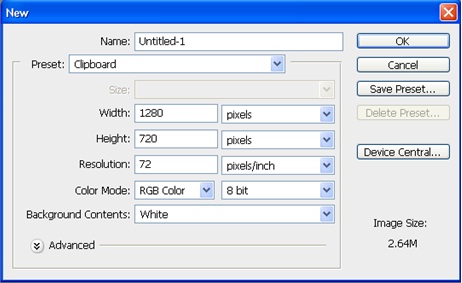
Create a new document of size 1280px by 720px
Step – 2:
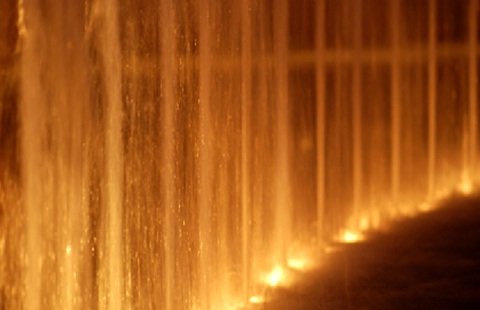
Open background image and paste it in the new document you have just created. To copy background,
Open the background image file and click Select >Select all (ctrl+a) and then Edit>Copy (ctrl+c)
And then open new document and paste it by clicking edit>paste (ctrl+v)
Step – 3:
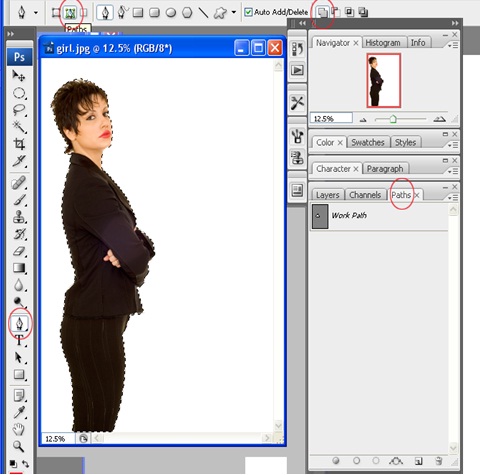
Then open image of woman and select her either by pen tool or magnetic lasso tool or any other selection tool, you are familiar with. Let’s suppose we are using pen tool.
Select pen tool, in pen tool option palette, select path icon and then make selection around woman.
After you finish making selection, in layer palette select path tab and then right click on it and select make selection.
See the round marked in the screenshot if you are confused.
Step – 4:
While the woman is selected click Select> Refine Edge
Put following in the refine edge box:
smooth – 5
Feather – 5px
These will make your selection smoother and the copied section (image) will be blended in the pasted region.
Then paste the selection to the background page we have done in step-2
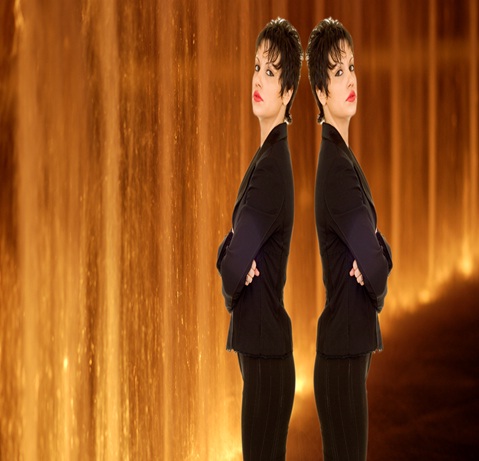
Step – 5:
Let’s duplicate same woman and flip the new duplicated one to make the image look more interesting.
To do so follow as stated below:
1. Right click the woman layer above background layer in your layer palette and select duplicate layer.
2. Now when you move the women you will notice two women.
3. Select / Click second woman layer above background layer and below duplicated women layer in layer palette and then click Edit>Transform>Flip Horizontal from menu bar
4. Put a little gap between these two women.
Step – 6:
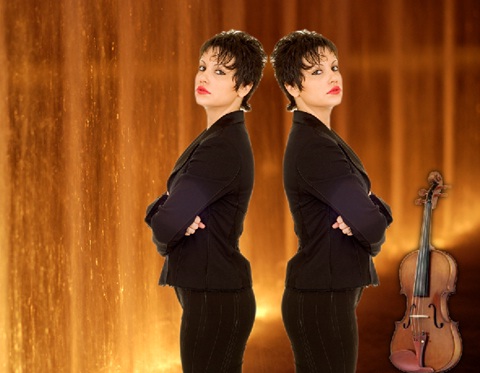
Then, open violin image, use pen tool, like we did in woman image, use feather too and paste it in our main image.
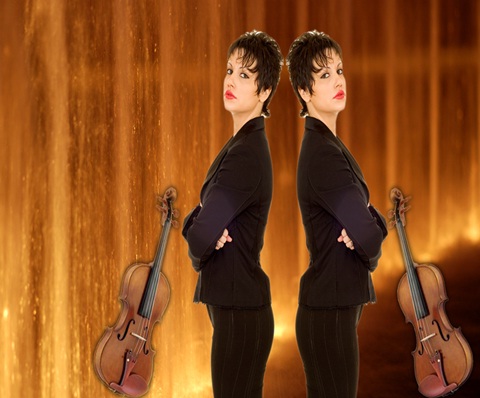
Step – 7:
Then first we shall rotate the violin little bit. Select violin layer in your layer palette and click Edit>Transform (ctrl+t)>Rotate. Then rotate bit to left.
Now, like the way we duplicated woman, we shall duplicate violin. Right click the violin layer in your layer palette and select duplicate layer.
Then move duplicated violin layer to the left and click Edit>Transform>Flip horizontal
Step – 8:
In this step, we shall create bulbs.
To do this:
1. Create new layer
2. Click “Ellipse Tool”,
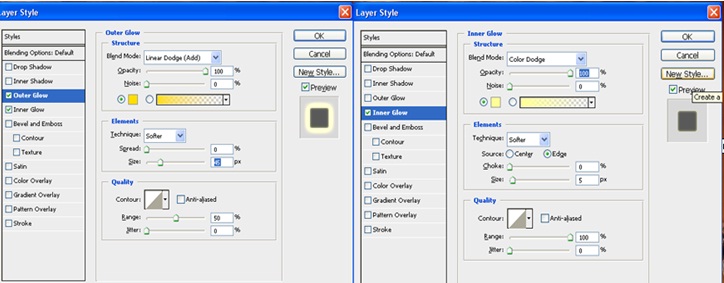
3. Create small circle then fill with color #ffffff. Then right click on this circle layer and select blending options
4. Select Inner Glow (color: #ffff99); fill as shown in the screenshot
5. Again add another outer glow (color: #ffffbe); fill as shown in the screenshot
Step – 9:
To make blub look like its glowing, we shall add a Gaussian blur on it. Select the bulb layer and then from menu click filter>Blur>Gaussian blur. Add 2 in radius.
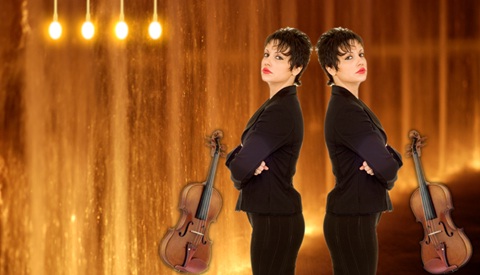
Your output should look like as shown in the screenshot.
Step – 10:
Now create bulb holder and string with pen tool and then duplicate bulbs the same way we duplicated woman and violin. Then place it in a little distance apart.
Your output should look like as shown in the screenshot.
Step – 11:
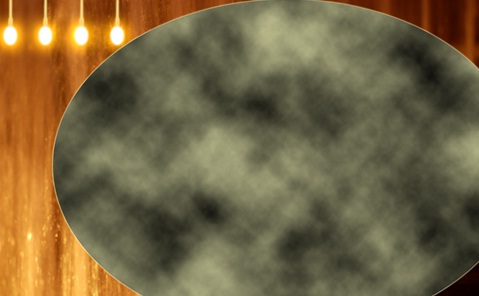
In this step, create new layer and create circle with “Elliptical Marquee Tool”.
Change foreground color: #cccc99. After that select Filter>> Render>> Clouds from menu bar.
Step – 12:
Then Select Filter> Liquify. Select “Twirl Clockwise Tool”, then use on the clouds. Just make a random twirling. Make sure you don’t tear cloud.
See screenshot
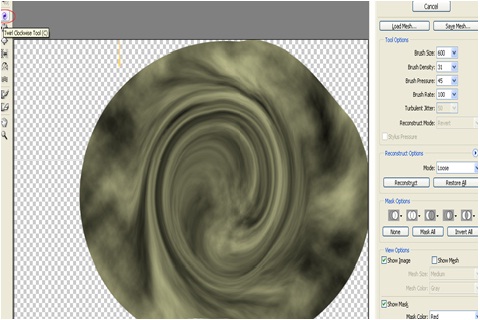
Step – 13:
Now select cloud layer in layer palette and change its blending mode by selecting “Soft Light”.
Step – 14:
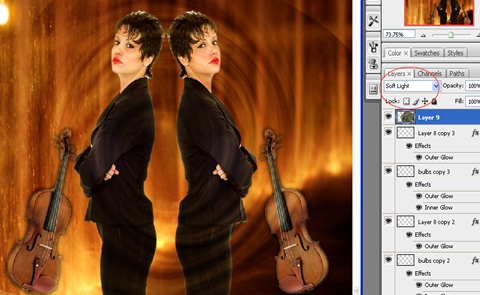
Voila! We are done! Your final output should look like this!
This is what we call collage – mixing of different image in interesting way.