How to add some amazing effects in an image in Photoshop
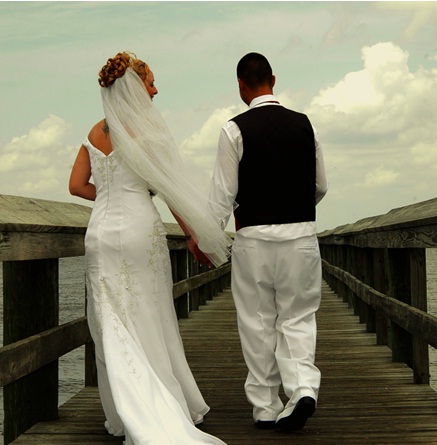
In this tutorial, we are going to add some basic effects in an image in Photoshop. For this, we will need an image to work on. Here we are taking the picture of a couple. Follow me step by step to give the following effect to the image.

Step – 1:
Let’s open the file first. Click File >> Open, then locate your file and select and click open.
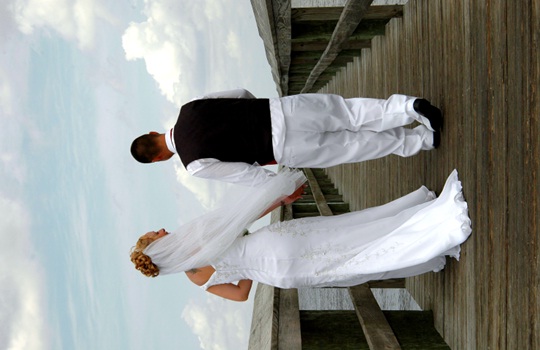
Let’s rotate the picture first. You can rotate it by clicking image>rotate canvas>90oCW.
Step – 2:
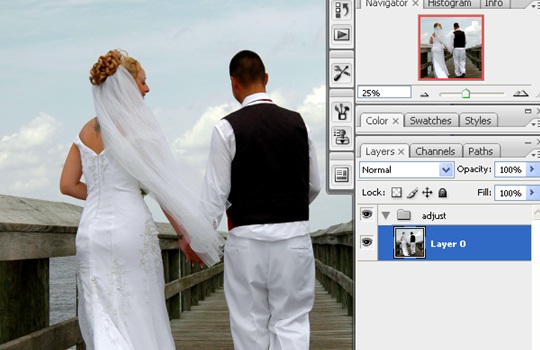
In this effect, we shall use 3 adjustment layers. We shall organize all adjustment layers in a group for our ease. Click in the layer palette to create a fresh group. Then click, drag and leave the main layer in your layer palette to the group you have just created.
Step – 3:
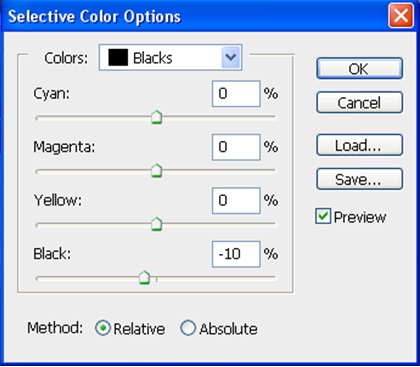
Now let’s use the adjustment layer. Add adjustment layer (selective color).
To add adjustment layer (selective color):
1. Click on the half black n half white circle icon located at your layer palette bottom,
2. Choose Selective color.
In colors, select black and fill the values, as displayed in the screenshot.
Step – 4:
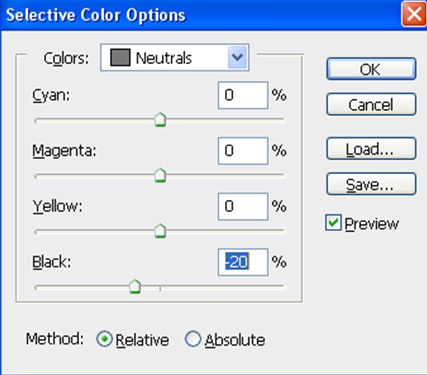
In Next step, again add another adjustment layer (selective color) and select neutrals from the color dropdown. Fill settings as displayed below.
Step – 5:
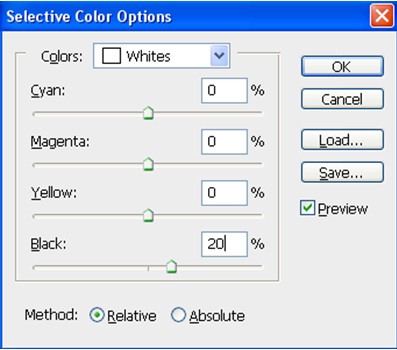
Finally, add another adjustment layer (selective color) and select whites from the color dropdown. Fill settings as displayed in the window below.
Step – 6:
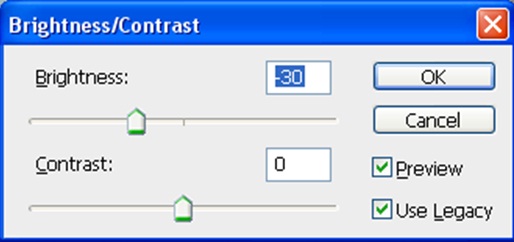
Now we shall add another adjustment layer (Brightness/Contrast) and fill values as shown below.
Step – 7:
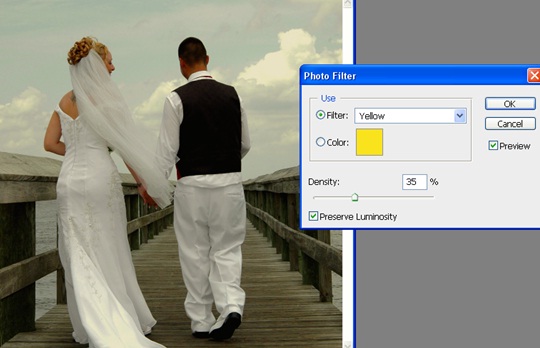
To give tint effect, let’s add another adjustment layer (photo filter) and fill values as displayed in the screenshot.
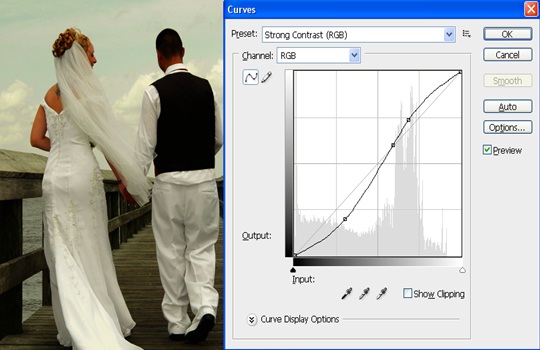
Step – 8:
Let’s increase contrast by adding another adjustment layer (curves). Fill curves setting as displayed in below.
Step – 9:
You are all done, simple, isn’t it! Try this out on different images to have a grip on this technique.