Creating Elegant Typography
In this tutorial, we would be learning how to make this elegant typography wallpaper using Photoshop. With the help of brushes, blending options and various images, you would be able to make something along these lines.

Step 1: Basics
Set a gradient on the background from black to green. Select the type tool. For this tutorial, you would be needing the font “Illusion”. Apply the font and type 0 in the middle of the canvas like shown below.

Step 2: Bevel and Emboss
Go to the Layer Style of the text layer and apply Bevel and Emboss.

Step 3: Stroke Path
Select the pen tool and make a line tilting at a ninety degree angle. Select the brush tool and keep the radius at 10 px. Select the pen tool again, right click on the selection and choose stroke path. Once the new window opens, choose the brush tool and click ok. Duplicate the line several times throughout the canvas. Merge all the lines into a single layer and go to Filter, Blur and apply the Gaussian blur effect. Reduce the opacity of the layer to 40%

Step 4: Brushes
Now you would need to download a set of brushes according to your choice and idea in mind. You can download the brushes used in this tutorial.
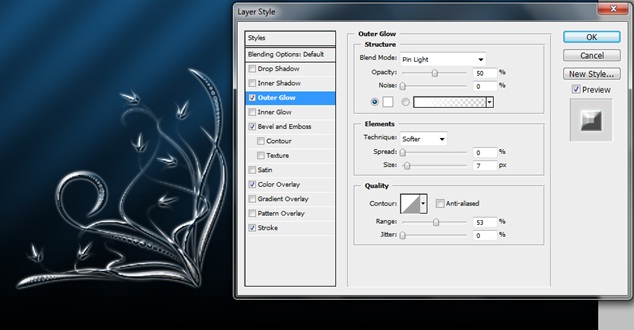
Once downloaded, apply anyone on the canvas. Choose gray color or something that matches with the background. Go to the Layer Style and choose Outer Glow. Apply the details given below.
Step 5: Bevel and Emboss
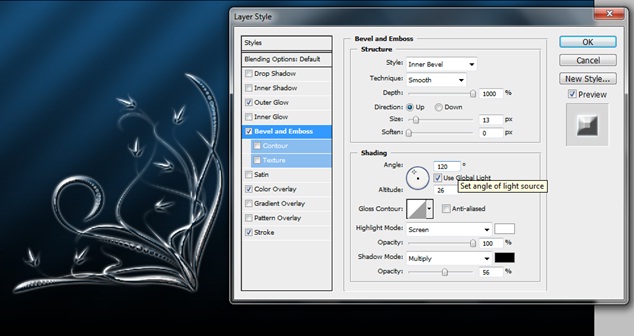
Choose the Bevel and Emboss option and use the following details.
Step 6: Stroke
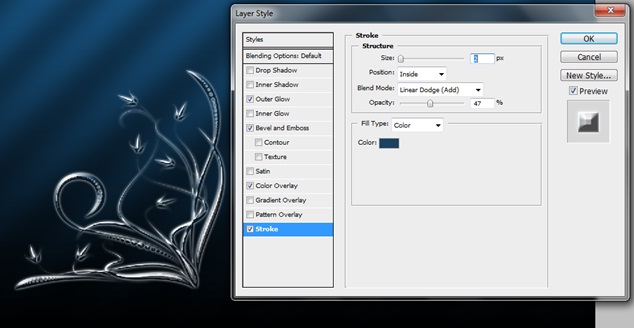
Tick the stoke check box and apply the following details.
Step 7: Pattern
Apply the same brush with the same layer styling and pattern your design accordingly.

Step 8: Clouds
Create a new layer and move it behind the text and brush layer. Choose the foreground black and keep the background white. Go to Filter, Render and choose clouds. Go to the blending options of that layer and choose Overlay.

Step 9: Grass
Find an image of a scenery and crop out the grass using the lasso tool.

Step 10: Scenery
Include the cropped out grass layer in the canvas and position it just below the text shown in the image below.

Step 11: Patterned Background
Use various brushes from the batch downloaded previously. Make various patterns on a new layer like shown below. Once done, change the blending options of the layer from Normal to Overlay.

Step 12: Basic Layout
Unhide all the layers and you would have a basic layout.

Step 13: Finishing Touches
Duplicate all the layers and merge them into a single layer. Apply the Gaussian blur effect. Choose the eraser tool and remove the area where your text is present. Go to the blending options of the layer and change it from Normal to Overlay. Similarly make a new layer and color the borders black using the brush tool. Reduce the opacity of the brush tool to 40% and brush around the canvas except for the area where your text is present. Go to the blending options of the layer and choose Overlay. That’s it!