
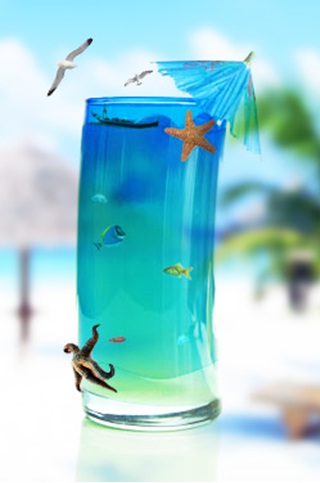
The Creation of Aquatic life
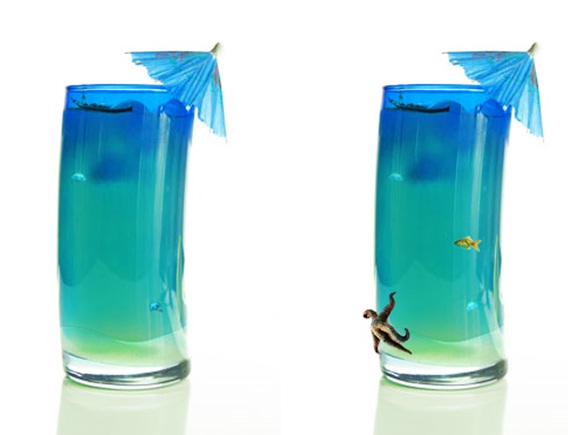
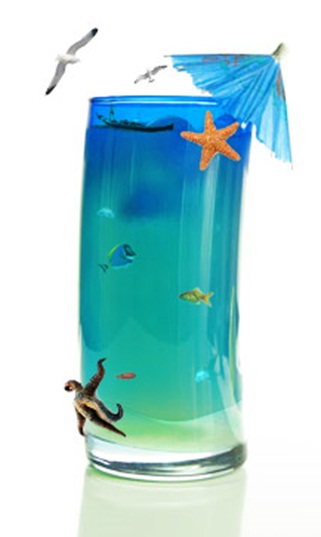
In this tutorial, we will learn how to create “Aquatic Life” in Photoshop. We need to follow few simple steps and at the end, we will be left with a beautiful creation as displayed below.
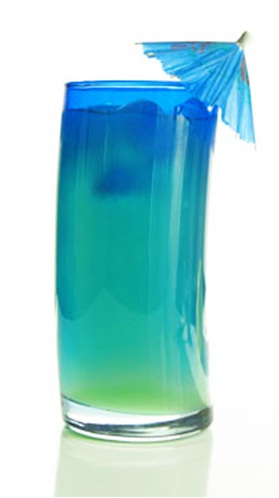
Step 1
We will start the process of manipulation by creating a simple document and add our base stock image here.
1. Create a new document of 250×376 px (or according to the size of your image). Once document is created, we have to grab the cocktail glass image.
Step 2
Now it is the time to do the actual photo manipulation.
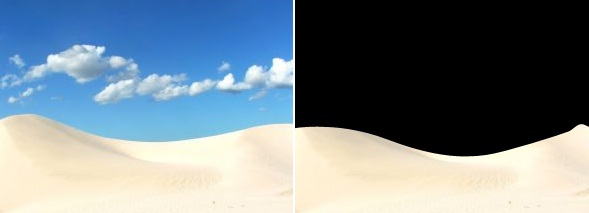
Take away the background once you have pasted the sand, using the ‘pen tool’, or selection tool.
Step 3
1. Scale it downward now so it sets in the bottle well.
2. This layer will be over the bottle.
3. Now select the ‘smudge tool’ in order to adjust the sand dimensions in such a way to match with that of the bottle perfectly.
4. Lastly, duplicate this layer and then apply overlay to it.
Step 4
1. Select sand now (click ctrl + press on the thumbnail of layer).
2. While still keeping the selection, return to the bottle in order to copy the bottle selection.
3. After that, paste the bottle selection into a new empty layer. Drag it over the ‘sand layer’ and then apply overlay to it.
Step 5
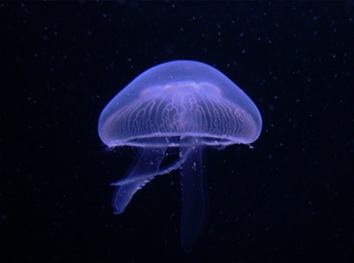
Continue adding other images into this composition. We need the image of a jellyfish to start this step.
1. Paste this image into the canvas after isolating it from its background.
2. Re-use the usual method to place the jellyfish in the bottle.
Step 6
Now we have to modify the image:
1. Press CTRL+SHIFT+U to desaturate the image of jelly fish.
2. Then by pressing CTRL+L, you can adjust your input level editor up like mine:
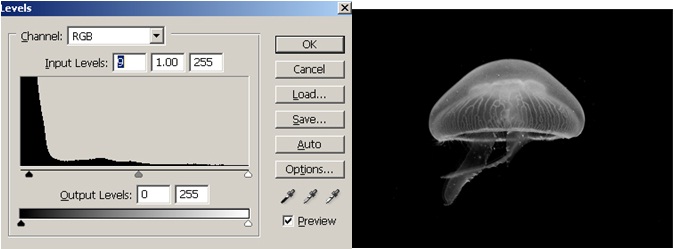
3. Now increase values of levels or either erase out these using Eraser Tool.
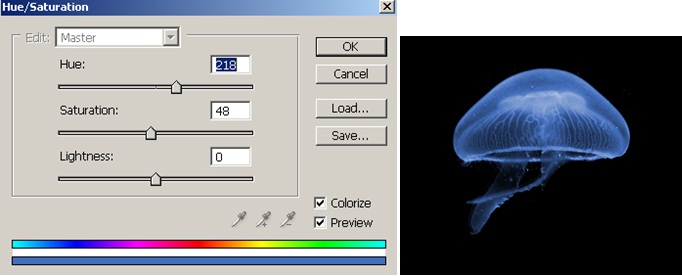
4. After that, click CTRL+U to open the window of ‘hue/saturation’. Then use the settings displayed below:
Step 7
Now set the layer on the screen. You can place it anywhere you want.
Keep on adding further details into it. Just paste in all of the jellyfishes and fishes you like!
Step 8
Make sure that every part of this composition needs to be adjusted according to its dimensions and colors. If duplicated layers are being used then to enhance the contrast of all the details, set on overlay.
Step 9
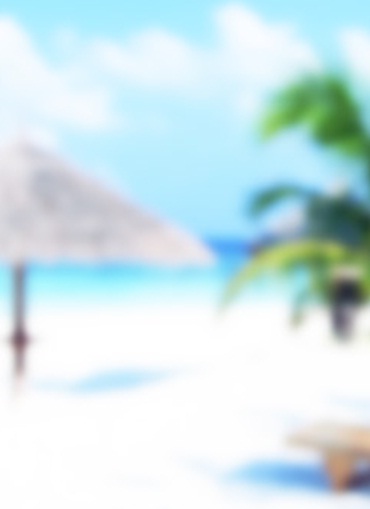
1. Put the background images below the last layer.
2. Set the Gaussian blur filter (Filter >Blur >Gaussian blur).
3. Adjust the radius to near 10pixels.
Step 10
Set the image in front of your background and you are done!


