
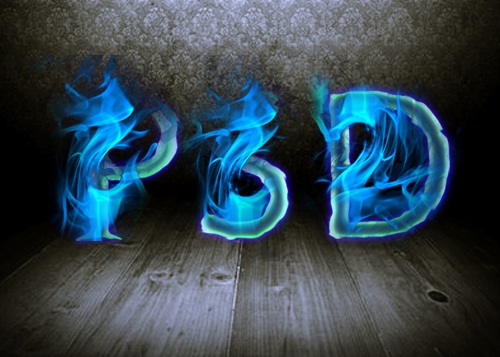
How to give your text wild fire effect
Text engulfed in flames has an appeal of its own. For this particular tutorial, we would be using various filters in Photoshop along with some imagery, which would help you to make exactly what is displayed below.

Step 1: Let’s Start With the Basics
After creating a new document, the first thing you need to do is to keep your background black. After that pick up the type tool and start typing whatever you want to write. For this tutorial we would be using the font “Trajan Pro” but you can use any other font if this one is not available.

Step 2: Outer Glow
Once you have typed in the letters, go to the blending options. To open the blending options box you have to right click on the layer and select on the “Blending Options” tab. Click on the “Outer Glow” check-box and keep the settings according to the image below.

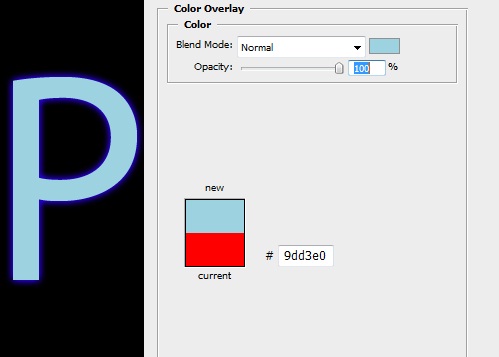
Step 3: Color Overlay
In the blending options, there is another feature known as the color overlay. Select the color overlay option and input the details according to the screen-shot below.
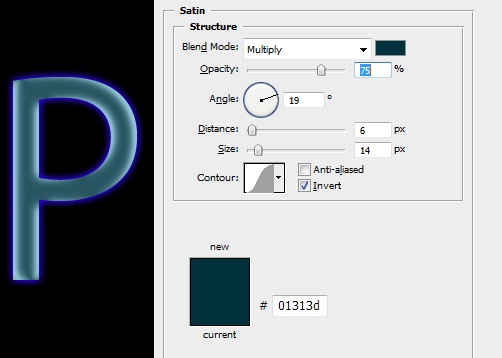
Step 4: Satin
Another option that needs to be addressed to is Satin. Use the following settings in the Satin option for this particular step.
Step 5: Inner Glow
With this particular feature, your image would give a more fiery look. Check the Inner Glow option in Blending options and use the following details for this particular look.

Step 6: Eraser Tool
Once you are done with the basic features, you need to rasterize the whole text into an image. After the text has been converted into an image select the eraser tool and use it to slightly fade the top portion of the image.

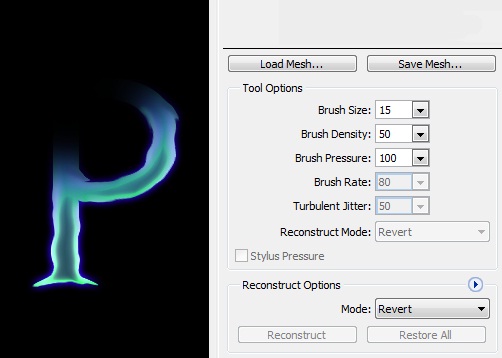
Step 7: Liquify
It is time to give your text a melting look. For this, you have to go into the filters option and select Liquify. After the new window has been opened, select the “Forward Warp” tool. Use the settings displayed in the screen-shot below and apply the tool around the edges of the text. This would allow you to create waves around the edges, giving it a melting look.
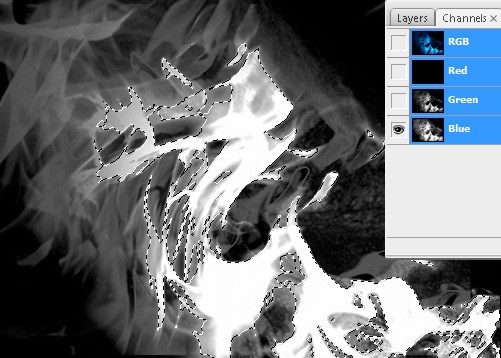
Step 8: Fire Images
Now you would be needing some imagery. Download images of fire from the web, since we would be merging them with the text. After inserting the image, you can make the selection in any way you want.
Step 9: Merging The Image
Once the selection has been made, use the Move tool to place the selected area on the text. By dragging the selection on the image, your text would look like it’s on fire.
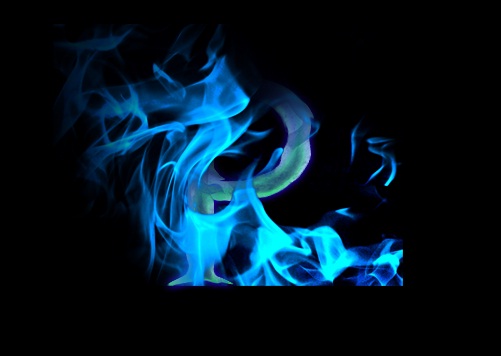
Step 10: Erasing the Unnecessary Selection And Duplicating Layers
With the image used for this particular tutorial, there is a lot of excessive fire surrounding the text. You can use the eraser tool to fade away all the unnecessary selection from the canvas. You can duplicate the layers once all the above steps have been completed. For all the duplicated layers set the opacity to 30%. Make sure that the Blend Mode for all the duplicate layers has been set to Overlay. You can repeat this process multiple times to add detail to the fire.

Step 11: Complete The Text
Once you have completed the first letter continue with the whole text and follow the exact same steps you have followed for the first letter. Be creative and play around with the features to see what possibilities you can achieve.

Step 12: Background Image
Now it is the time to add a background image. There are a number of online directories, which provide free background textures. You can download such images and include them in your working photoshop file.
Step 13: New Layer
Create a new layer above the background image you have selected and fill the color for the whole layer with black. Make sure the color frequency is set to #000000. Once that is done, you can decrease the opacity of the layer. Lower the opacity to 50% or even lower if desired. Select the eraser tool again and erase the layer from the area where the wooden floor is displayed. This is what the final image would look like.


