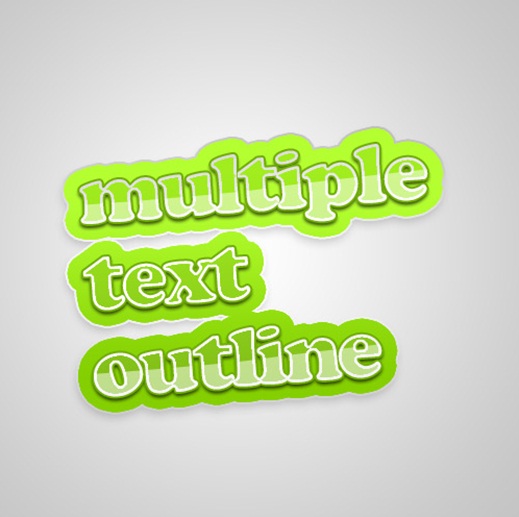
Use of Multiple text outline Technique in Photoshop
This is a technique to make multiple borders of any object in Photoshop. This method can be used on text, shapes and layers. So, let’s get started.
Step 1
Open a new document with dimensions 500×500 px, white background in Photoshop.
Step 2
Select type tool, and write text using a clear bold readable font, so it can have multiple borders and also is easy to read.

Step 3
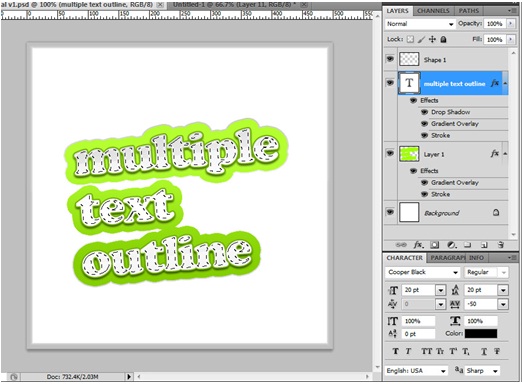
Now, we need to create the backdrop for the text. This will give us a stroke on its own layer on which we can make independent effects.
1. First duplicate the text layer. (Ctrl + J)
2. While you are working with the bottom layer, turn off the visibility of the top text layer.
3. Apply green color large enough stroke in order to fill the area between the words while still keeping it readable.
4. Apply a green color overlay effect matching your stroke color.
5. Above or below your background text layer, create a new layer.
6. Highlight both the newly created layer and the text layer. Now merge both of these layers.

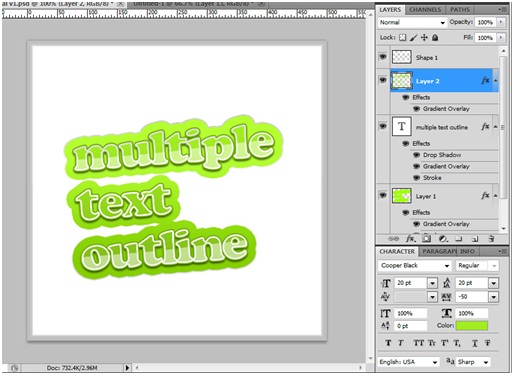
Step 4
1. Give your text a gradient overlay effect.

2. After adding gradient, add a stroke to your text. Use a darker version of green to make the text standout.
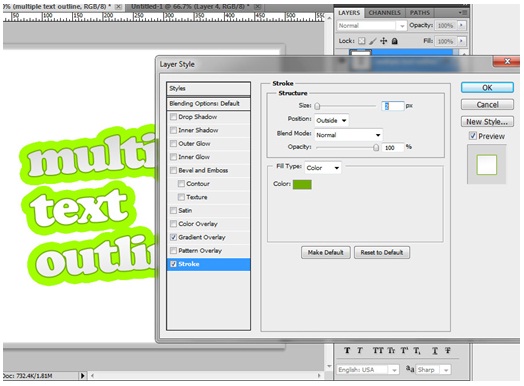
3. Add drop shadow to the text. (Dark multiply)
Step 5
Now we will be adding a soft white reflection over the text.
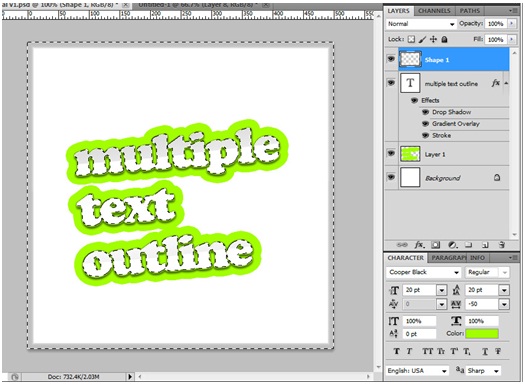
1. Make a new empty layer above your text layer.
2. Select the pen tool to create a shape over the text.

3. ‘Right click’ the shape and then from the menu select “fill Path”.
4. Keep the pen tool selected, Right click again within the shape and then select “delete path”.
5. Select the new layer shape by ctrl + clicking on the layer object, you should have something like this.
Step 6
1. Inverse current selection, top menu > Select > inverse. (Ctrl + shift + i)
2. Now ‘delete’ the new selection.
3. Set the layer blend mode to screen. (Shift ++)
4. Decrease the transparency of the layer to 30%. (num pad 30)
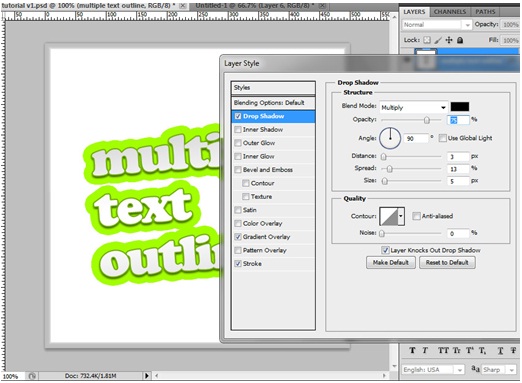
Step 7
Now you have to give some depth to the backdrop.
1. Give a gradient darker overlay effect from original color.
2. Give a stroke effect to the backdrop. (Medium dark)

Step 8
Now add inside the text an additional color fill three px.
1. Do a selection of the text layer.
2. Top menu; Select > Modify > Contract
select a contract value of 3 pixels.
3. Make a new layer over your text layer.
4. Now use the paint bucket tool and the color same as your backdrop of your fill. Fill your new layer selection.

Step 9
Let’s add a light gradient effect on the text.
1. Select the new fill layer that we just made and then add a layer mask.
2. keeping the layer mask selected, choose the gradient tool.
3. Set your background color to white and foreground color to black.
 4. Using the gradient tool, apply a small gradient from top to the bottom. The result would look somewhat like this.