
Making a scene of breaking stone statue in Photoshop
Hi guys! Today we are first going to create a stone statue effect then we will create a breaking effect with the real skin visible underneath the stone. I know it’s a bit of a mouthful but believe me it’s really fun to create this effect and making an amazing out of it. So let’s just roll up your sleeves and note down the ingredients for this image. We’ll need a naked lady, an image of dry earth and an image of clouded sky with these all we need is Photoshop.
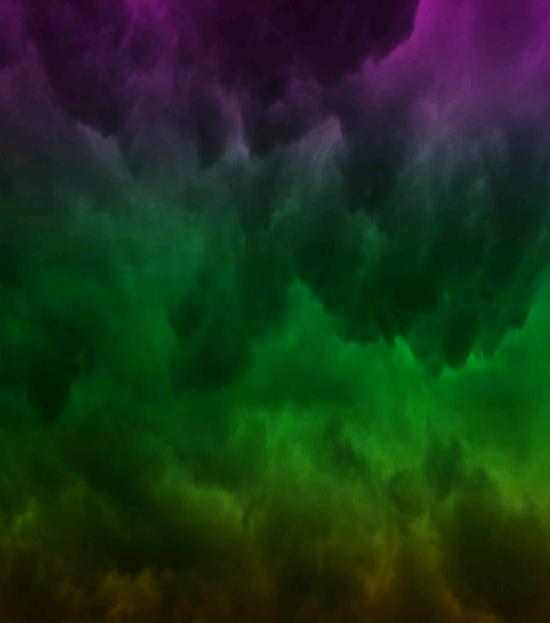
Take a look at the final Image before starting with tutorial.

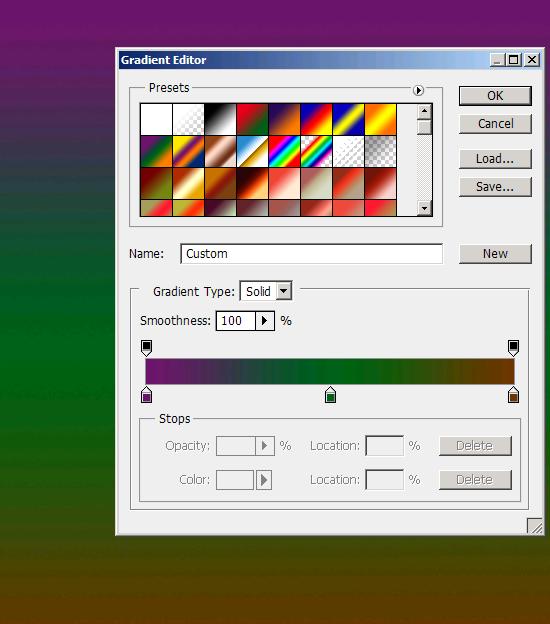
Step1:-
Create a new document in Photoshop of size 550×626 pixels. Fill it with a gradient shown below in the picture. Colors used are #6f156c, #00601b, #6c3603 (left to right).
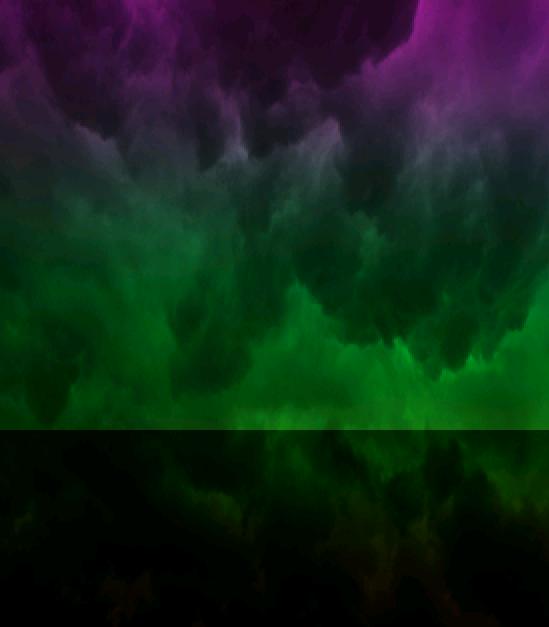
Step2:-
Open the clouded sky image, copy the whole picture and paste it on our background. Set the Blend Mode of the sky layer to Overlay.
Step3:-
Create another layer and make a rectangle as shown below using Rectangle Marquee Tool. Fill the shape with black color #000000.

Step4:-
Set the Blend Mode of this layer to Soft Light and leave the Opacity 100% to give the effect of a mirrored floor.
Step5:-
Now open up the naked lady’s image and cut the lady out of it background and paste it on our background. Re-size it according to our canvas by press Ctrl+t.

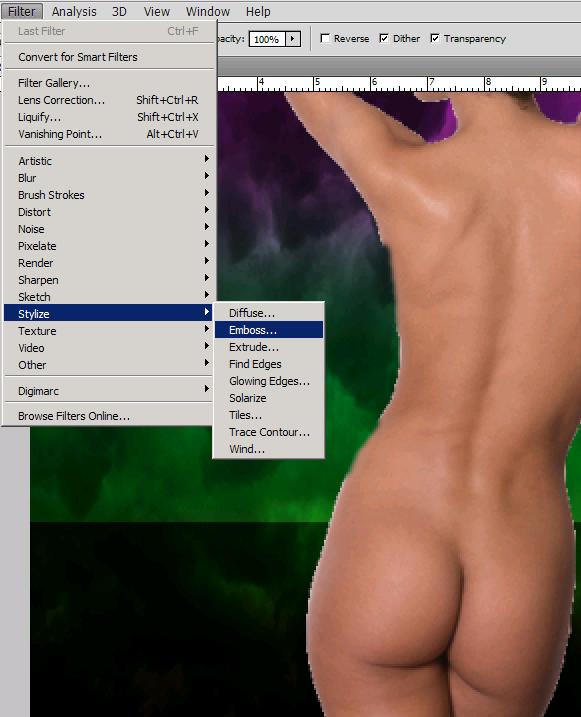
Step6:-
Now we’re going to turn this lady into a statue. To do that go Filter>Stylize>Emboss (as shown in the picture below).
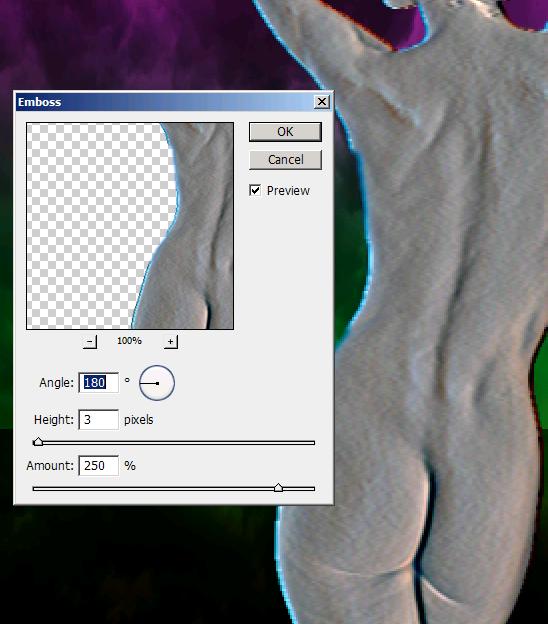
Step7:-
Make the settings of Emboss according to the picture shown below.
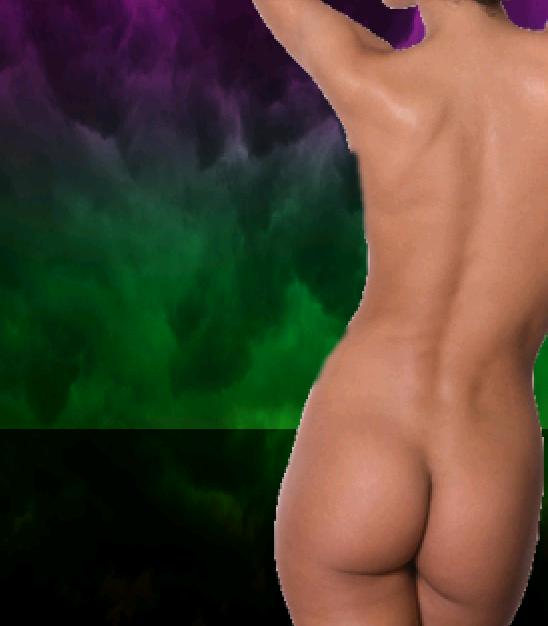
Step8:-
Once again open up the naked lady’s picture and cut her out and paste it on our stone statue.
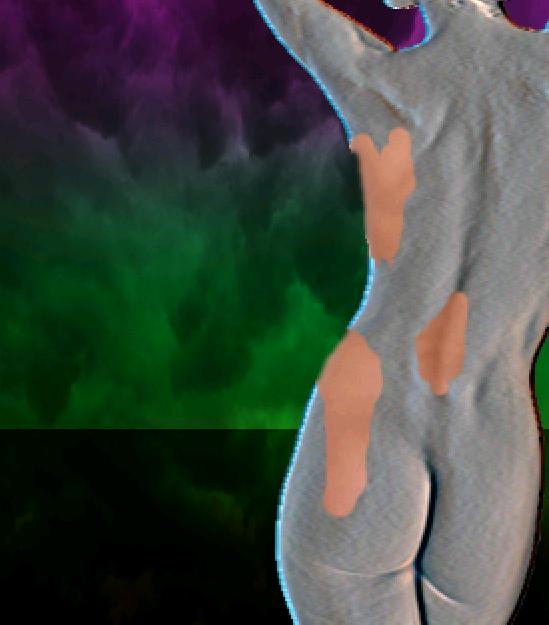
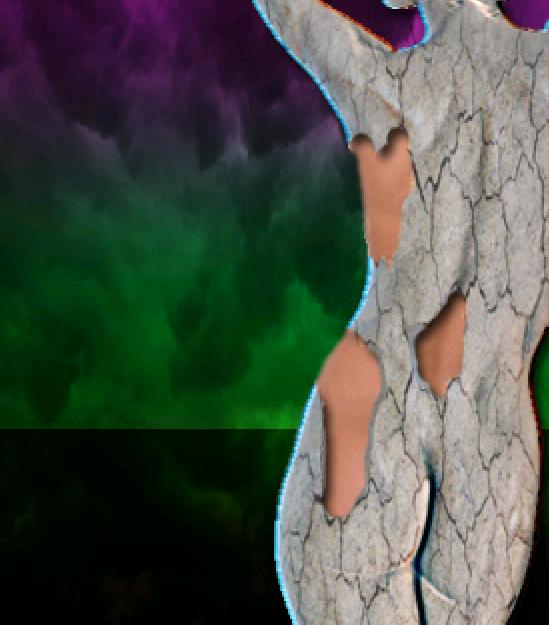
Step9:-
Place this layer behind the stone statue layer. Erase some pieces from stone revealing the natural skin underneath.
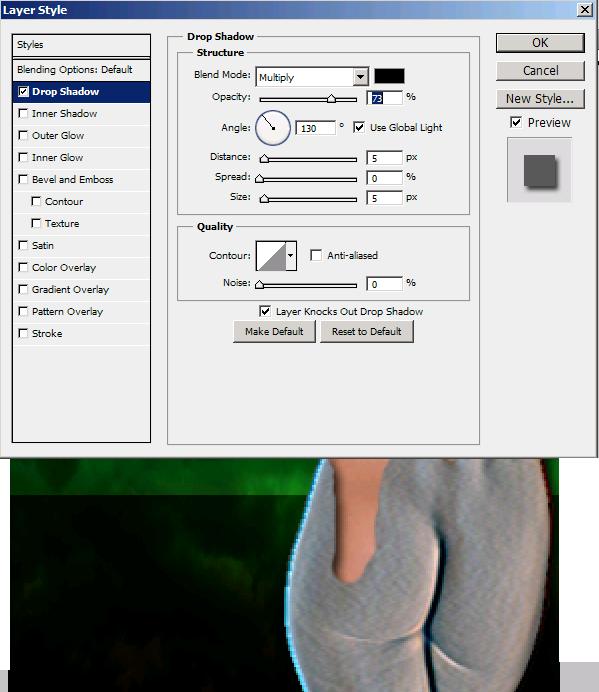
Step10:-
Now add drop shadow to the stone layer. Right click on the stone layer>Blending options and check Drop shadow. Make the settings according to the picture shown below.
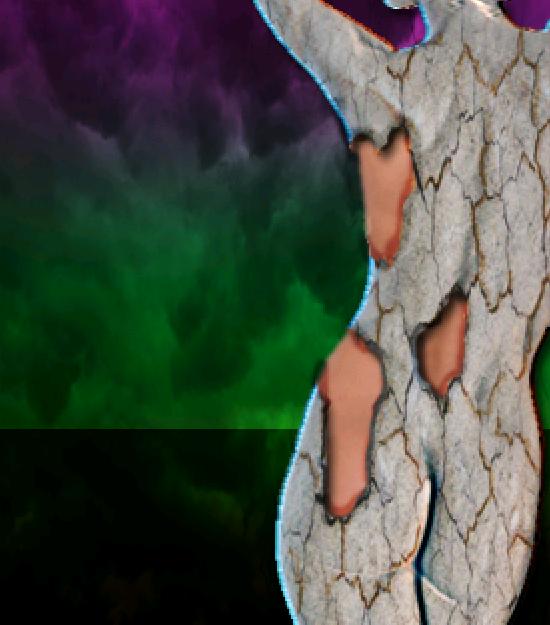
Step11:-
Now open the dry earth image copy it and paste on our stature to add cracks on our stone statue. Set the Blend Mode to Overlay. Remove extra area out of the statue figure using Eraser tool.
Step12:-
Make a new layer. Select a soft round brush of size 3px with color # 603913 and draw on the cracks to add depth. Set the Blend Mode to Overlay and reduce the Opacity to 63%.
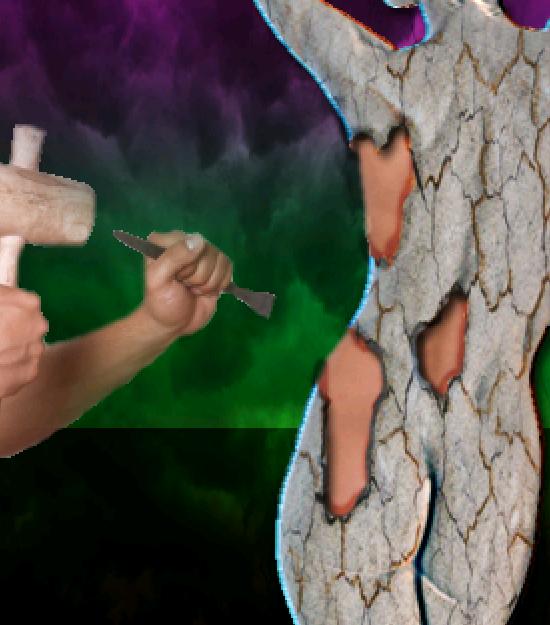
Step13:-
Now we’ll cut the hands with a hammer and a nail out of the naked lady’s picture and paste the cut out on our image.
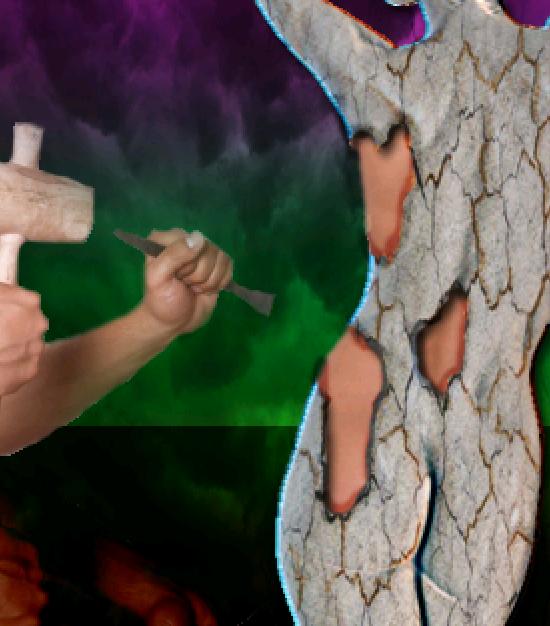
Step14:-
Now we’ll create a reflection of the hands. To do the duplicate the layer, press Ctrl+t and select Flip vertical. Place the copied vertical image according to the picture shown below. Set the Blend Mode to Hard light and reduce the Opacity to 61%.
There you have it. Our stature image is complete. Hope you had fun and learned something new. Share your comments. I’ll be back soon. Take care.


