
Making a colorful cosmic poster in Photoshop
Hey guys! Today I’ve brought a very attractive colorful cosmic poster for you. To create this poster we’re going to play with various colors in, we’ll throw some planetary shapes with a sprinkle of stars to give the poster a cosmic look and at the end we’ll add some magical butterflies to give the girl a magical attraction (how’s that sound? Fun huh). So roll up your sleeves and note down the main ingredients, first of all we’ll need a portrait of an attractive girl, which I’ve taken from bigstock (butterflies included) with our magical Photoshop.
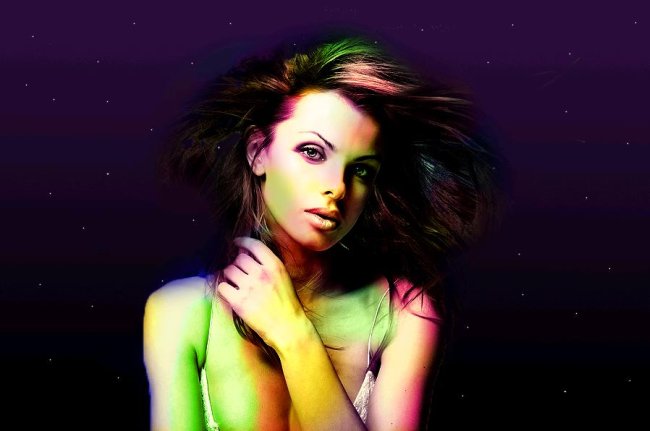
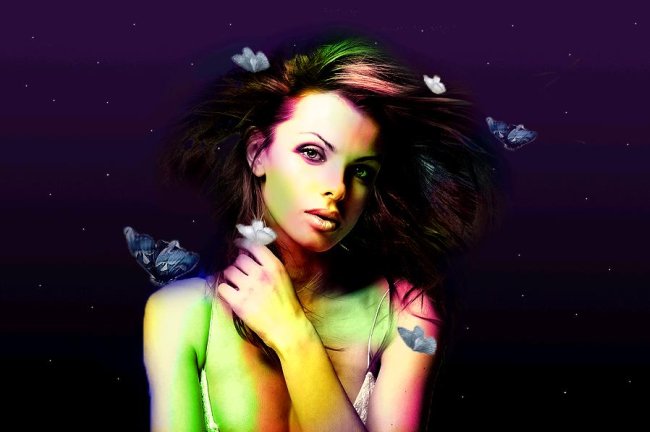
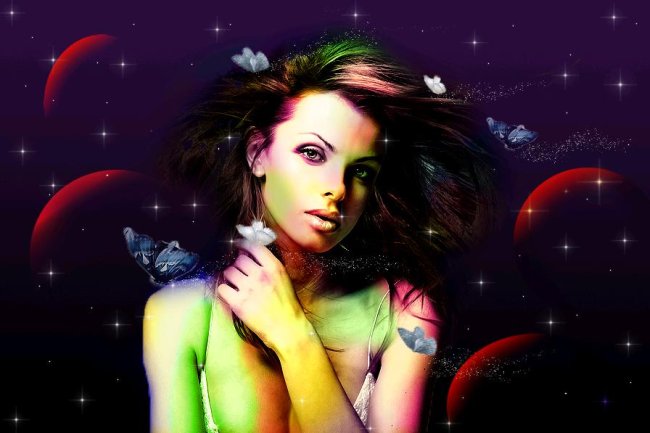
Before going ahead with the poster, do take a look at the final image.

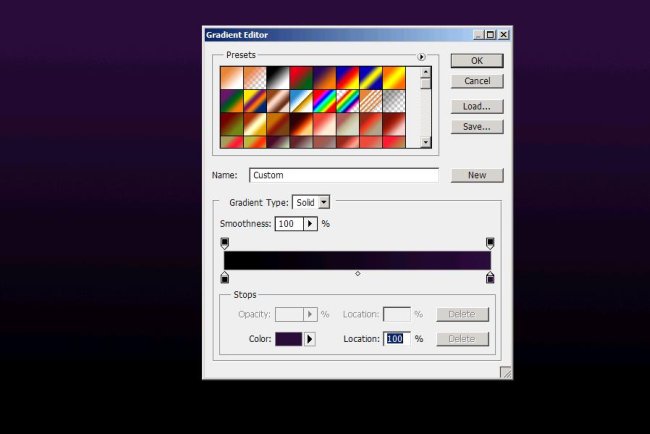
Step1:-
First thing first, create a new document in Photoshop of size 900×600 pixels and fill it with a linear gradient (from left color #000000 to color# 2a0c3b on the right).
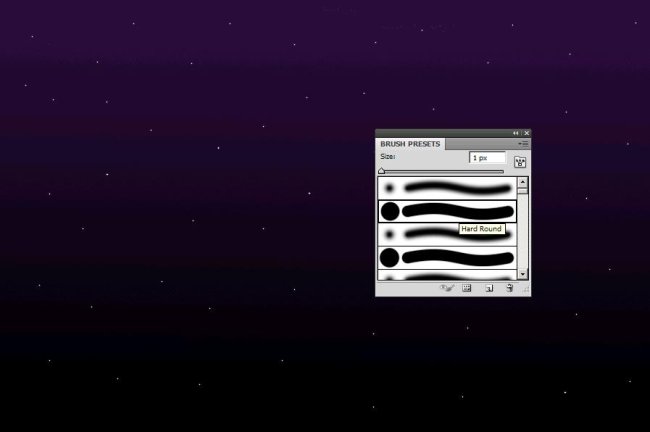
Step2:-
Make a new layer and name it smaller stars. Select a hard round brush from brush set of size 1 px and choose white color #ffffff. Now draw the stars by clicking on our background.
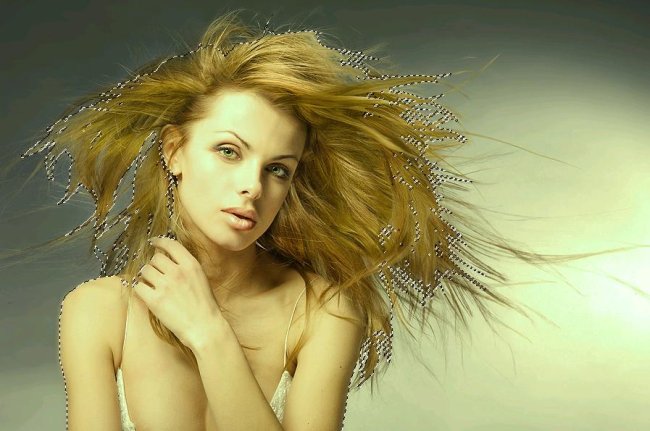
Step3:-
Open up the girl’s portrait and cut the girl out of it background using Quick Selection Tool.
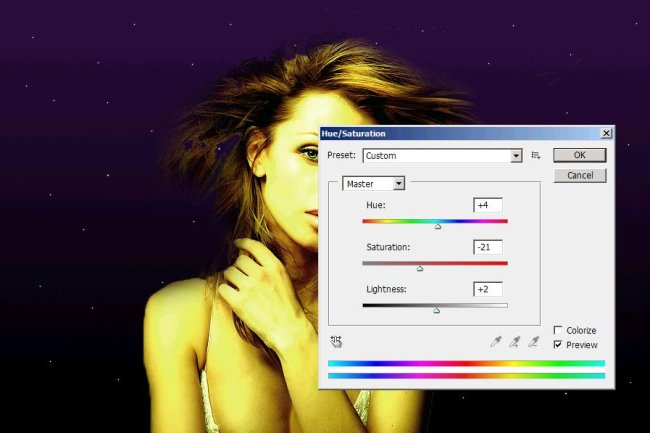
Step4:-
Paste the girl’s cutout on our background. Now go to Image>adjustments>Hue/saturation (set the Hue to: +4, Saturation: -21, Lightness: +2) and change the color according to the picture shown below.
Step5:-
Create another layer and name it light-colors. Select a soft round brush of size 32px and choose the color # 0dc4fe, color #ff00ff and color #0000ff. and paint the girls head and a bit of face as shown in the picture below.
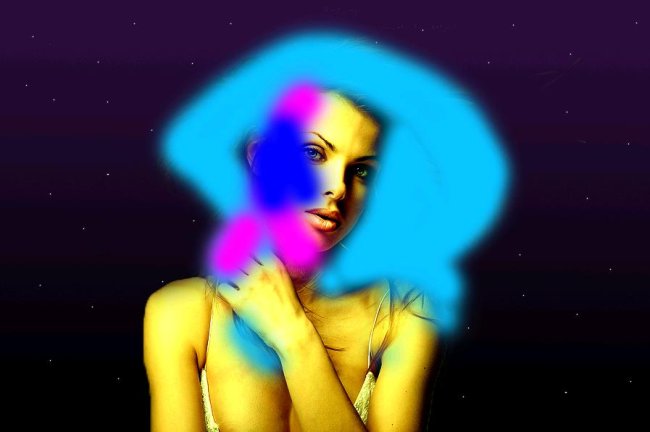
Step6:-
Set the Blend Mode to Color Burn, reduce the Fill 47% and reduce the Opacity to 56%.

Step7:-
Okay now we are going to add more colors to the girls face and body.
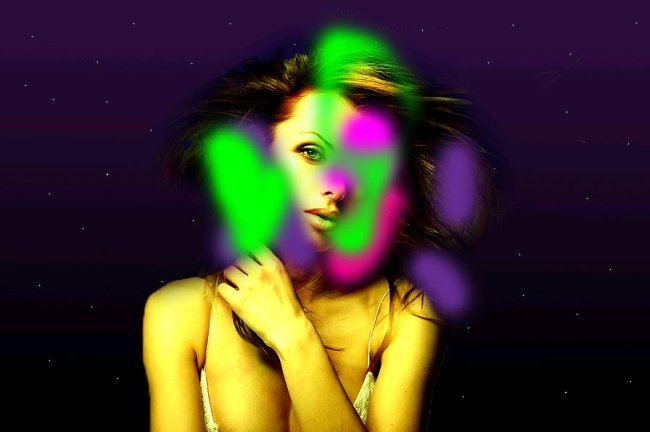
Step8:-
I’m going to use different colors (for every color I’ll make a new layer and will give each color layer a number for you to easily understand).
1- Select same soft round brush with color #ec008c and set the Blend mode to Color with Fill 78% and reduce the Opacity to 70%.
2- Color #662d91; Fill 71% and Opacity 40%. Set the Blend Mode of this layer to “Darker color”.
3- Color #ff01fe, Fill 81%, Opacity 30% and Blend mode is Darker Color.
4- Color #00ff00, Fill 64%, Opacity 50% and Blend Mode is Color.
5- Color #00e900, Fill 60%, Opacity 100% and Blend Mode is Color.

Step9:-
Do same for the body. To color the body I’ve used a single layer for different colors (colors are #0214ec, #0cff05, #640560, #005d20, #ec018b, #32004b, # db311b).
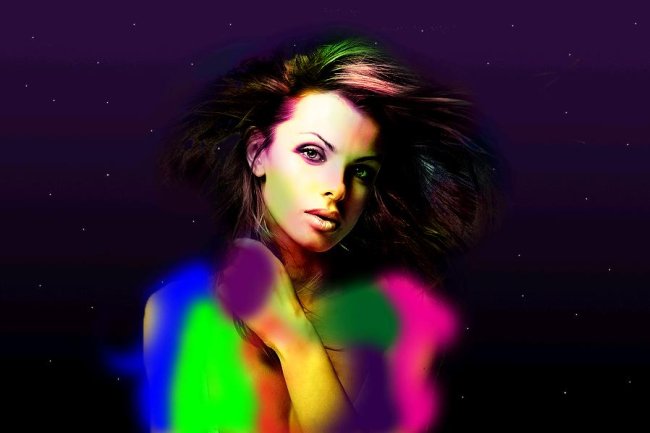
Step10:-
Set the Blend Mode of this layer to Color, Fill will be 65% and leave the Opacity to 100%.
Step11:-
Open up the butterfly Image and cut some butterflies out of their background and paste it on our poster as shown in the picture below. You can make the butterflies large or small by pressing Ctrl+t.
Step12:-
In this step we will add some sparkling magical star dust to our butterflies. For that effect select a hard round brush of size1px with color #ffffff.

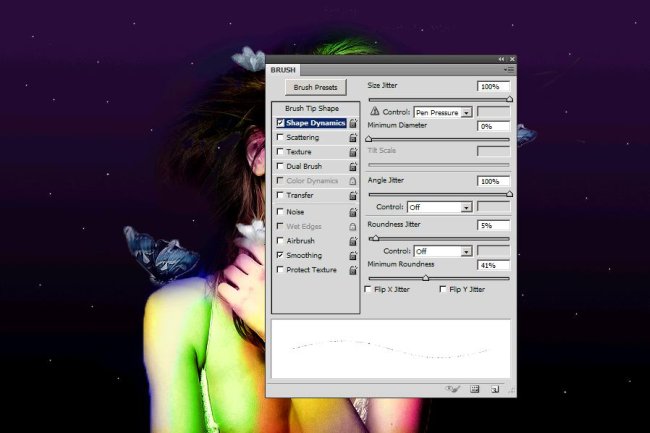
Step13:-
Now open the brush panel and check on shapes dynamics and make the settings according to the picture given below.
Step14:-
Now check on scattering and make the settings as shown below.

Step15:-
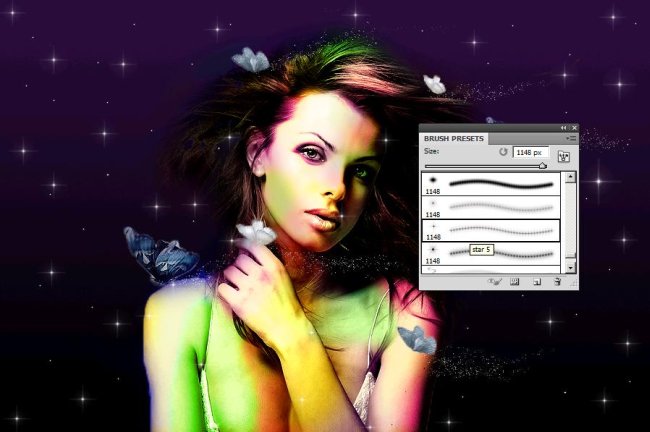
Now paint from the end of butterflies, make some waves with the dust.

Step16:-
Now we’re going to add some more stars but a bit bigger than before. Create a new layer and select a star shape brush of size 40px with color #ffffff. Scatter the stars by clicking on the image.
Step17:-
Now finally we’re going to add some planetary shapes (circles) using Elliptical Marquee Tool.
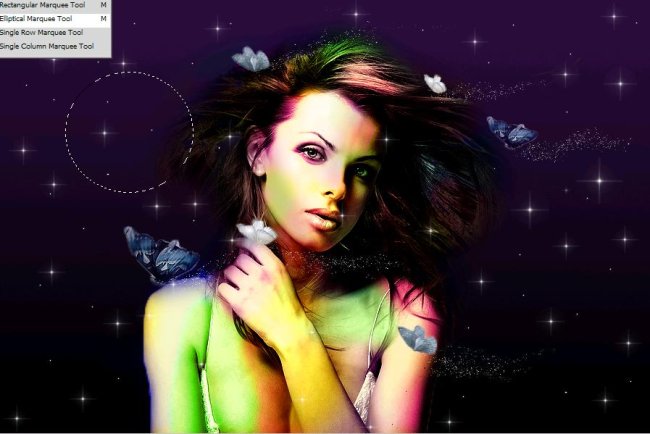
Step18:-
Fill that circle with a gradient (from left with color#290a59 to right with color #bf080a).
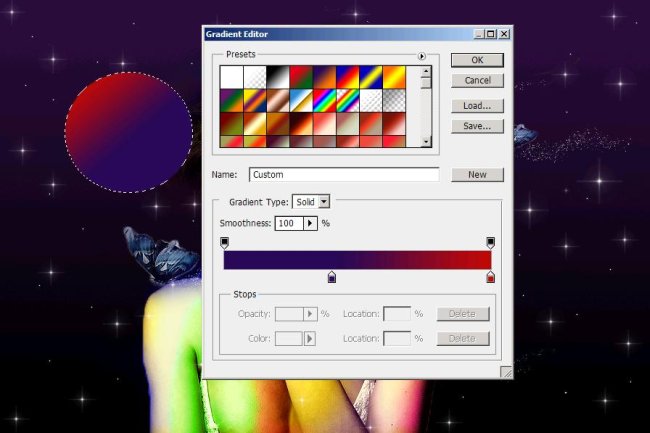
Step19:-
Deselect by pressing “Ctrl+d” and erase more than half circle using Eraser. Repeat the same process of step 17 and 18 for making 3 more planetary shapes.
There you have it. Your colorful cosmic poster is ready. Hope you had fun. Do try it and experiment with more colors and shapes. Share your thoughts. I’ll be back with more exciting tutorials. Till than take care and have fun.


