
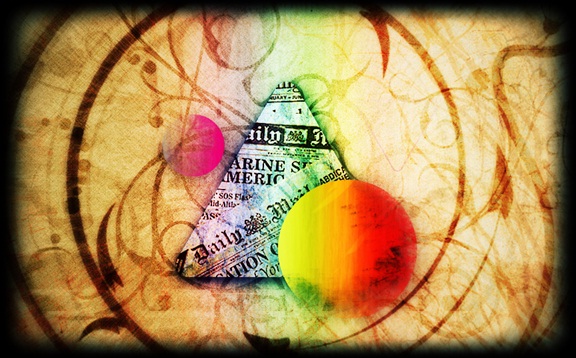
Learn how to create an Abstract Wallpaper
In this tutorial, we would be using basic shapes and custom brushes to make an abstract wallpaper.
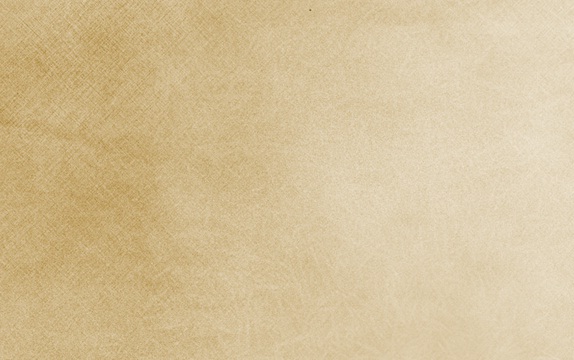
Step 1: Background Image
You can download any background image from the net and bring it on the canvas. For this tutorial, we would be using paper textures for our backdrop.
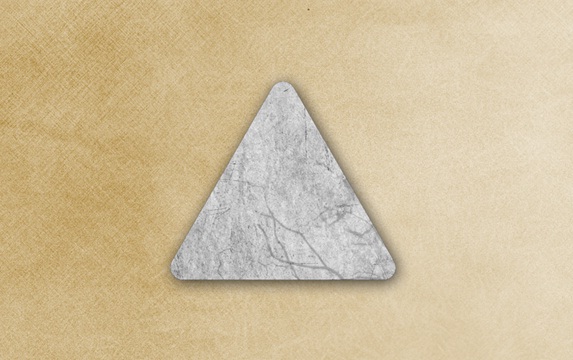
Step 2: Custom Shape
Go to the custom shape and choose the triangular shape. Once made, go to the Layer Style and choose the Drop Shadow option. Apply the following details on your shape.

Step 3: Grunge Texture
Download any grunge texture and bring it on the canvas. Press CTRL and click on your shape layer palette. This would automatically load the selection of the shape. Go to your grunge texture layer and press CTRL C and CTRL V. This would copy paste the selection on a new layer. After that, desaturate the image by pressing CTRL U and setting the saturation to -100.
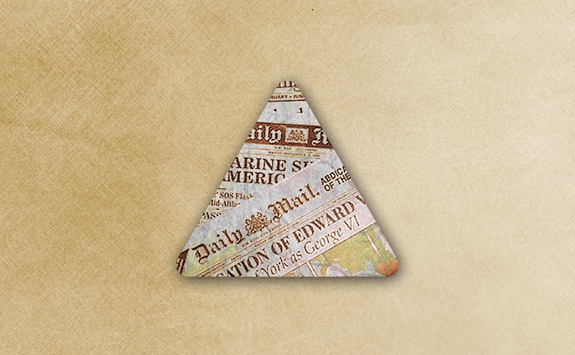
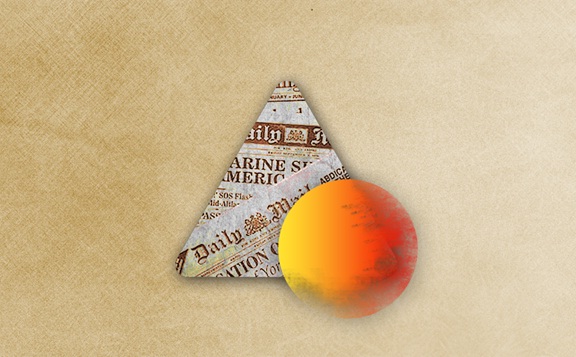
Step 4: Newspaper Layer
Now download any old newspaper image and bring it on the canvas. Press CTRL and click on the shape layer palette. Once the selection has been loaded go to the newspaper layer and press CTRL C and CTRL V. This would copy paste the selection. Once that is done, change the blending options of the layer to Pin Light.
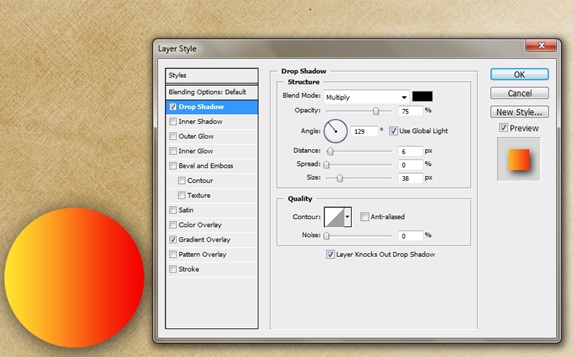
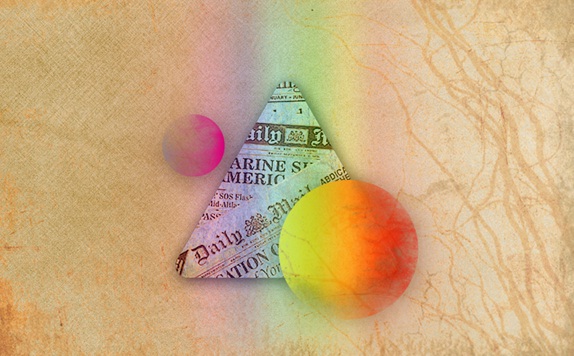
Step 5: Ellipse Tool
Grab the Ellipse tool and make a circular shape like shown below. Choose a gradient for your shape and tick the Drop Shadow check box in the Layer Style. Apply the following details.
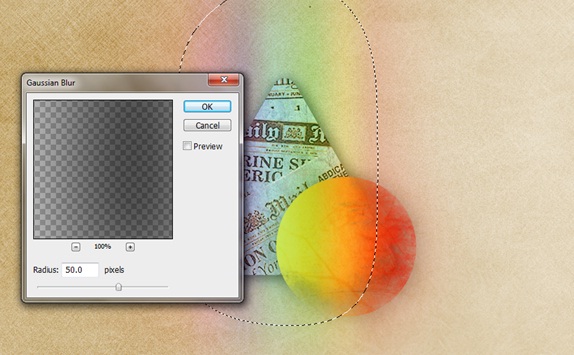
Step 6: Gaussian Blur
Duplicate the shape layer and go to Filter, Blur and apply the Gaussian Blur effect. You would have to rasterize the image first. Once that is done, reduce the opacity of the layer to 20%.

Step 7: Layer Mask
Select the shape layer and go to Layer, Layer Mask and choose the Reveal All option. Once that is done, select the brush tool. Choose grunge brushes for your design. Once downloaded and installed, click the layer mask and apply the brushes around the edges of the circle.
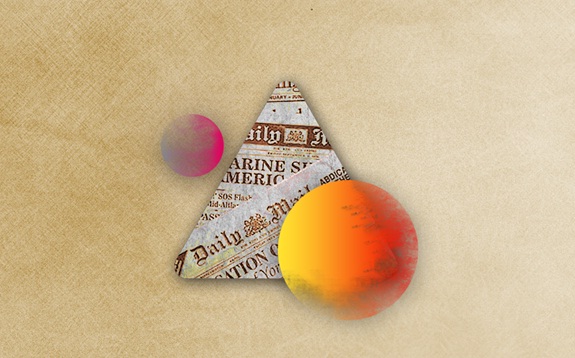
Step 8: Repeat
Repeat Step number 5, 6 and 7 to make another shape. Use different gradients for this shape.
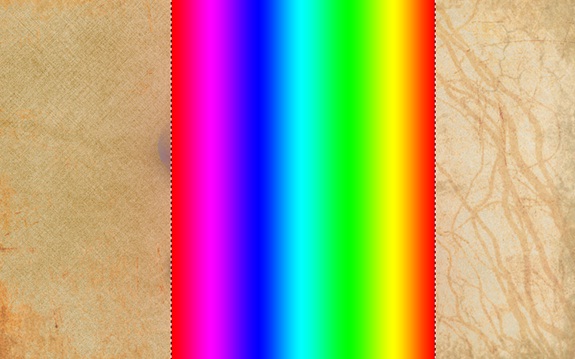
Step 9: Gradient Layer
Create a new layer and select the rectangular marquee tool. Make a selection and fill it with any color. Go to the layer style and choose the gradient option. Create any rainbow colored gradient.
Step 10: Gaussian Blur
Go to Filter, Blur and apply the Gaussian Blur effect. Reduce the opacity of the layer to 20% and change the blending options of the layer to Screen.
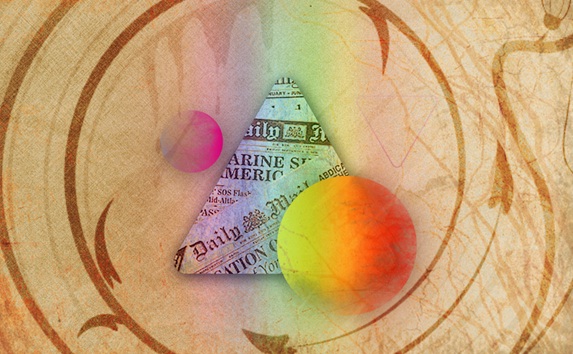
Step 11: Grunge Wallpaper
Download another grunge background and position the layer right at the top. Reduce the fill of the layer to 50% and change the blending options of the layer to Darker Color.
Step 12: Brushes
For this step, you would need to download various brushes. You can download them from Brusheezy.com. Once you have the brushes downloaded and installed, start applying them on new layers. Make sure to increase the size of the radius to fill the entire canvas with your design. Once you are done with your composition, duplicate the layer. Change the blending options of both layers to Overlay.
Step 13: Final Touches
That’s it for your basic designs. You can do some minor modifications to increase the sharpness of the image. Use different effects and blending options and test your creativity.


