
How to make a graffiti wallpaper
With this particular tutorial, you would get to learn how to make a graffiti wallpaper using basic shapes and the pen tool in Photoshop.

Step 1: The Background
First of all, select the background color for your image. Add a new layer to the image and pick the brush tool. Increase the radius to 200px and keep the hardness to 0%. After that, use the brush tool right at the middle of the canvas. Make sure you use the white color for your new layer. Choose “Overlay” from the blending options. This would add a little depth to the background.

Step 2: Adding Objects
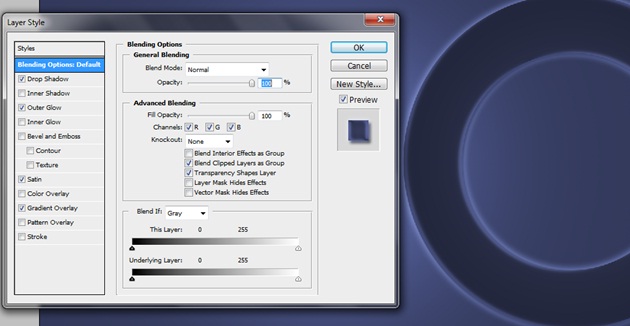
Use the Custom Shape Tool and choose the Circle Frame. Apply the shape on the image like displayed below. Go into the Layer Styling and apply the Drop Shadow, Outer Glow, Satin and Gradient Overlay features on the shape. Be sure to use the colors, which would easily merge with the background.
Step 3: Adding the Second Object
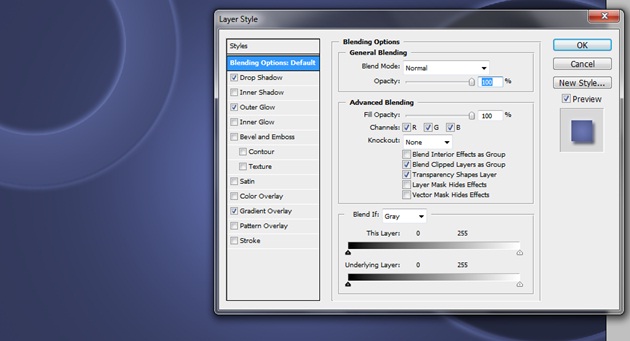
For the Second object, use the same Circle Frame. Apply the features displayed in the image below. Make sure you choose colors, which would easily merge with the background.
Step 4: First Object
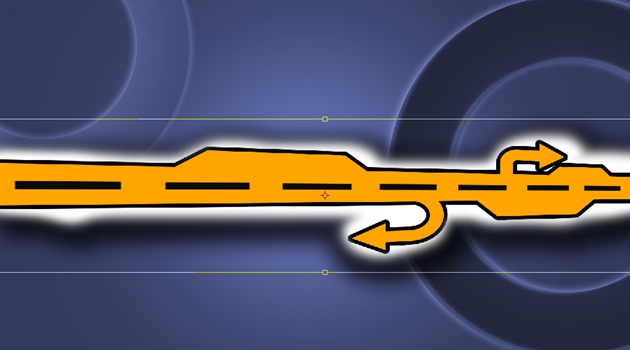
For the first object, make a selection using the rectangular shape tool. Select the pen tool and make a shape as displayed in the image below. You can copy the same shape and add it to the rectangular shape making a unique pattern. Again go to the custom shape tool and choose Arrow 18. You can use that shape and arrange it in any order like displayed below.

Step 5: Second Object
For the second object, we would use the circle frame shape and arrange them together with the rectangular tool as displayed below.

Step 6: Third Object
Making the third object is really easy. Simply select the line tool and make the following pattern. Make sure the weight of the line is set to 20px

Step 7: 4th Object
For the fourth object, duplicate the selection you’ve made using the pen tool for the first object. After that, use the circle frame shape and make it twice as displayed below. Connect the two circles with the line shape using 20px weight. Position the shape you made with the pen tool as displayed in the image. Go to custom shapes and use the Arrow 7 shape and add it in front of the second circle as displayed underneath. This would complete your 4th object.

Step 8: 5th Object
For your fifth object, select the pen tool and make the shape exactly as displayed below.

Step 9: Border
Go to the Layer style of each of the objects and click on stroke. Set the stroke color to white and choose 8px for your border.

Step 10 : Perspective
Select the layer and press CTRL T. Click on the Perspective option and transform the image as you see fit. Apart from that add a drop shadow feature from the layer style. Keep the distance, spread and size to a considerable number for your shadow.
Step 11 : Merge all the layers
Once you are done adding effects and playing with the perspective option for each one of your object, it is the time to combine them into one single canvas. You can pattern the design as you want.

Step 12 : Final Touches
For the background, you can add textures and shadows around the border of the image to add depth to the whole image. Increased sharpness along with saturation would go a long way for your graffiti. Let your creativity run wild and play with different features and effects.


