
How to create the scene named working mind in Photoshop
Hi friends! Today we are going to portray the working of the mind, an amazing scene created in Photoshop. So without further ado let us start with the ingredients for this scene, first of all we’ll need an image of a man with a light bulb which I’ve taken from bigstock, then an image of a glass of water (taken from Google Images so rights are reserved for the owner), a brain, an image depicting love, an image showing community, an image showing a family, an image portraying friendship (all these are also taken from Google Images so rights are reserved to their owners, I’m just using these for this tutorial) and with all these we are going to need Photoshop ( what else?)
Take a look at the finished image before moving ahead.

Step1:-
Open up the blub image and make it a working layer by double clicking on it.

Step2:-
Open the water glass image and cut a piece out and paste it on the blub and set the layer’s Blend Mode to Linear Light. Remove the extra bit by Eraser Tool.

Pic3:-
Open the brain image and cut it out of its background and paste it on our blub as shown in the picture below. Press Ctrl+t to re-size it.

Step4:-
Paste another layer of water in the blub and set the Blend Mode to hard light.

Step5:-
Create another layer and select a round marquee tool to make a shape as shown in the picture below.

Step6:-
Right click and select stroke then press Ctrl+t and rotate and place it according to the picture shown below.

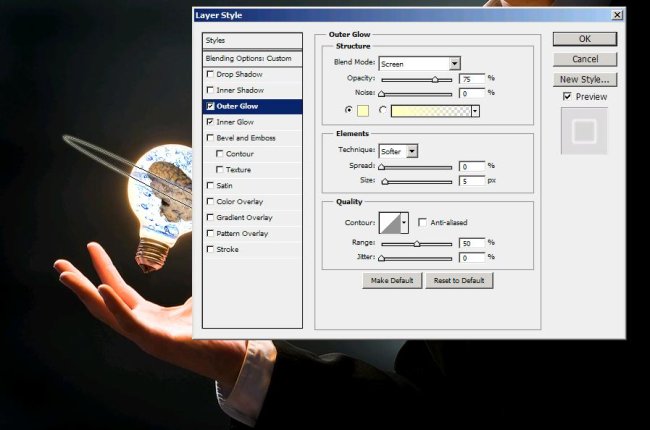
Step7:-
Now right click on the layer and go to blending options and check on out and inner glow. Set it according to the picture given below.
Step8:-
Duplicate the ring layer and place it according to the picture shown below.

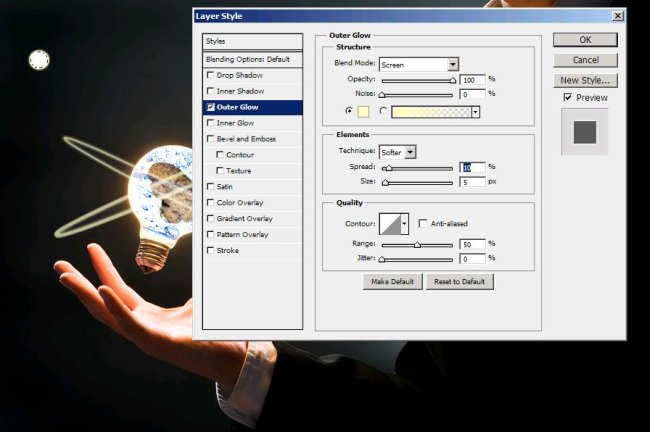
Step9:-
Create another layer and choose round marquee tool and make a small circle, fill it with color #ffffff and then give it outer glow as shown in the picture below.
Step10:-
Create 3 more of these circles or simple duplicate the layers and place them according to the image shown below.

Step11:-
Now open the love depicting image and copy it. Paste it on our working layer and re-size it by pressing Ctrl+t according to the picture shown below. Reduce the Opacity to 70%.

Step12:-
Now select the typing tool and type the word Love (you can choose the color of your choice). I’ve used the font Franklin Gothic Demi Cond and of size 24pt.

Step13:-
Now repeat the same process of step 11 and 12 for community, family, work and friends.

Now our scene of a working mind is complete. Hope you had fun going through this tutorial. Share your side of story with us. I’ll be back with another fun idea, till then have fun.


