How to create stylish switch button in Photoshop
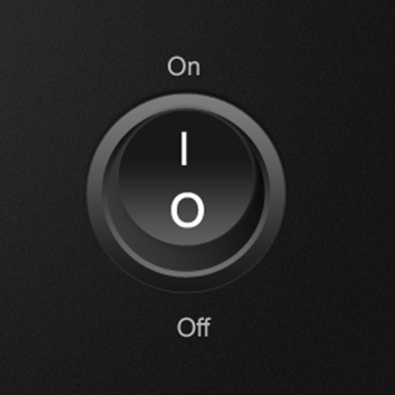
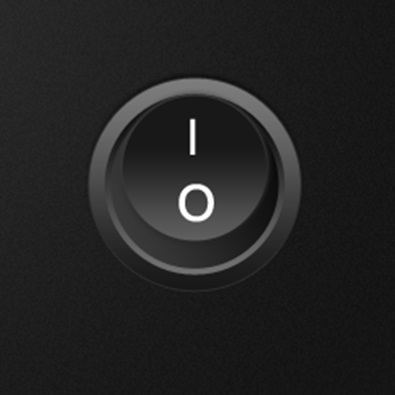
In this tutorial, I am going show you how to create a stylish Switch button, which you may have seen all over internet. Below is displayed that button that we are going to make. Let’s start!

Step – 1:
First, create a new document of 800 X 600 pixels.
Then make foreground color #303030 and background of #161616.
Select “Gradient Tool” (G).![]()
Select radial gradient at the top and drag it to middle of the document. This will create a background on the document.

Step – 2:
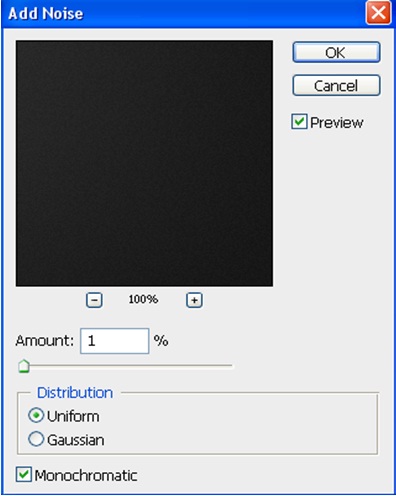
Let’s apply noise filter.
To add:
Click Filter >> Noise >> Add Noise.
Fill setting as shown in the screenshot.
Step – 3:
Select “Ellipse Tool” ![]() (shortcut – U) in toolbox and then click shape layers in the option bar of the tool at the top.
(shortcut – U) in toolbox and then click shape layers in the option bar of the tool at the top.![]()
Select following at the top in option bar of ellipse tool:
Style: 1px stroke, 100% fill opacity
Color: #000000.
Then click and drag to draw ellipse in the middle area of the document. Hold shift to draw exact round while dragging. Lastly, rename this layer as Outer Circle for our ease.

Step – 4:
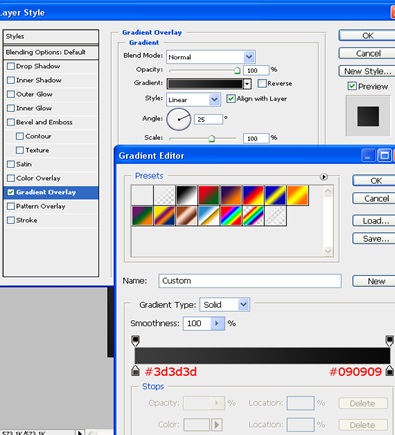
Then add layer styles by right clicking this layer and select blending options.
We are using drop shadow, gradient overlay and stroke. Fill as shown in the screenshot.
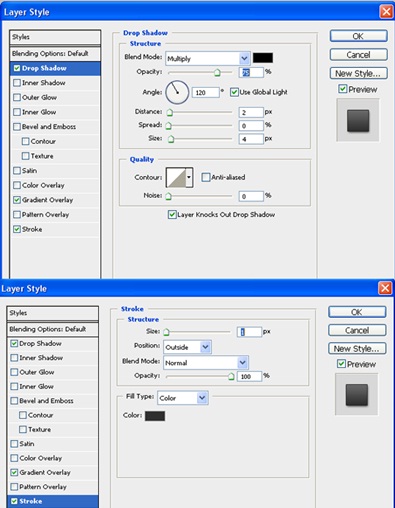

You should have the result like the one shown in the screenshot till now.

Step – 5:
Now duplicate the layer and rename it as “Switch Indent”.
Right-click it and click clear layer styles.
Now resize this duplicated later by pressing ctrl + T (free transform) and then drag corner anchor points inwards. That means, we are making it smaller than original layer. While dragging hold shift and alt key, which will drag from middle in the same proportion.
You will have something like the one shown in the screenshot.

Step – 6:
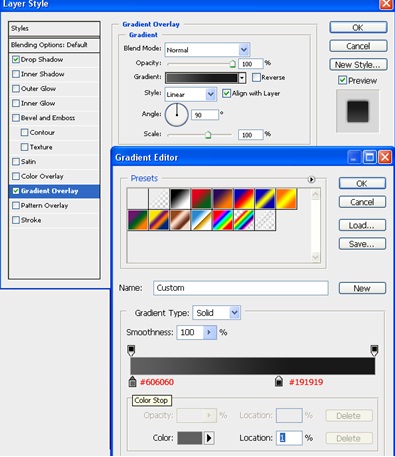
Then right click the duplicated layer and select blending options and add gradient overlay.
Fill as shown in the screenshot.
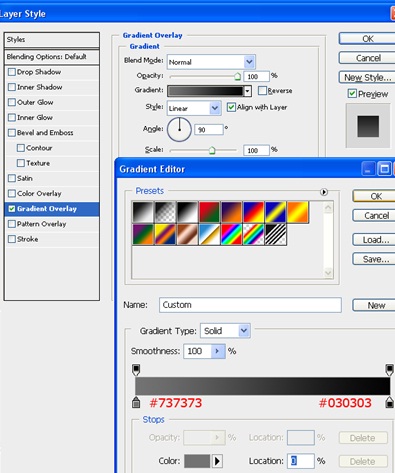
Now you will have something like the one shown in the screenshot.

Step – 7:
Duplicate the duplicated layer (switch indent).
Again clear styles by right-clicking it and click Clear Layer Styles.
Now rename new layer to Switch.
Resize this new duplicated layer inward by holding ctrl+t just as we resized layer switch indent. While dragging, hold shift and alt key, which will drag from middle in same proportion by about 1-3 pixels.
Now add a gradient overlay using the settings below.
You should have something like this.

Step – 8:
Duplicate layer Switch and rename it to Switch Main.
Again clear styles by right-clicking it and click Clear Layer Styles.
Resize it a bit smaller and move up slightly.

Step – 9:
Then add layer styles by right clicking this layer and select blending options.
We are using drop shadow and gradient overlay.
Fill as shown in the screenshot.
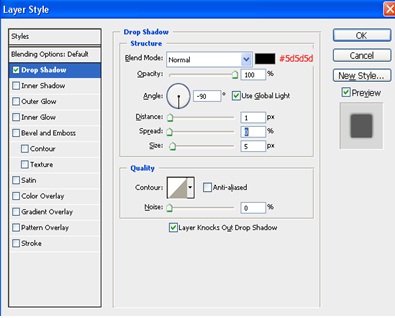
Use these values in gradient overlay setting.
You should have something like this till now.

Step – 10:
Now duplicate layer switch main and clear its layer styles.
Rename it to Shadow switch and drag it under the layer “Switch Main”.
Now select this shadow switch layer and click Filter >> Blur >> Gaussian Blur. The layer will be rasterized automatically before adding Gaussian blur.
Fill settings as shown in the screenshot.
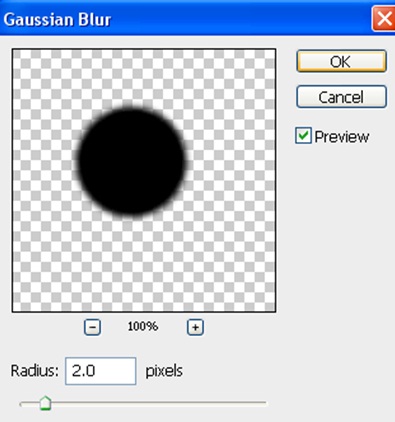
You should have this effect.

Step – 11:
Now select Horizontal type tool (T) and type two letters. Use color white (#ffffff).
Type O and I.
Place these letters on the button.
Step – 12:
Now again with type tool, type two text – On and Off and add above and below of the button as shown in this screenshot
Your final image should look like this.