How to create Lighting Effect in Photoshop
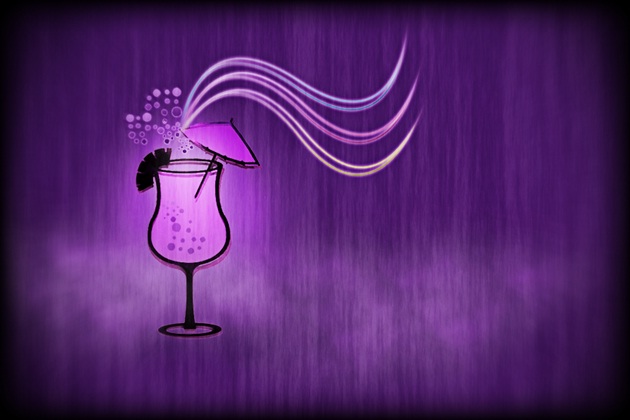
Those of you who want to play around with the lighting effects in Photoshop; this is the tutorial for you. We can basically take any object and apply different types of effects on it using textured filters and light effects. Here we are aiming to create something along the lines that is displayed below.

Step 1: Choosing the object
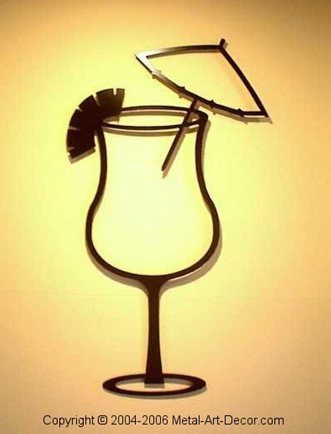
First of all, you would need an object. For this tutorial, we have selected the following image.
Step 2: Using the Crop Tool
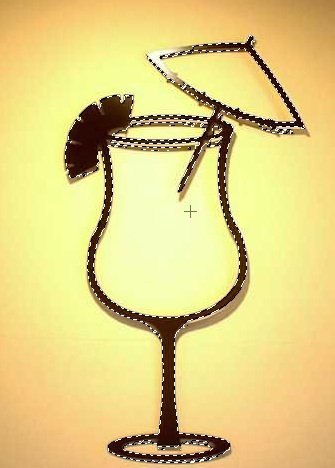
Now use the polygonal lasso tool and crop the object and separate it from the background.
Step 3: Background
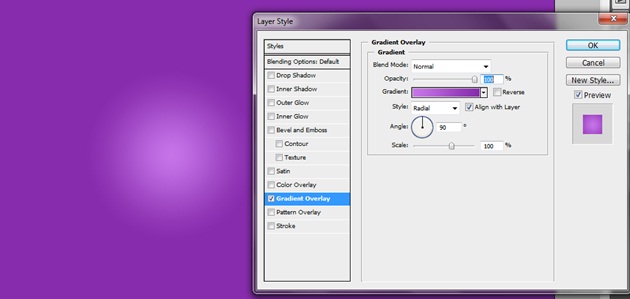
For the background use any color. Then make a new layer and include a gradient on that layer. Try to merge and blend the two layers together using various color combinations for your gradient.
Step 4: Mixing the two images
Now simply use your cropped image and include it in the background. It would be better to do a little color correction before you move any further. For this purpose, press control (or CTRL) U. A new window would open up and make sure you have ticked the “Colorize” check box. Try to jell the image with the background.

Step 5: Blur
Use the Ellipse tool to make a circular object over the image. Make sure you have rasterized the image before applying any filter.

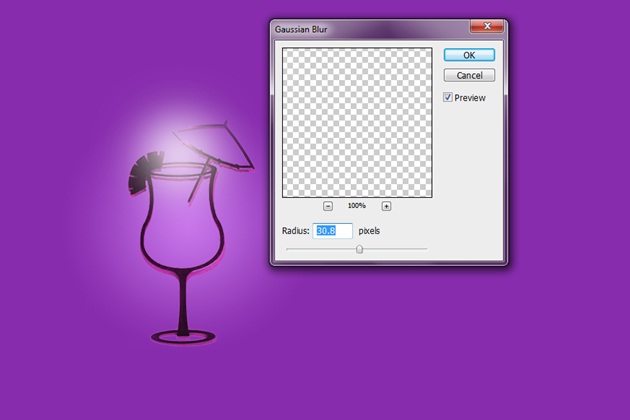
Step 6: Gaussian Blur
Once the image is rasterized go to Filters, Blur and then select on Gaussian Blur. Once the new window pops up use the following frequencies for the required effect.
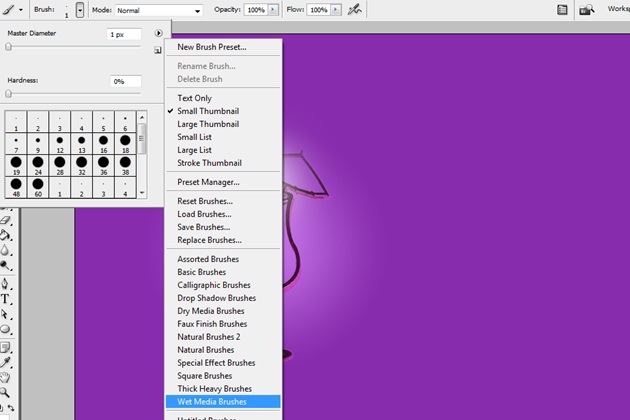
Step 7: Choosing the Brushes
Now we want a bubble effect both inside and outside the glass. For this purpose, pick your brush tool and go to the options. Choose the “Wet Media Brushes” option and then select the “Rough Dry Brush”.
Step 8: Bubbles Inside the Glass
Once that is done, make a new layer and use the brush to make bubbles inside the glass. Make sure you decrease the opacity of this particular layer. Resize and move the bubbles as you want inside the glass.

Step 9: Bubbles Outside The Glass
Follow the same steps mentioned in step number 8 but this time, make the bubbles outside the glass. Once that is done, go to the Layer Style options and click on Outer Glow. Let the values remain as they are by default.

Step 10 : Clouds
For a cloudy effect, make sure the foreground color is white and the background color is selected black. Once that is done, use the lasso tool to make a random selection. Make sure you have set the feather to 30px. Once the selection has been made, simply go to Filter, Render and select clouds. Play with the idea, change your selections and transform the final image, until you are satisfied with the result.

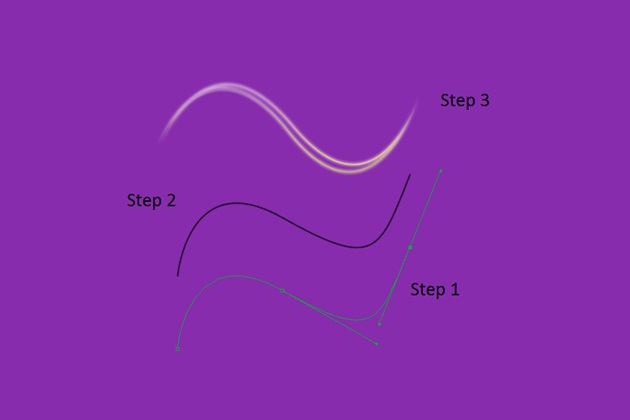
Step 11 : Curvy Lines
To make the curvy lines simply make a new layer and select the pen tool. After that, make a curved selection as displayed in step 1. Once that is done, select the brush tool and set it to 2px with 100% hardness. Now select the pen tool once again, second click on the selection and click on “Stroke Path”. A new window would pop up and select brush from the drop down menu. Once that is done, you would have a curvy line as displayed in step 2. Copy the line and transform it using CTRL T. Move it a little downwards to transform it into a double line as shown in step 3. After that, rasterize the whole image and go to the layer styling. Choose the option of outer glow together with a gradient and this is what the finished product should look like.
Step 12 : Adding Everything made so far
Once you are done with the first set of curvy lines, duplicate the layers as many times as you want and change the gradient color for each and every one of them.

Step 13 : Blending Options
Make a new layer over the glass and just roughly paint over the glass using the brush tool

Step 14 : Overlay
Once you are done painting, go to the blending options of that layer and choose “Overlay”.

Step 15 : Adding Effects
You can add the background texture, decrease the brightness and play with the contrasts and saturation of the image to give it a more sharp and edgy look. You can download or even make various textures yourself by simply using the brush tool. Play around with the idea a little bit and see what you can create yourself.