How to create an Abstract Background
In this tutorial, we would be making an abstract background such as the one displayed below. We would be covering all the basics from shapes to playing with the blending options, etc.

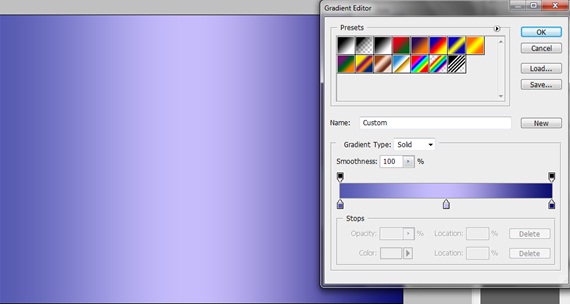
Step 1: Background
Go to the layer style of the background and tick on the Gradient check box. Use the following details for the gradient displayed below.
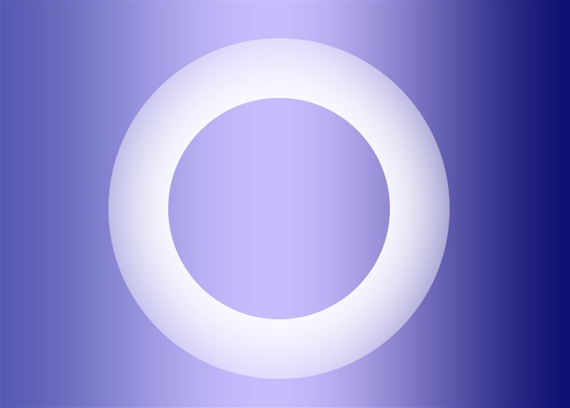
Step 2: Creating A Circle Frame
Go to the custom shapes and choose the circle frame. Make the shape right in the middle of the canvas. This would be the basis of your design.

Step 3: Fading Effect
Now select the Elliptical Marquee tool and make the selection around the circular frame shape. Make sure that the selection is of the same size as of the shape. Go to Select, Modify and choose the Feather option. Once the new window opens, change the radius to 50 px. Then again go to Select, Modify and choose the Inverse option. When you do these changes, the overall selection will automatically change on the canvas, press the Delete button and you would see this nice fading effect.
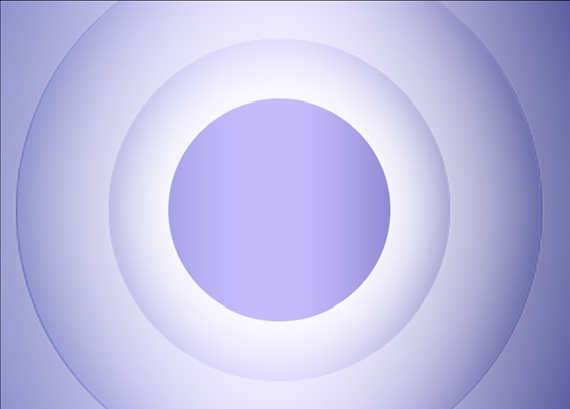
Step 4: Duplicate
Duplicate the layer, reducing the opacity for every layer by 25%. Increase the size of each layer and position them as shown below.
Step 5: Fading Effect on the New Layer
Select the Ellipse tool and Make a shape at the corner of the image like shown below. Now click on the quick mask button and select the gradient tool. Make the gradient on the canvas as shown below. When in the mask mode, the gradient would be shown with the red color.
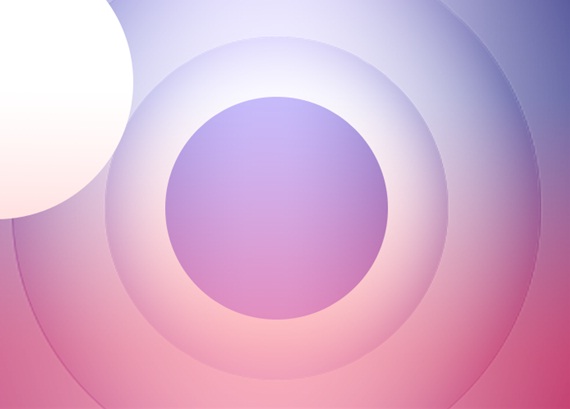
Step 6: Lens Effect
Once you are done with the gradient, come out of the mask mode. Hit delete and you would see the fading effect on the circle. Duplicate the same layer and position it as you like.
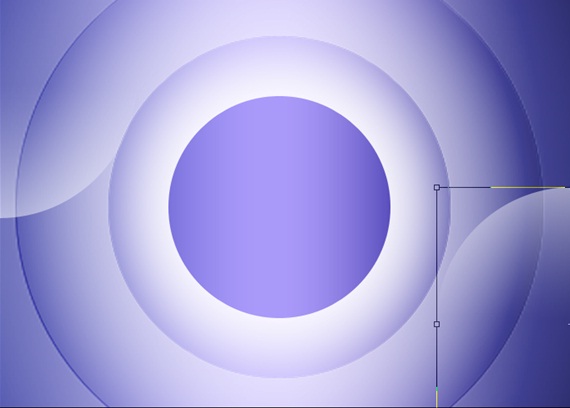
Step 7: Pen Tool
Use the Pen tool to make a circle as shown below.
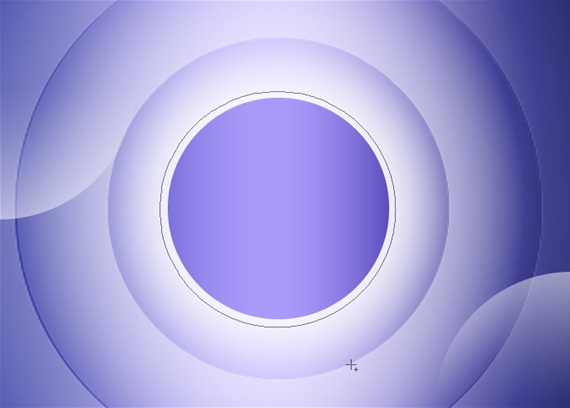
Step 8: Pen Tool Circular Outlines
Choose the brush tool and keep the radius at 3px. Select the pen tool once again and second click on the selection. Choose the option of stroke path. Once the pop up window opens, choose the brush tool from the drop down menu. Once the circle is created, duplicate the layer.

Step 9: Duplicated Circles
Keep duplicating the circles, reducing the opacity of each one of them to add depth to the image.
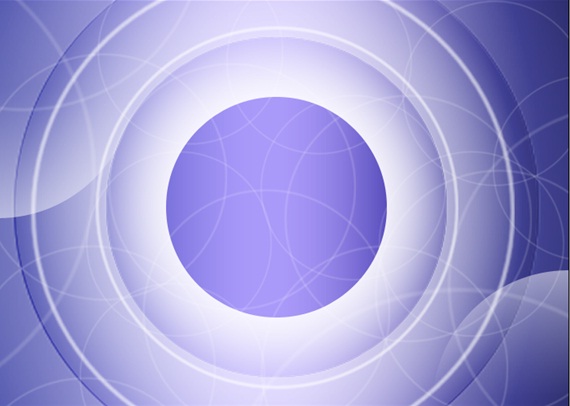
Step 10: Repeat Step No 9
Repeat Step No. 9 until the whole canvas has been filled.

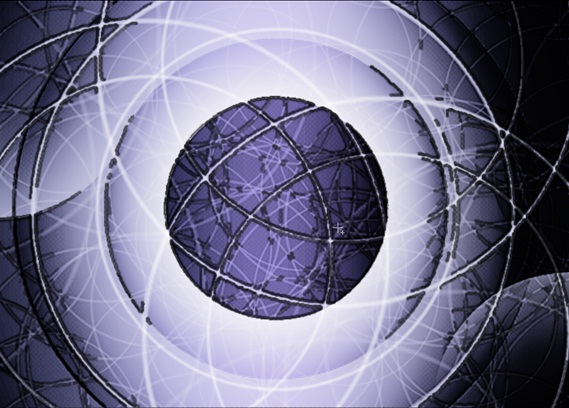
Step 11: Multiply Blending Option
Duplicate the entire canvas and merge all the layers into one. Darken the final output by increasing the saturation and decreasing the brightness of the layer. This is to give an outline to the circles in the canvas. Now go to the blending options of the layer and choose Multiply instead of the default value.
Step 12: Final Touches
Make a new layer and add borders to the layer. Color the borders black and apply the Gaussian blur filter on the layer. Go to the blending options and change it to Overlay. This would give a nice fading blurry effect to the image.