
Creating a unique patched dancer in Photoshop
Hey friends! I’m back with another exciting tutorial. I’ve created a unique patch effect with lighting on a dancer’s body. It’s very simple to make, you just have to be a little creative. The things we need for this image is a picture of a dancer, a fractal image (which I’ve taken from Google images (so all the rights of this image are reserved to its owner) and Photoshop (what else?).
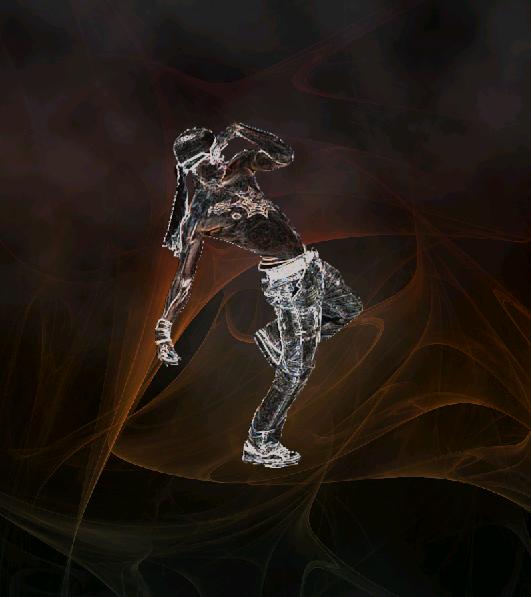
Do have a look at the finished image before we start our tutorial.

Step1:-
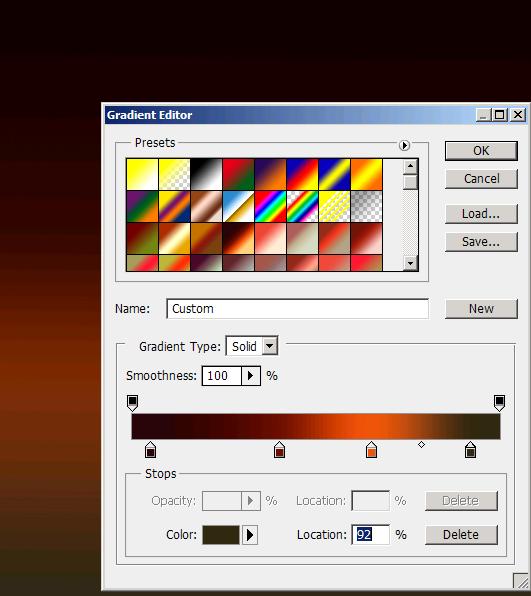
Create a fresh document of size 800×900 pixels. Fill it with a linear gradient (going from left with color #280509>color #6d1000>color #ed550c>color #362917) as shown in the picture below.
Step2:-
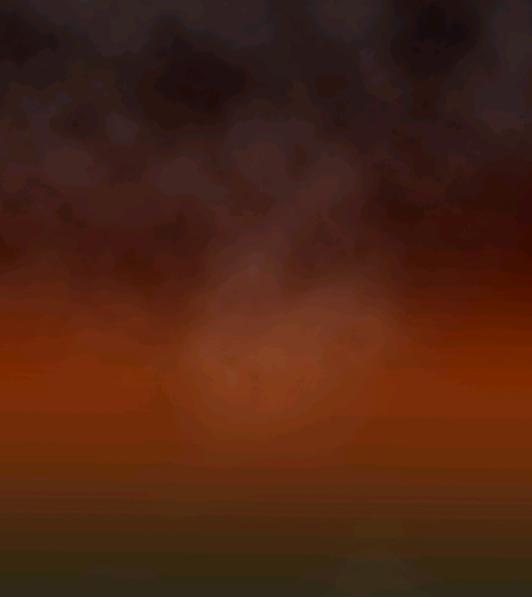
Go to Filter, go to Render and select Clouds.

Step3:-
Remove a portion of clouds from the bottom part of our background with the help of Eraser Tool.
Step4:-
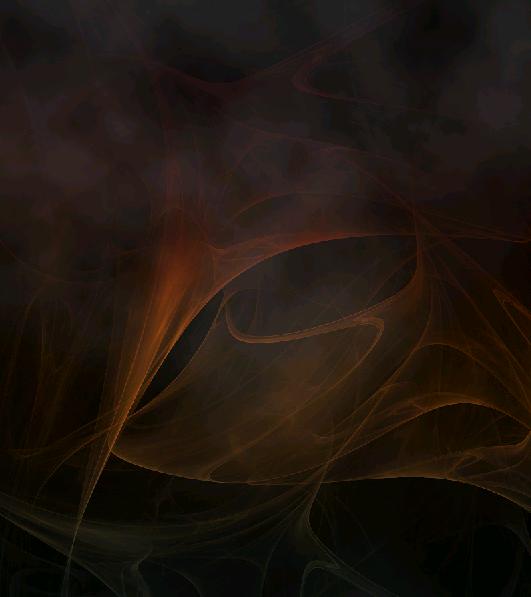
Open up the fractal picture. Select the whole image, copy it and paste on our clouded background. Set the Blend Mode of this layer to Overlay with 100% Opacity.
Step5:-
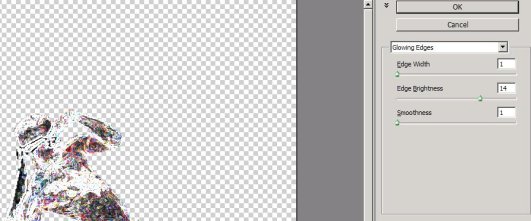
Now open the dancer’s image cut the dancer out of it background using Quick Selection Tool (then go to Edit and cut or copy the selected part) and paste it on our background. Then go to Filter > Stylize and select Glowing Edges. Set the Edge width 1, Edge brightness 14 and Edge smoothness1.
Step6:-
Keep the Blend Mode of dancer’s layer to Normal but reduce the Opacity to 75%. Now you’ll have something like the picture shown below.
Step7:-
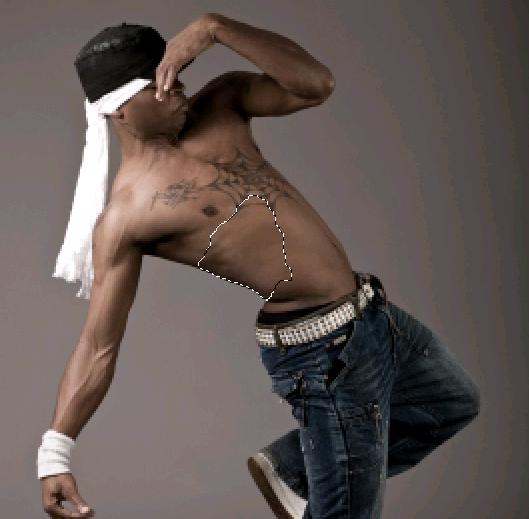
Okay now we are going to make patches for our dancer’s body. Create a new layer and name it patches. Open up the dancer’s image again if you’ve close it before. Pick up the Quick Selection Tool and make small selection like it is shown in the picture below.
Step8:-
Now go to Edit and copy that patch. Paste the patch on our working image. Place it exactly on the dancer’s body from where you’ve taken the patch in the original picture with the help of Move Tool.
Step9:-
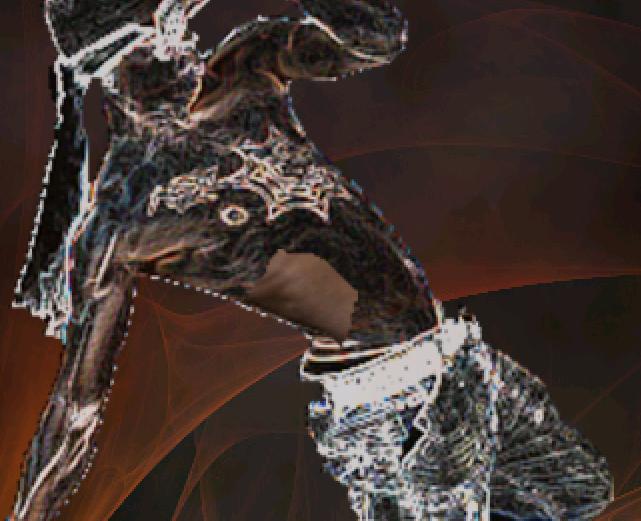
Repeat the process (of step 7 and ![]() for various parts of the dancer’s body. Now you’ll have something like the picture shown below.
for various parts of the dancer’s body. Now you’ll have something like the picture shown below.

Step10:-
Make a group of all the patch layers and dancer’s layer, for that Click on the dance’s layer press Shift and click on the last patch layer, then go to Layer tab> New and select Group from layers..Name the group as patched dancer.

Step11:-
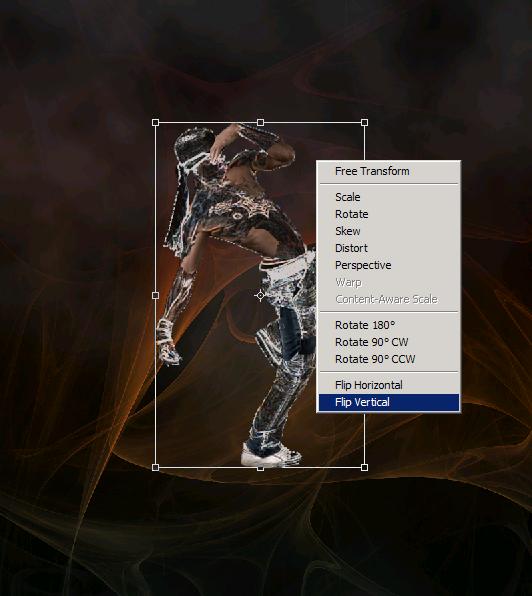
Now we’re going to create a mirror reflection of the dancer for that copy the group and then press Ctrl+t, right click and select Flip vertical.
Step12:-
Move the reflection image and place it according to the picture shown below. Set the Blend Mode to Pass through and reduce the Opacity to 51%.

Step13:-
Create another layer and name it as Blur. Now blur the reflection at the bottom a bit using a soft round brush. Reduce the Opacity to 50% of this layer.

There you go our unique patched dancer image is complete. Hope you’ll have fun with these techniques in Photoshop. Do share your thoughts. I’ll be back with something new for you soon. So take care. Bye.


