
How to create 3D effect in a retro style background in Photoshop
Hi guys! Today we’re going to introduce a 3D effect in 70’s retro styled background with the help of our Photoshop. As we all know retro is never out and 3D is the new fashion in town so let’s combine these two and make a unique background image using the simplest techniques in Photoshop. Sounds good? Yes it does. So let’s count the things we will need for this retro image, and that thing is only our Photoshop and nothing else.
Have a look at the finished image before going ahead with the tutorial.

Step1:-
Let us start this retro look by creating a new document in Photoshop of size 784×389 pixels and fill it with the color #630460.

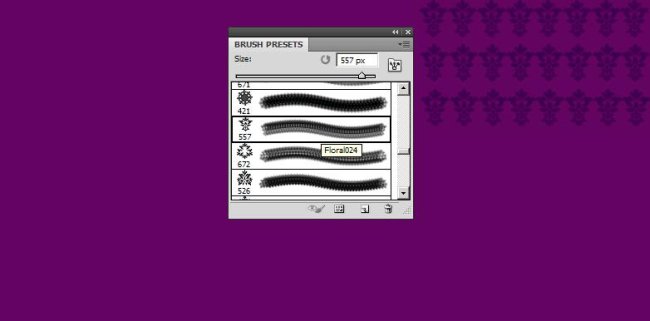
Step2:-
Now we are going to make a pattern on this purple background of ours like old wallpapers, to do that select a floral brush of size 45 with color#400151.
Step3:-
Make the pattern similar to the picture shown below.

Step4:-
Now create another layer and select a Rectangular Marquee Tool and make a rectangle as shown in the picture below and fill it with the color# fbaf5d.

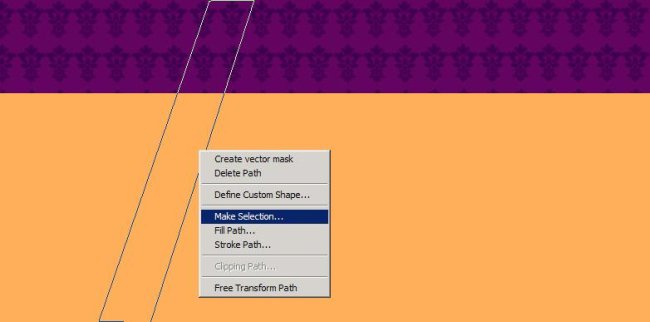
Step5:-
Make another layer, select Pen Tool and make a shape similar to the picture shown below.

Step6:-
Now Right click on the shape and choose Make Selection.
Step7:-
Fill the selected area with color #ffffff then press Ctrl+D to de-select.

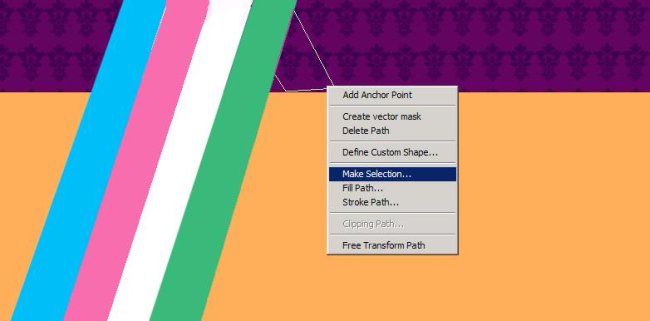
Step8:-
Make three more shapes like the white strip using Pen Tool and fill them with colors (pink) # f16eaa, (Blue) # 00bff3, (Green) # 3cb878. Place these strips according to the picture given below.

Step9:-
Make another shape similar to the picture shown below using Pen Tool and then Right click on it and select Make Selection.
Step10:-
Fill it with a darker shade of green color # 1f9257.

Step11:-
Use Pen Tool to make another shape as shown below and after the right click on it choose Make Selection.
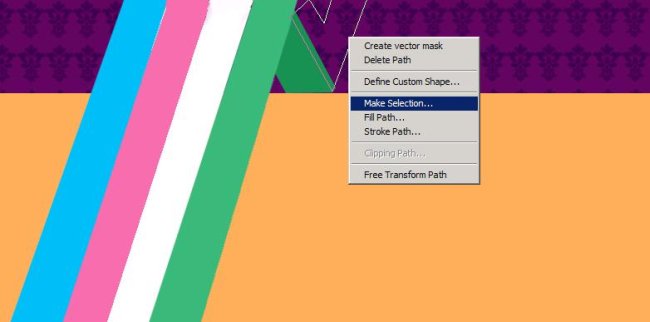
Step12:-
Fill it with the color #3cb878.

Step13:-
Now we are going to use Pen Tool again to make two small triangles and fill them with color #ffffff. Place them according to the picture shown below.

Step14:-
Now we are going to add shadow under our beams, for that select a soft round brush of size 25px with color #000000 and draw according to the picture shown below. Set the Opacity to 25%.

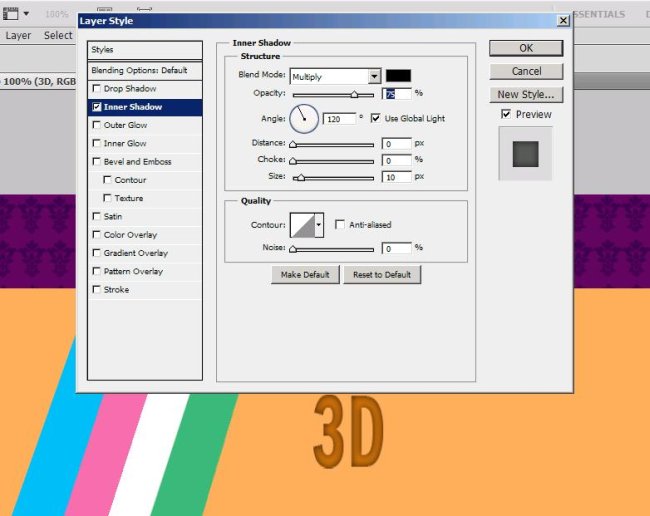
Step15:-
Now select the type tool and type 3D with color #ca7010. Right click on the type layer and go to Blending Options then select Inner Shadow. Make the settings according to the picture given below.
Step16:-
Add another type layer and type the words in retro with the color #a47341 and create Inner shadow by right clicking on the layer and selecting Blending Options.

There you go. Your 3D effect in a retro styled background is complete. Hope you had fun. Do experiment with these techniques and create your own unique effects. Share your thoughts. I’ll be back with something interesting for you to create, till then take care.


