
Gilded framed face of an ancient goddess in Photoshop
Hello friends! Today we are going to frame a face in a gilded design to portray a goddess with the help of Photoshop. We’re going to create this beautiful image with the help of some photos and some very simple techniques in Photoshop. The whole thing is very attractive and really fun to make. First thing we’ll need is a gilded frame taken from Google Image (so rights are reserved for the owner), second we are going to need a portrait picture of a woman (I’ve taken that from the bigstock) and with these two all we are going to use is our Photoshop.
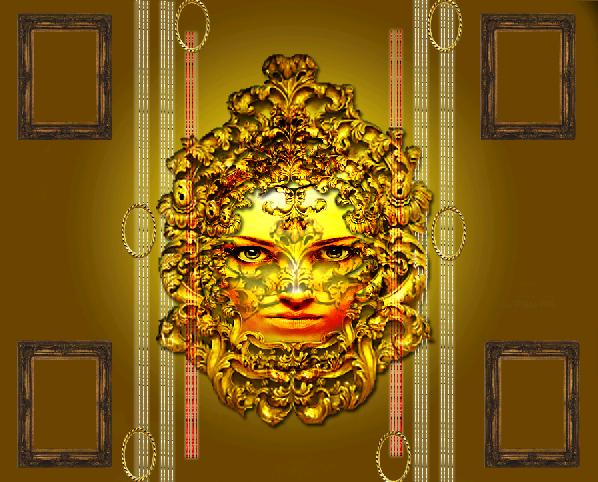
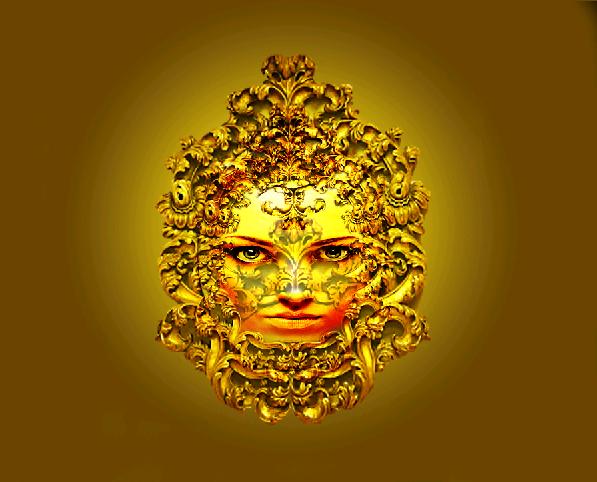
Have a look at the final result before moving ahead.
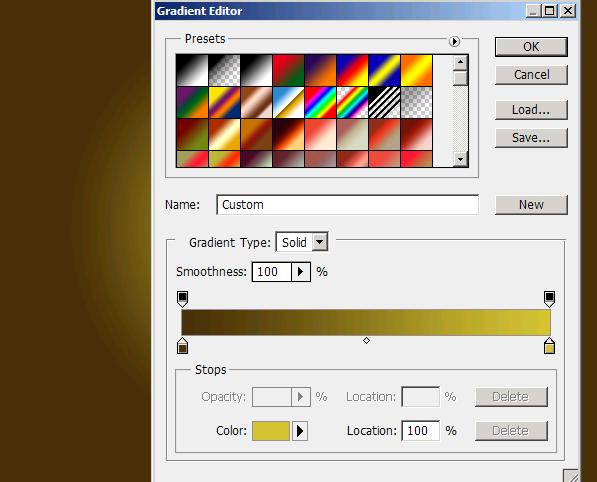
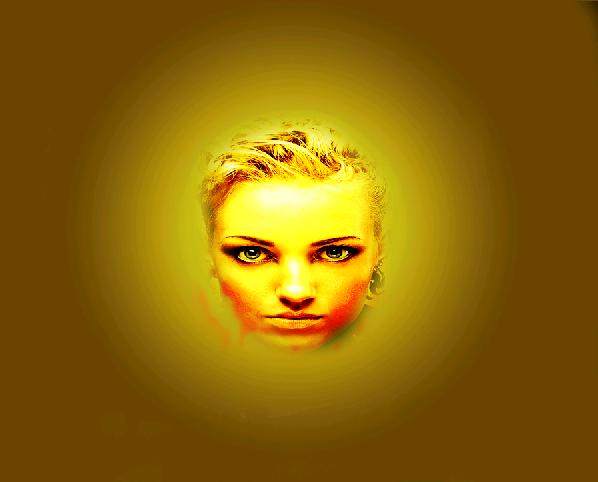
Step1:-
We’ll start by creating a new document in Photoshop of size 900×600 pixels. Fill the new document with a radial gradient of colors #49310a and #d0c034 from left to right.
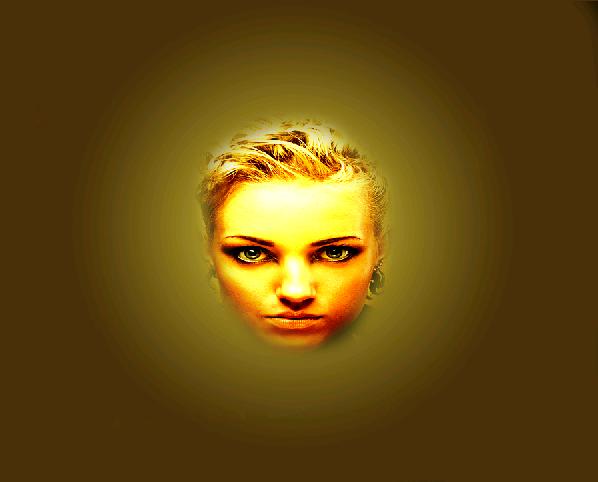
Step2:-
Open up the portrait picture and copy only the face using Quick Selection Tool. Paste the face on our background.
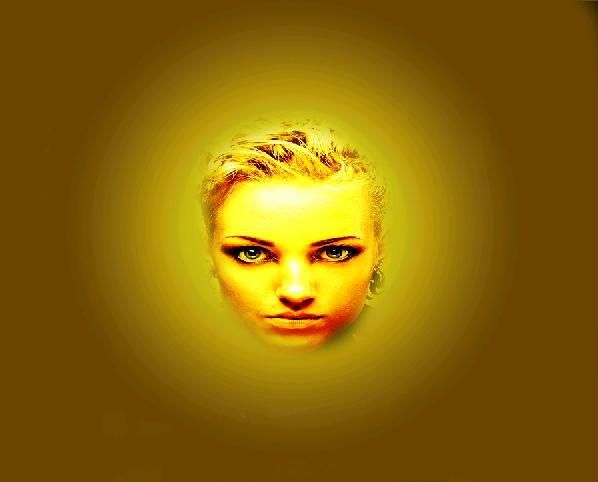
Step3:-
Create another layer and fill it with yellow color #ffff00.

Step4:-
Set the Blend Mode of the yellow layer to Overlay and leave the Opacity 44%.
Step5:-
Create another layer and select a soft round brush of size 25px with color #ec1759. Now paint on the cheeks of the girl and then Set the Blend Mode of this layer to Overlay and reduce the Opacity to 57%.
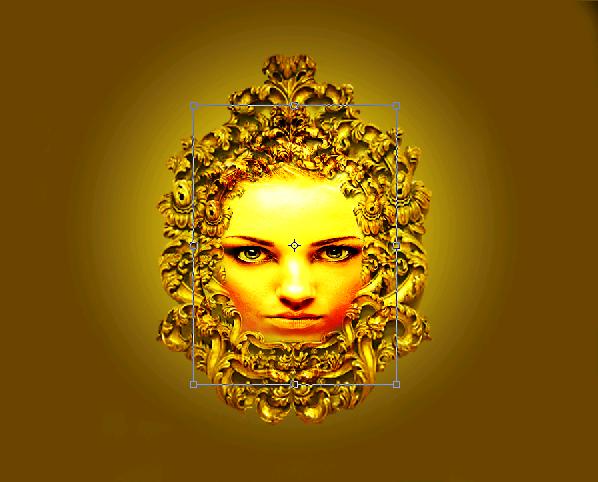
Step6:-
Open up the gilded frame cut it out of its back ground and paste it on our working image as shown below.

Step7:-
Now we’ll paste the frame again around the face, but this time make it a bit smaller by pressing Ctrl+t.
Step8:-
Now paste a third frame and erase it half from the lower part as shown below.
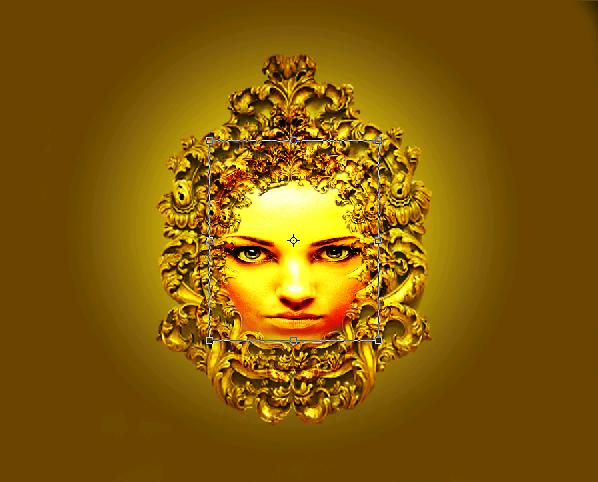
Step9:-
Cut a small piece of the frame and paste it on the forehead as shown below.
Step10:-
Now cut another piece and paste it on her face as shown below. Set the Blend Mode to Pin Light and reduce its Opacity to 60%.
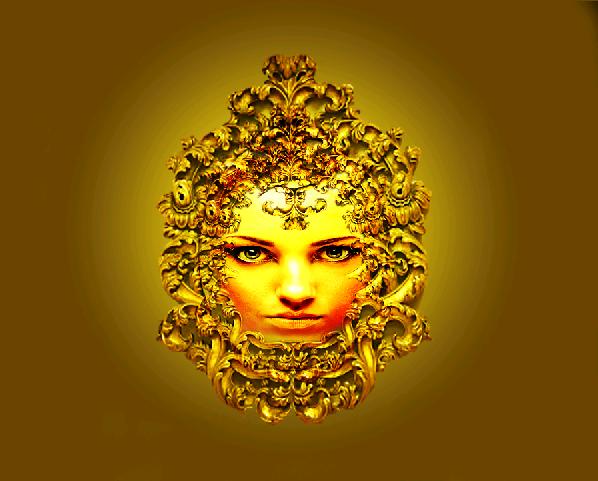
Step11:-
Now give the frames drop shadow and inner shadow by right clicking on the frame layers and selecting Blending Options from drop down menu and checking the drop shadow and Inner shadow with default settings.
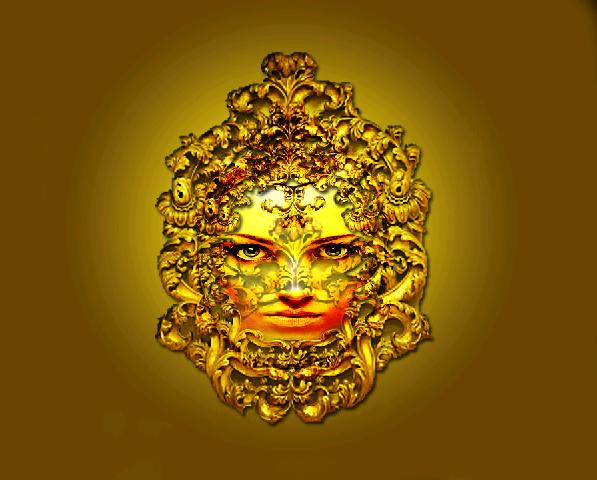
Step12:-
Our framed face is complete. I’ve added a few more things to the image like some straight lines using pen tool.
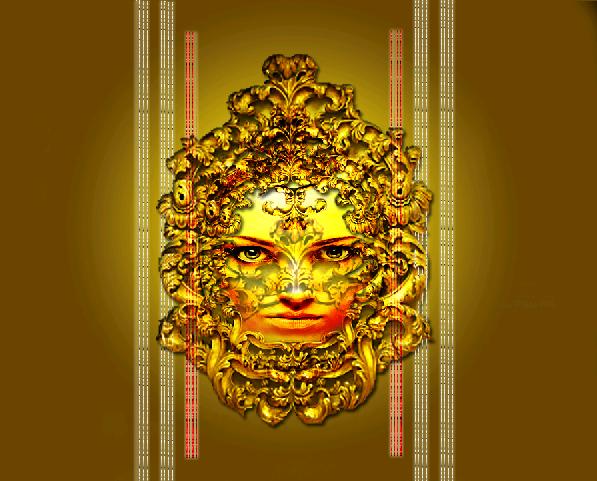
Step13:-
Furthermore I’ve added some more frames round and square around the image as shown below to add a rusty touch to our picture.

Now our image is finished. Hope you had fun going through the techniques with me. Share your thoughts and suggestions. I’ll be back with some new effects till then have fun and be creative.


